4.1Configuration flow of setting procedure
4-3
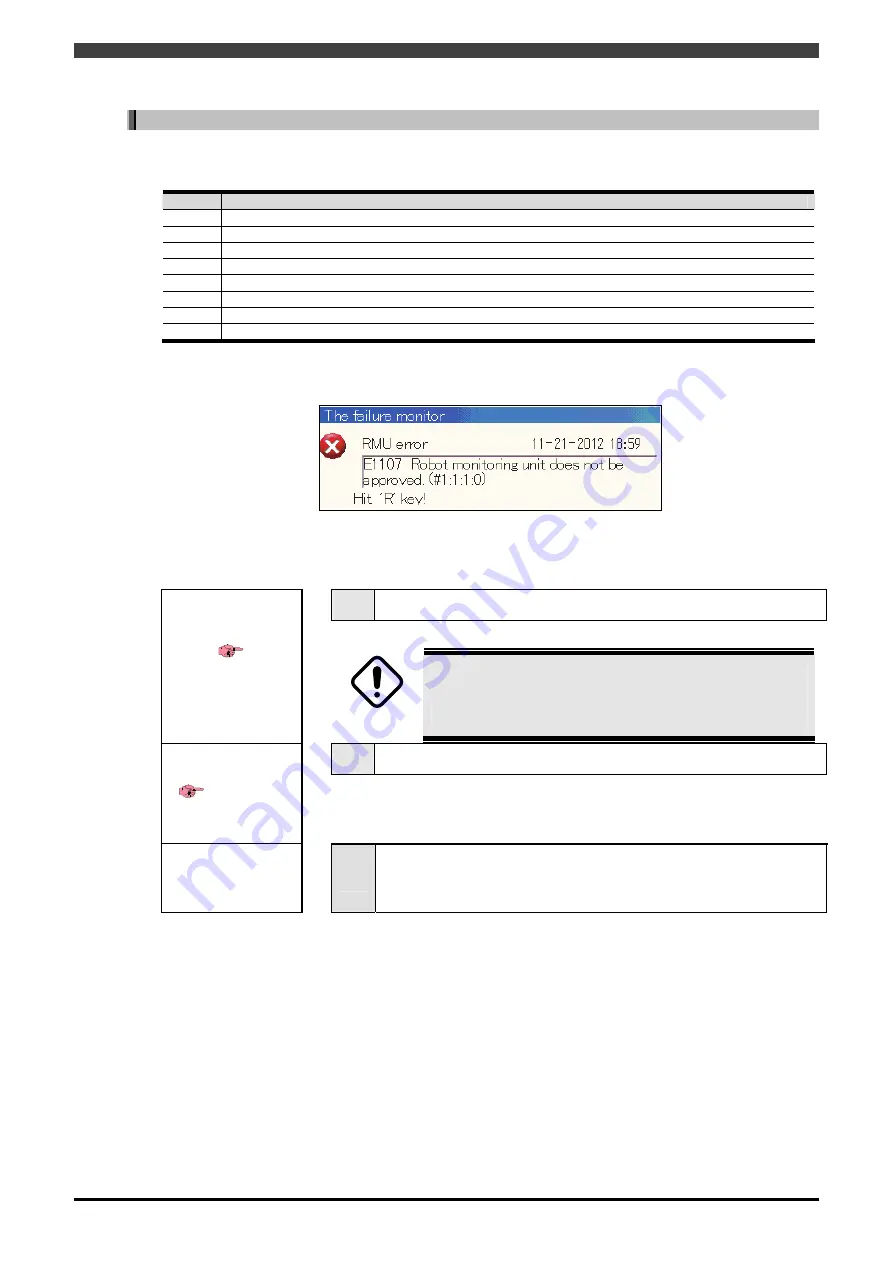
<2> Parameters related to the RMU has been changed
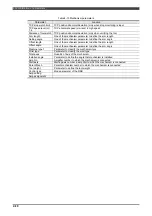
When parameters listed below are set, these parameters are also set to the RMU.
Table 4-1 Settings related to the RMU
No.
Settings related to the RMU
1
<Constants> - [2 machine constants ] - [1 Tool constants ]
2
<Constants> - [2 machine constants ] - [3 Axis constants ]
3
<Constants> - [2 machine constants ] - [4 Encoder correction ]
4
<Constants> - [2 machine constants ] - [5 Soft limit ]
5
<Constants> - [2 machine constants ] - [11 Motor and encoder ]
6
<Constants> - [2 machine constants ] - [15 Manipulator ]
7
<Constants> - [2 machine constants ] - [33 Virtual Safety Fence Function ] all setting under were
8
<Constants> - [2 machine constants ] - [34 Robot monitoring unit ] all setting except [1 setting]
The following message is displayed when the above-mentioned settings related to RMU has been changed.
But, this is normal.
If these settings have been modified, perform an approval procedure for the RMU according to the following
steps.
1
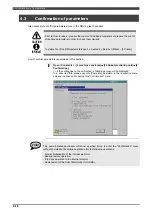
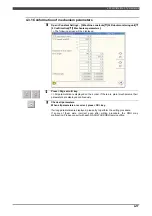
Confirmation of parameters
Confirm the parameters which have been set.
DANGER
Please make sure the parameter values are changed correctly
in the confirmation screen of the parameter. If the parameter is
not set correctly, the robot does not work in the intended
function will be death or serious injury accidents.
2
Approval (*)
Confirm that the monitoring unit parameters and robot controller parameters
are the same. Robot can not be operated without aprroval.
Power OFF and ON
3
Turn OFF and ON the power of the robot controller.
(*) At first visually check that these parameters are the same between the RMU and the controller by referring
to "4.3Confirmation of parameters". Next perform “Approval” procedure (This means that the setting is correct).
If this approval procedure is not finished, robot can not be operated.
Summary of Contents for RMU20-20
Page 2: ......
Page 6: ...Contents 4 ...
Page 8: ......
Page 26: ...1 4 EC DECLARATION OF CONFORMITY FOR MACHINERY 1 18 NOTE ...
Page 68: ...2 9 Enabling RMU 2 40 NOTE ...
Page 70: ......
Page 100: ...3 4 Setting when a slider unit is used 3 30 NOTE ...
Page 102: ......
Page 138: ...4 4Approval 4 36 8 Approval is completed The following screen will be displayed ...
Page 144: ......
Page 154: ...5 4Trouble shooting 5 10 NOTE ...
Page 156: ......
Page 166: ...6 4Trouble shooting 6 10 NOTE ...
Page 168: ......
Page 189: ......


