Network Management
5-79
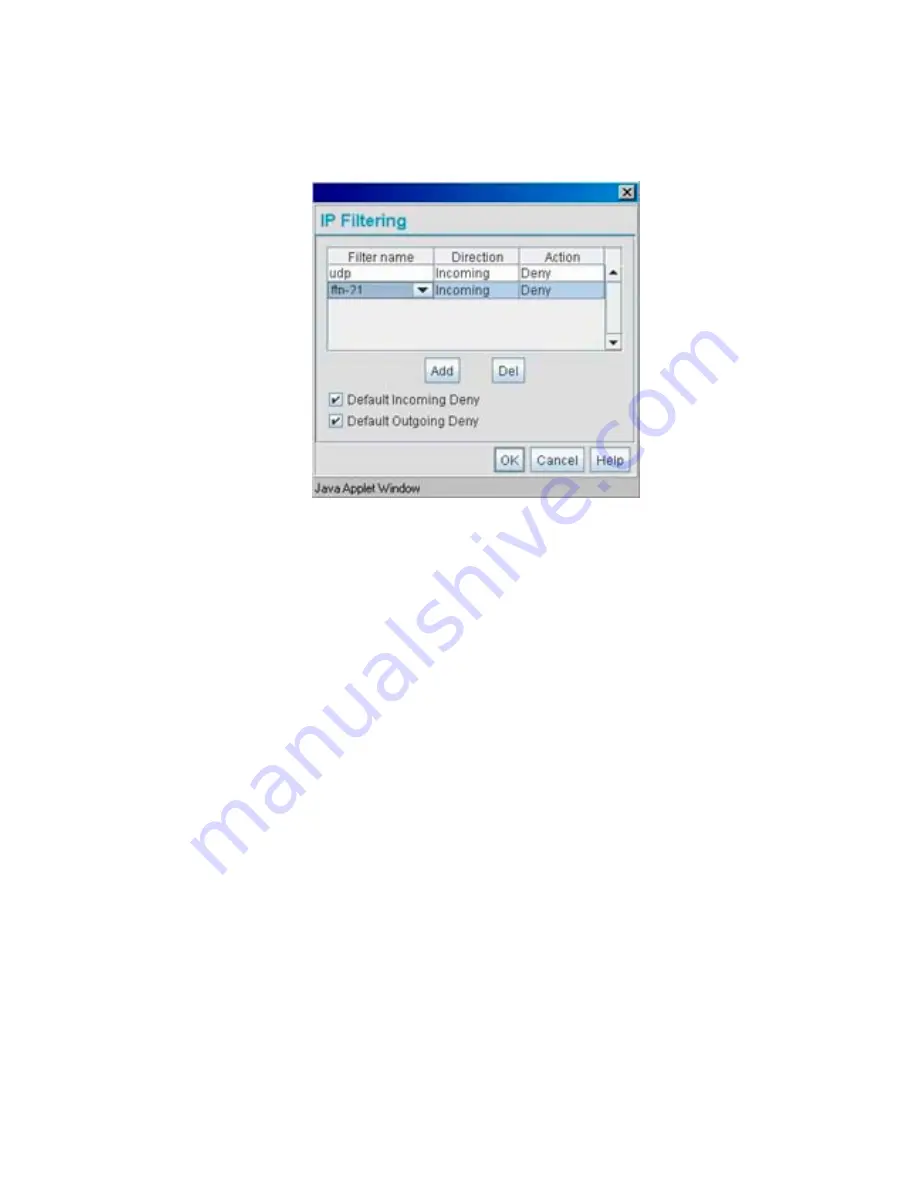
The screen displays with both the
Default Incoming Deny
and
Default Outgoing Deny
checkboxes selected by default. Consequently, if you enable IP filtering but do not apply any
filters that allow IP traffic, then no IP traffic will be forwarded, as the default deny settings
have precedence.
2.
Use the
Filter name
drop menu to select an existing filter.
3.
Set the
Direction
as Incoming or Outgoing as required.
4.
Apply an
Action
of Allow or Deny to permit or restrict the rules of this filter in the direction
selected.
5.
Select
Add
to apply the filter(s) (and their rules and permissions) to the LAN or WLAN.
6.
Click
OK
add the IP filter to the LAN or WLAN. Navigating away from the screen without
clicking OK results in all changes to the screens being lost.
7.
Click
Cancel
to securely exit the IP Filtering screen without saving your changes.
Summary of Contents for AP-51 Series
Page 1: ...AP 51xx Access Point Product Reference Guide ...
Page 3: ...AP 51xx Access Point Product Reference Guide 72E 124688 01 May 2009 ...
Page 4: ......
Page 16: ...AP 51xx Access Point Product Reference Guide xiv ...
Page 80: ...AP 51xx Access Point Product Reference Guide 2 32 ...
Page 96: ...AP 51xx Access Point Product Reference Guide 3 16 ...
Page 158: ...AP 51xx Access Point Product Reference Guide 4 62 ...
Page 238: ...AP 51xx Access Point Product Reference Guide 5 80 ...
Page 318: ...AP 51xx Access Point Product Reference Guide 6 80 ...
Page 636: ...AP 51xx Access Point Product Reference Guide 9 22 3 Define a mesh supported WLAN ...
Page 649: ...Configuring Mesh Networking 9 35 3 Determine the Radio MAC Address and BSSID MAC Addresses ...
Page 679: ...Adaptive AP 10 25 line con 0 line vty 0 24 end ...
Page 680: ...AP 51xx Access Point Product Reference Guide 10 26 ...
Page 692: ...AP 51xx Access Point Product Reference Guide A 12 ...
Page 716: ...AP 51xx Access Point Product Reference Guide C 4 ...
Page 722: ...AP 51xx Access Point Product Reference Guide IN 10 ...
Page 723: ......


