6-14
Using Custom Paper > Setting from the Operation Panel
4
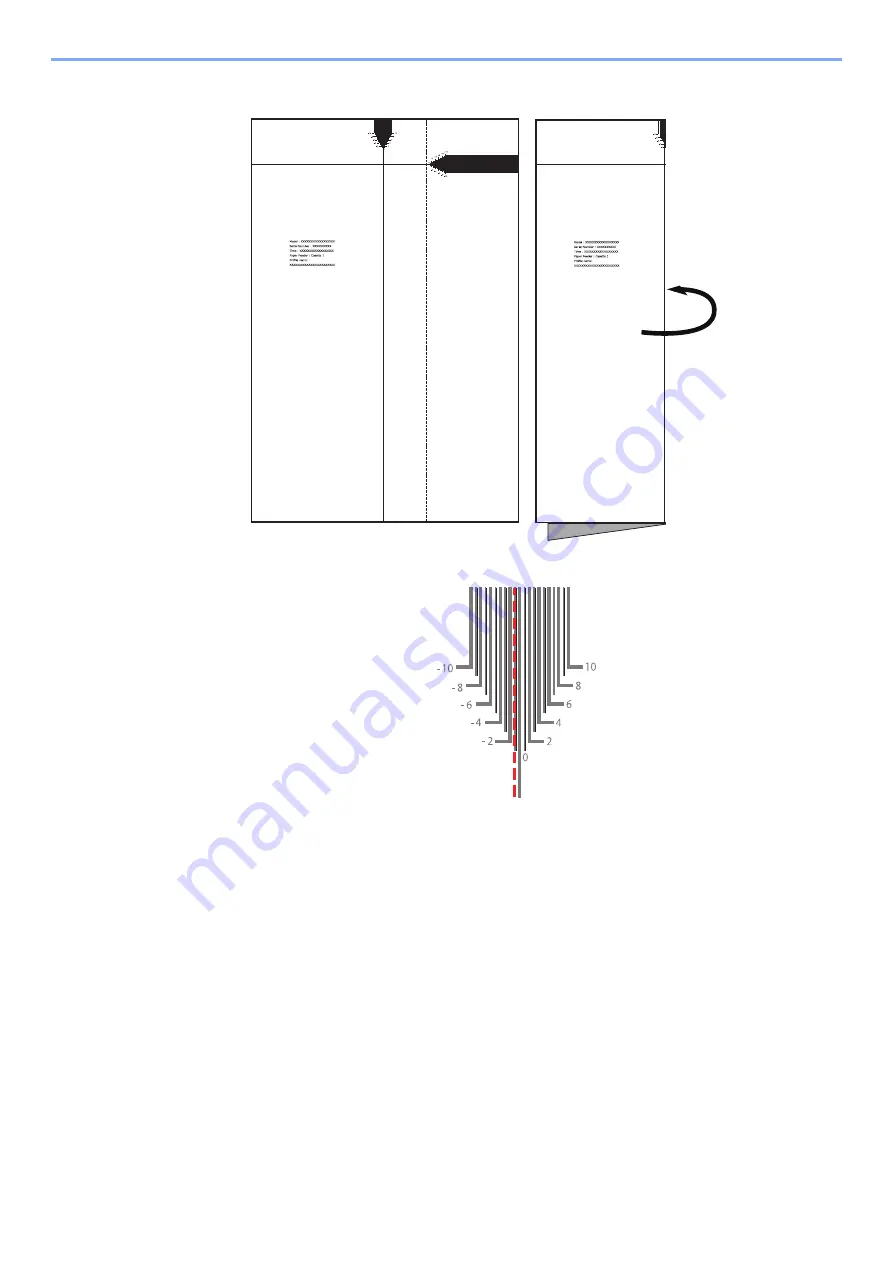
Align the right and left edges of the chart and valley fold it.
5
Unfold the chart and read the value of the crease in the scale "CT2".
5
Enter the correction value.
1
[
System Menu/Counter
] key > [
Device Settings
] > [
Paper Feeding
] > "Cassette
Settings" [
Cassette 1
(to
8
)
Settings
] > [
Manual
] > "Adjustment Items" [
Front Side
]
2
In [
Paper Timing
], use [
+
] and [
-
] to specify the correction value found in step 3-3.
You can also select the entry box and enter the correction value with the numeric keys.
3
In [
Centering
], use [
+
] and [
-
] to specify the correction value found in step 3-5.
You can also select the entry box and enter the correction value with the numeric keys.
4
[
OK]
> [
Close
]
5
[
System Menu/Counter
] key > [
Device Settings
] > [
Paper Feeding
] > "Cassette
Settings" [
Cassette 1
(to
8
)
Settings
] > [
Manual
] > "Adjustment Items" [
Back Side
]
6
In [
Paper Timing
], use [
+
] and [
-
] to specify the correction value found in step 4-3.
You can also select the entry box and enter the correction value with the numeric keys.
PT
2
C
T
2
B
K
PT
2
C
T
2
B
K
C
T
2


