


3
3
4
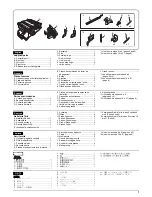
A
2
L
O
2
A
E
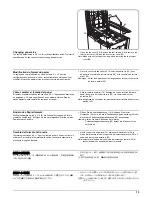
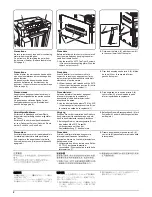
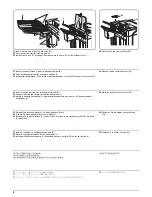
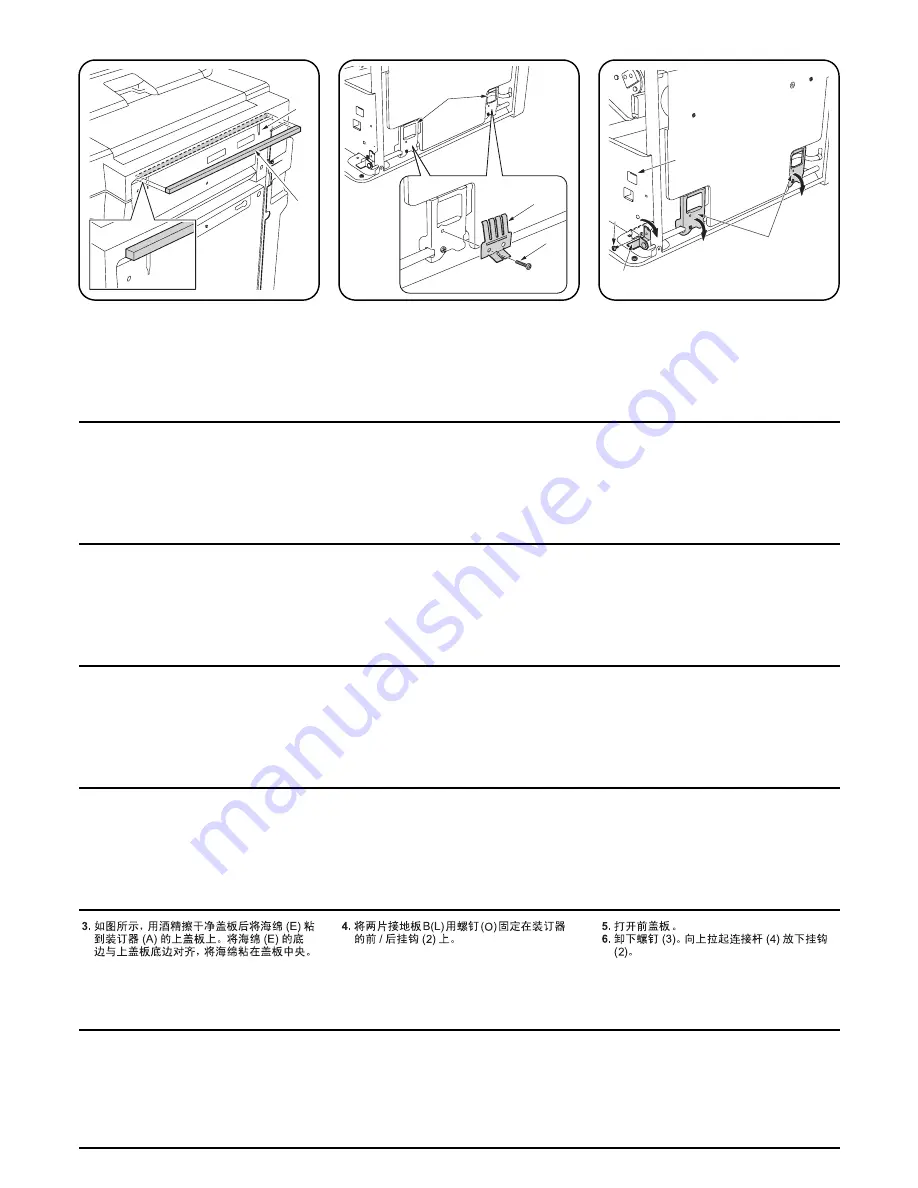
3.
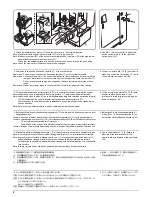
スポンジ (E) をイラストの様にフィニッ
シャ(A) の天カバーにアルコール清掃後貼り
付ける。
* スポンジ (E) の下と天カバーの下を合わ
せ、中央に貼り付けのこと。
4.
フィニッシャの前後2箇所のフック
(2)に
アース板 B(L)をビス
(O)で固定する。
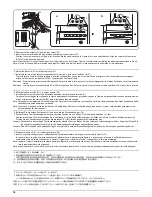
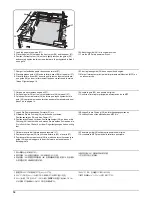
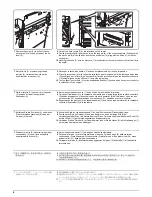
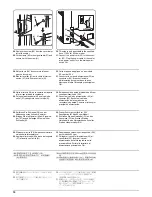
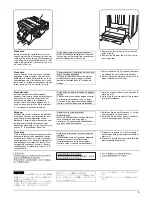
5.
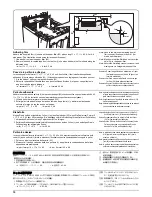
前カバーを開く。
6.
ビス (3)1 本を外し、連結レバー(4) を起こ
し、フック (2) を下げる。
3.
As shown in the illustration, adhere the
sponge (E) to the top cover of the finisher (A)
after wiping the cover with alcohol.
Aligning the bottom of the sponge (E) with
the bottom of the top cover, adhere the
sponge in the center of the cover.
4.
Fix two earth plate B (L) with the screw (O)
to the front/back hooks (2) of the finisher.
5.
Open the front cover.
6.
Remove the screw (3). Pull up the connect-
ing lever (4) to lower the hooks (2).
3.
Comme indiqué dans l’illustration, coller
l’éponge (E) sur le couvercle supérieur du
retoucheur (A) après l’avoir nettoyé à
l’alcool.
Tout en alignant le bas de l’éponge (E) sur la
partie inférieure du couvercle supérieur, col-
ler l’éponge au centre du couvercle.
4.
Fixer les deux plaques de terre B (L) à l'aide
de la vis (O) sur les crochets avant/arrière
(2) du retoucheur.
5.
Ouvrir le couvercle avant.
6.
Retirer la vis (3). Relever le levier de jonction
(4) pour abaisser les crochets (2).
3.
Como muestra la ilustración, adhiera la
esponja (E) a la cubierta superior del final-
izador (A) tras haber limpiado con alcohol la
cubierta.
Alineando la parte inferior de la esponja (E)
con la parte inferior de la cubierta superior,
adhiera la esponja al centro de la cubierta.
4.
Fije dos placas de conexión a tierra B (L)
con tornillos (O) a los ganchos delanteros/
traseros (2) del finalizador.
5.
Abra la cubierta frontal.
6.
Quite el tornillo (3). Levante la palanca
conectora (4) para bajar los ganchos (2).
3.
Befestigen Sie den Schwamm (E), wie in der
Abbildung gezeigt, an der oberen Abdeck-
ung des Finishers (A), nachdem Sie die
Befestigungsstelle mit Alkohol abgerieben
haben.
Richten Sie die Unterkante des Schwamms
(E) an der Unterkante der oberen Abdeck-
ung aus und befestigen Sie dann den
Schwamm in der Mitte der Abdeckung.
4.
Befestigen Sie zwei Erdungsplatten B (L) mit
Schraube (O) an den vorderen/hinteren
Haken (2) des Finishers.
5.
Öffnen Sie die vordere Abdeckung.
6.
Entfernen Sie die Schraube (3). Ziehen Sie
den Verbindungshebel (4) nach oben, um
die Haken (2) abzusenken.
3.
Far aderire la spugna (E) al pannello superi-
ore della finitrice (A) dopo aver pulito il pan-
nello con alcol, come mostrato
nell’illustrazione.
Allineando il fondo della spugna (E) al fondo
del pannello superiore, far aderire la spugna
al centro del pannello.
4.
Fissare due piastre di messa a terra B (L)
con la vite (O) ai ganci anteriore/posteriore
(2) della finitrice.
5.
Aprire il pannello anteriore.
6.
Rimuovere la vite (3). Sollevare la leva di
collegamento (4) per abbassare i ganci (2).
Summary of Contents for TASKalfa 620
Page 1: ...SERVICE MANUAL Published in August 2009 842KP112 2KPSM062 Rev 2 TASKalfa 620 820 ...
Page 4: ...This page is intentionally left blank ...
Page 10: ...This page is intentionally left blank ...
Page 144: ...2KN 2KP 1 3 106 This page is intentionally left blank ...
Page 308: ...2KN 2KP 1 5 88 This page is intentionally left blank ...
Page 412: ...2KN 2KP 2 3 60 This page is intentionally left blank ...
Page 435: ...1 1 INSTALLATION GUIDE INSTALLATION GUIDE FOR SIDE FEEDER ...
Page 442: ...INSTALLATION GUIDE FOR LARGE SIZE SIDE FEEDER ...
Page 460: ...INSTALLATION GUIDE FOR DOCUMENT FINISHER ...
Page 475: ...INSTALLATION GUIDE FOR CENTERFOLD UNIT ...
Page 490: ...INSTALLATION GUIDE FOR MULTI JOB TRAY ...
Page 501: ...INSTALLATION GUIDE FOR PUNCH UNIT ...
Page 512: ...INSTALLATION GUIDE FOR STOPPER GUIDE ...
Page 515: ...INSTALLATION GUIDE FOR PRINTING SYSTEM ...
Page 518: ...INSTALLATION GUIDE FOR SCAN SYSTEM ...
Page 520: ......
Page 521: ......


