2KN/2KP
1-3-101
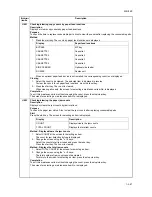
Erasing borders
Sets the width for erasing borders.
1. Select [Default erase width] using the cursor up/
down keys and press [Change #].
2. Press [+] and [-] to specify the widths to erase the
borders.
Setting range
Inch specifications: 0 to 2" (in 1/8" increments)
Metric specifications: 0 to 50 mm (in 1-mm incre-
ments)
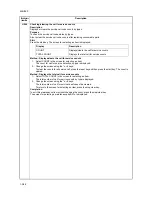
Selecting maximum number of copies
Limits the maximum number of copies.
1. Select [Preset limit] using the cursor up/down keys
and press [Change #].
2. Enter the maximum number of copies from 1 to
9999 using the numeric keys.
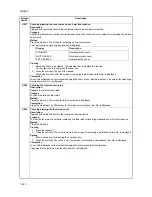
Enabling repeat copy
Enables or disables repeat copy and set it as the
default.
This setting is not available when the copier is
equipped with the optional security kit.
1. Select [Repeat Copy] using the cursor up/down
keys and press [Change #].
2. Select [Off] or [On] under Function.
3. Select [Off] or [On] under Default.
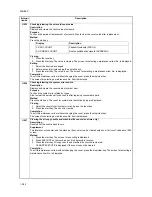
Enabling job history display
Enables or disables the [Job History] screen in output
management mode.
1. Select [Job Queue Report] using the cursor up/
down keys and press [Change #].
2. Select [Off], [On/All job] or [On/reserved] ([On/
Reserv.job]).
Enabling [Shortcut] ([Register]) key
Enables the [Shortcut] ([Register]) keys so that it is dis-
played while various operations are made on the touch
panel.
1. Select [Display register key] ([Display"Regis-
ter"key]) using the cursor up/down keys and press
[Change #].
2. Select [On] or [Off].
Customizing basic functions screen
Customizes the layout of the basic functions screen.
1. Select [Customize (Basic Screen)] ([Customize
(Main function)]) using the cursor up/down keys
and press [Change #].
2. Move the item using the cursor up/down keys,
[Move Ahead] or [Move Behind] ([Move Back-
ward]).
Customizing additional functions screen
Customizes the layout of the additional functions
screen.
1. Select [Customize (User Choice)] ([Customize (Add
function)]) using the cursor up/down keys and press
[Change #].
2. Highlight the menu item on the right-side frame
using the cursor up/down keys.
3. Press [
←
] to move the item to the left-side frame
according to the corresponding number.
(4) Common default settings
Enabling auto cassette switching
If the cassette in use runs out of paper, the copier can
continue copying by automatically switching to another
cassette loaded with the paper of the same size and
orientation. You can specify not to switch to the cas-
sette if the paper type differs.
1. Select [Auto cassette switching] using the cursor
up/down keys and press [Change #].
2. Select [Off] or [On] under Function.
3. Select [All types of paper] or [Only same media
type] under Paper Type.
Selecting paper size
Sets the paper size for the cassettes 3 and 4.
1. Select [Paper size (Cassette 3)] or [Paper size
(Cassette 4)] using the cursor up/down keys and
press [Change #].
2. When [Auto Detection] is selected, select the unit of
measurement.
When [Standard sizes] is selected, select the paper
size.
Selecting media type
Sets the media type to the cassettes 1 to 5.
Cassette 5 is available when the copier is equipped
with the optional side feeder.
1. Select [Media type (Cassette 1)] through [Media
type (Cassette 5)] using the cursor up/down keys
and press [Change #].
2. Select the media type.
Plain/Recycled/Preprinted/Bond/Color (Colour)/Let-
terhead/Thick paper/High Quality/Custom 1-8
Enabling quick access to MP tray settings
Checks MP tray sizing allows quick access to the MP
tray setting screen when the MP tray is selected for
copying.
1. Select [Check MP tray sizing] using the cursor up/
down keys and press [Change #].
2. Select [On] or [Off].
Summary of Contents for TASKalfa 620
Page 1: ...SERVICE MANUAL Published in August 2009 842KP112 2KPSM062 Rev 2 TASKalfa 620 820 ...
Page 4: ...This page is intentionally left blank ...
Page 10: ...This page is intentionally left blank ...
Page 144: ...2KN 2KP 1 3 106 This page is intentionally left blank ...
Page 308: ...2KN 2KP 1 5 88 This page is intentionally left blank ...
Page 412: ...2KN 2KP 2 3 60 This page is intentionally left blank ...
Page 435: ...1 1 INSTALLATION GUIDE INSTALLATION GUIDE FOR SIDE FEEDER ...
Page 442: ...INSTALLATION GUIDE FOR LARGE SIZE SIDE FEEDER ...
Page 460: ...INSTALLATION GUIDE FOR DOCUMENT FINISHER ...
Page 475: ...INSTALLATION GUIDE FOR CENTERFOLD UNIT ...
Page 490: ...INSTALLATION GUIDE FOR MULTI JOB TRAY ...
Page 501: ...INSTALLATION GUIDE FOR PUNCH UNIT ...
Page 512: ...INSTALLATION GUIDE FOR STOPPER GUIDE ...
Page 515: ...INSTALLATION GUIDE FOR PRINTING SYSTEM ...
Page 518: ...INSTALLATION GUIDE FOR SCAN SYSTEM ...
Page 520: ......
Page 521: ......

