


2KN/2KP
1-5-19
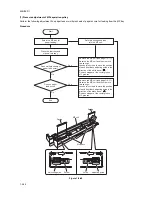
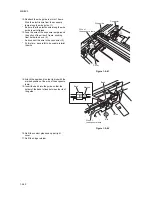
(6) Detaching and refitting the MP paper feed pulley, MP forwarding pulley and MP separation pulley
Follow the procedure below to clean or replace the MP paper feed pulley, MP forwarding pulley and MP separation pulley.
Procedure
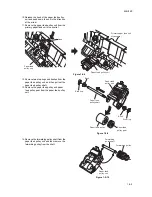
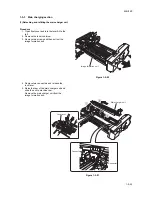
1. Remove the MP unit (see page 1-5-17).
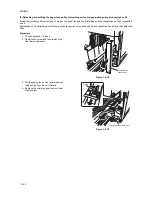
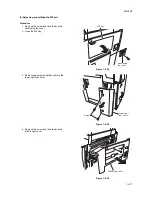
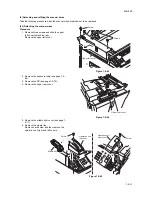
2. Remove each screw from the MP unit front
and rear.
3. Release the claws of the MP unit front and
rear in the direction of the arrow.
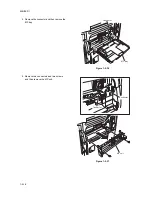
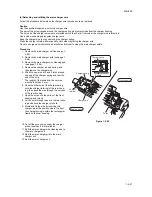
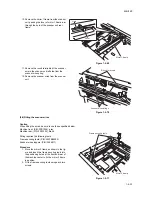
4. Remove the projections from the inserted
parts, and then divide the unit into upper and
lower unit.
Figure 1-5-38
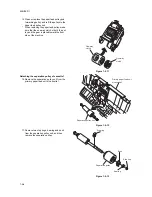
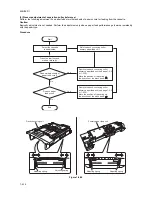
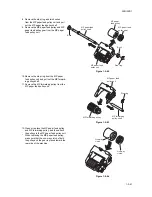
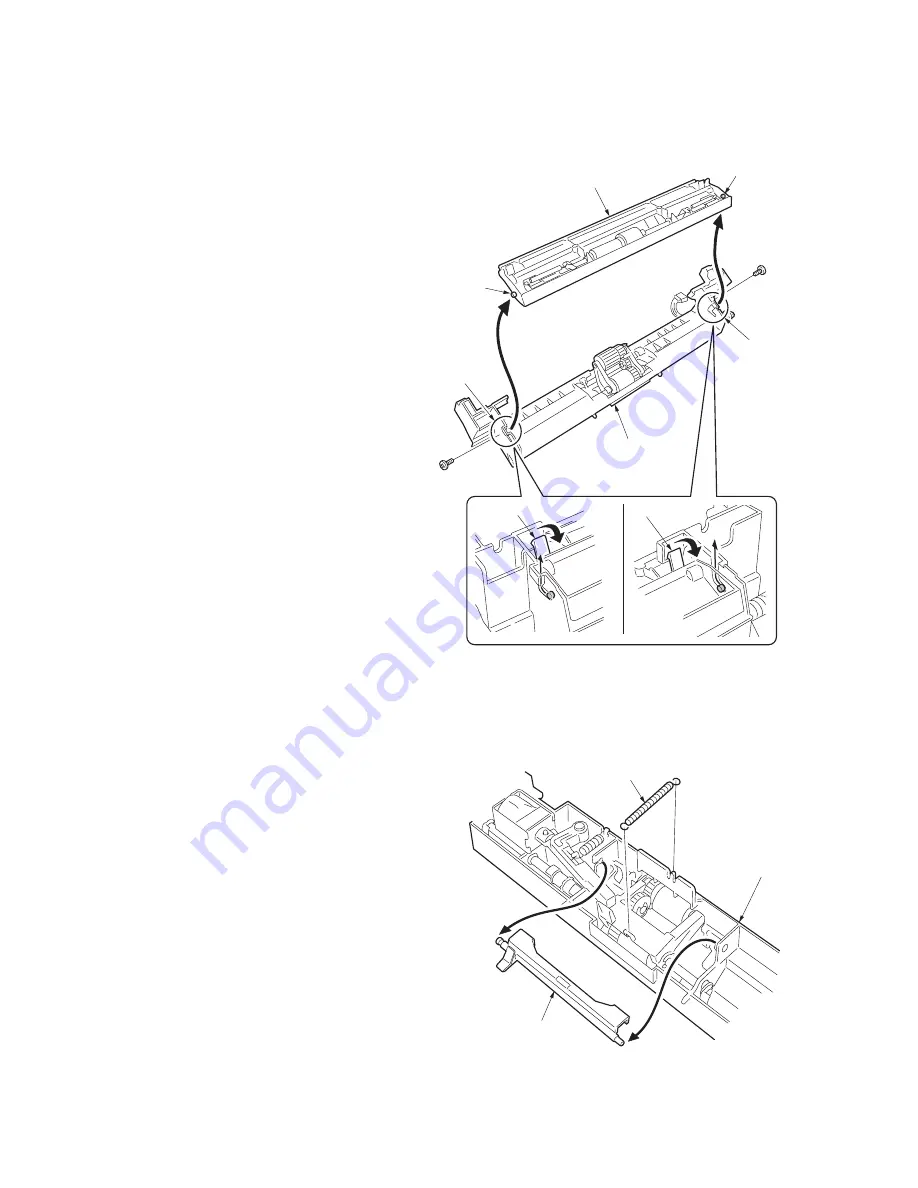
Detaching the MP paper feed pulley and MP forward-
ing pulley
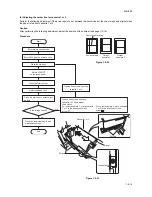
5. Remove the spring and lever from the upper
MP unit.
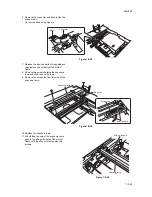
Figure 1-5-39
Upper MP unit
Lower MP unit
Projection
Projection
Claw
Inserted
part
Inserted part
Claw
Lever
Spring
Upper MP unit
Summary of Contents for TASKalfa 620
Page 1: ...SERVICE MANUAL Published in August 2009 842KP112 2KPSM062 Rev 2 TASKalfa 620 820 ...
Page 4: ...This page is intentionally left blank ...
Page 10: ...This page is intentionally left blank ...
Page 144: ...2KN 2KP 1 3 106 This page is intentionally left blank ...
Page 308: ...2KN 2KP 1 5 88 This page is intentionally left blank ...
Page 412: ...2KN 2KP 2 3 60 This page is intentionally left blank ...
Page 435: ...1 1 INSTALLATION GUIDE INSTALLATION GUIDE FOR SIDE FEEDER ...
Page 442: ...INSTALLATION GUIDE FOR LARGE SIZE SIDE FEEDER ...
Page 460: ...INSTALLATION GUIDE FOR DOCUMENT FINISHER ...
Page 475: ...INSTALLATION GUIDE FOR CENTERFOLD UNIT ...
Page 490: ...INSTALLATION GUIDE FOR MULTI JOB TRAY ...
Page 501: ...INSTALLATION GUIDE FOR PUNCH UNIT ...
Page 512: ...INSTALLATION GUIDE FOR STOPPER GUIDE ...
Page 515: ...INSTALLATION GUIDE FOR PRINTING SYSTEM ...
Page 518: ...INSTALLATION GUIDE FOR SCAN SYSTEM ...
Page 520: ......
Page 521: ......


