Ch.2 Unpacking and Installation
< 37 >
DRYPRO Vstage MODEL 793 Installation Manual Ver.1.00 2004.11
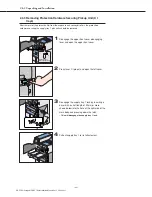
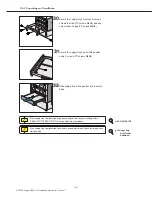
15
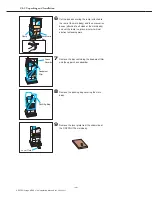
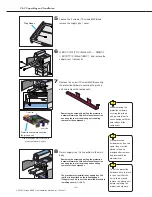
Supporting the unit from left and right sides (one
worker at each side), slowly slide the DRYPRO
793 down the ramp and off the palette.
16
Remove tape securing the supply trays and
covers.
Be sure that no one is
standing in the path of
the DRYPRO 793.
If the unit should topple,
anyone standing in the
way may be injured.
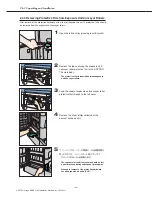
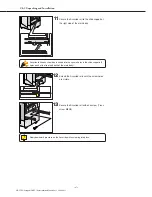
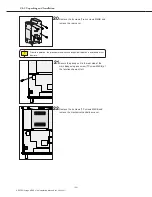
13
Set the ramp removed in step-
6
at the front of
the palette.
- The non-tapered side is the front.
14
Remove the clamp taped to the back of the
ramp and secure the palette and the ramp.
Clamp
Ramp
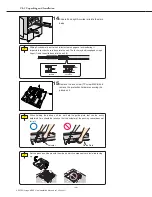
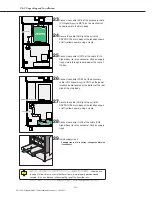
12
Likewise, raise the main body from the front and
remove the shock absorbers from the underside of
the main body.
3 ~ 5cm
DRYPRO 793
Lever Plate Screw
Be careful not to allow
hands to become
trapped when removing
the shock absorbers
from the underside of
the main body.
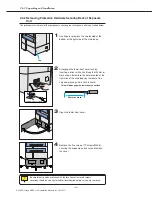
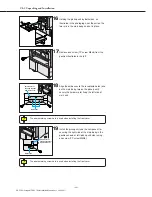
10
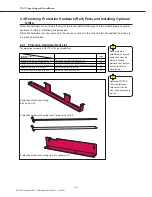
Insert the removed lever plate frame from the
rear between the main body and the palette as
illustrated.
11
Raise the main body by turning the lever plate
screw using a socket wrench with ratchet and
remove the shock absorbers from the underside
of the main body.
Tape
17
Remove the protective sheet from the operation
panel.
Operation Panel Protective Sheet
Be sure to remove the shock absorbers from the rear of the main body before
removing those at the front.
This is because, while an anti-tilt plate is furnished on the side where the casters are
located at the rear of the main body, there is no anti-tilt plate at the front.

