Ch.4 Checking Image Quality
< 142 >
DRYPRO Vstage MODEL 793 Installation Manual Ver.1.00 2004.11
4.2 Calibrating Internal Densitometer
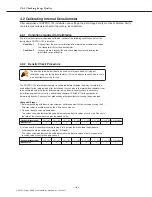
After completion of DRYPRO 793 installation and settings, the print image density must be calibrated. Firstly,
the internal densitometer should, if necessary, be calibrated.
4.2.1
Conditions required for Calibration
The internal densitometer should be calibrated if either of the following conditions exists at the
facility where DRYPRO 793 is installed.
Condition 1
: Request from the user for calibration of the internal densitometer based on
the standard of the facility densitometer.
Condition 2
: In cases where a density linearity check produces results outside the
prescribed range of density.
4.2.2
Density Check Procedure
The items detailed below should be used as reference when carrying out
calibration using the facility densitometer. (This also applies to cases where there
is no densitometer at the facility.)
The DRYPRO 793 internal densitometer is calibrated before shipment and may, therefore, be
used without further adjustments after installation. In cases where the internal densitometer is not
to be calibrated using the facility densitometer, only a density linearity check is necessary.
Installation engineers must carry a portable densitometer (X-Rite331) for the purposes of
determining density. Density values produced by other densitometers cannot be guaranteed.
<Essential Steps>
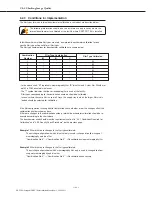
1. Before proceeding with density measurement, calibration must first be carried out using the X-
Rite step tablet in accordance with the X-Rite user's manual.
2. Carry out density value measurement.
The values shown below should be added to measured density values at each step. Density is
the total of the measured value plus the added value.
3. In the event that linearity measured in step-2 falls outside the prescribed range, density
calibration should be carried out using the "X-Rite331".
The values shown below should be added to measured density values at each step and the
resulting values input to the operation unit.
Range of Measurement
0.00~0.50
0.51~1.00
1.01~1.50
1.51~2.00
2.01~2.50
2.51~3.00
3.01~3.50
3.51 or higher
Added Value
0
0
0
0
0
0
0
0
Range of Measurement
0.00~0.50
0.51~1.00
1.01~1.50
1.51~2.00
2.01~2.50
2.51~3.00
3.01~3.50
3.51 or higher
Added Value
0
0
0
0
0
0
0
0

