23
Installing the RAID Disk Drives
The InterRAID-8 cabinet contains up to eight 1.0-inch or 1.6-inch high, 3.5-inch form factor
RAID disk drives. Supported capacities include 2 GB, 4 GB, 9 GB, and higher as the disk
drives become available. Contact an Intergraph sales representative for drive availability.
The left-hand side of the disk drive label identifies the disk drive size.
NOTE
Intergraph attaches a SCSI ID number to the disk drive label to identify each of the boot disk
drives. All other disk drives are for data storage and do not specify a SCSI ID number.
CAUTION
Ensure you install the boot disk drives into the InterRAID-8 cabinet that connects to the
primary RAID controller board.
To install the RAID disk drives:
1. Unlock the front panel door using the key for the InterRAID-8 cabinet.
2. Remove the RAID disk drives from the carton labeled, “This box contains disk drives
loaded with operating system software ...” The first three drives (ID 0, 1, 2) contain the
operating system.
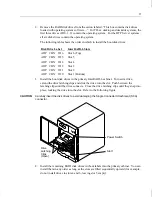
The following table shows the order in which to install the boot disk drives:
Disk Drive Label
InterRAID-8 Slots
ADP CHN ID 2
Slot 3
ADP CHN ID 1
Slot 2
ADP CHN ID 0
Slot 1 (bottom, if deskside; right-hand, if rack)
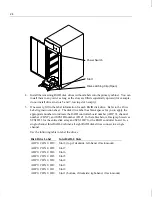
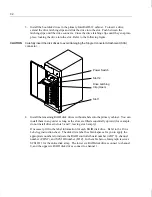
3. Install the boot disk drives in the primary InterRAID-8 cabinet. To insert a drive,
extend the drive latching clips and slide the drive into the slot. Push between the
latching clips until the drive connects. Close the drive latching clips until they snap into
place, locking the drive into the slot. Refer to the following figure.
CAUTION
Carefully insert the disk drives to avoid damaging the Single Connector Attachment (SCA)
connector.
Summary of Contents for InterRAID-12
Page 1: ...InterRAID Hardware User s Guide January 1997 DHA018210 ...
Page 4: ......
Page 121: ...106 ...
Page 157: ...142 ...
Page 163: ...148 ...
Page 171: ...156 ...

