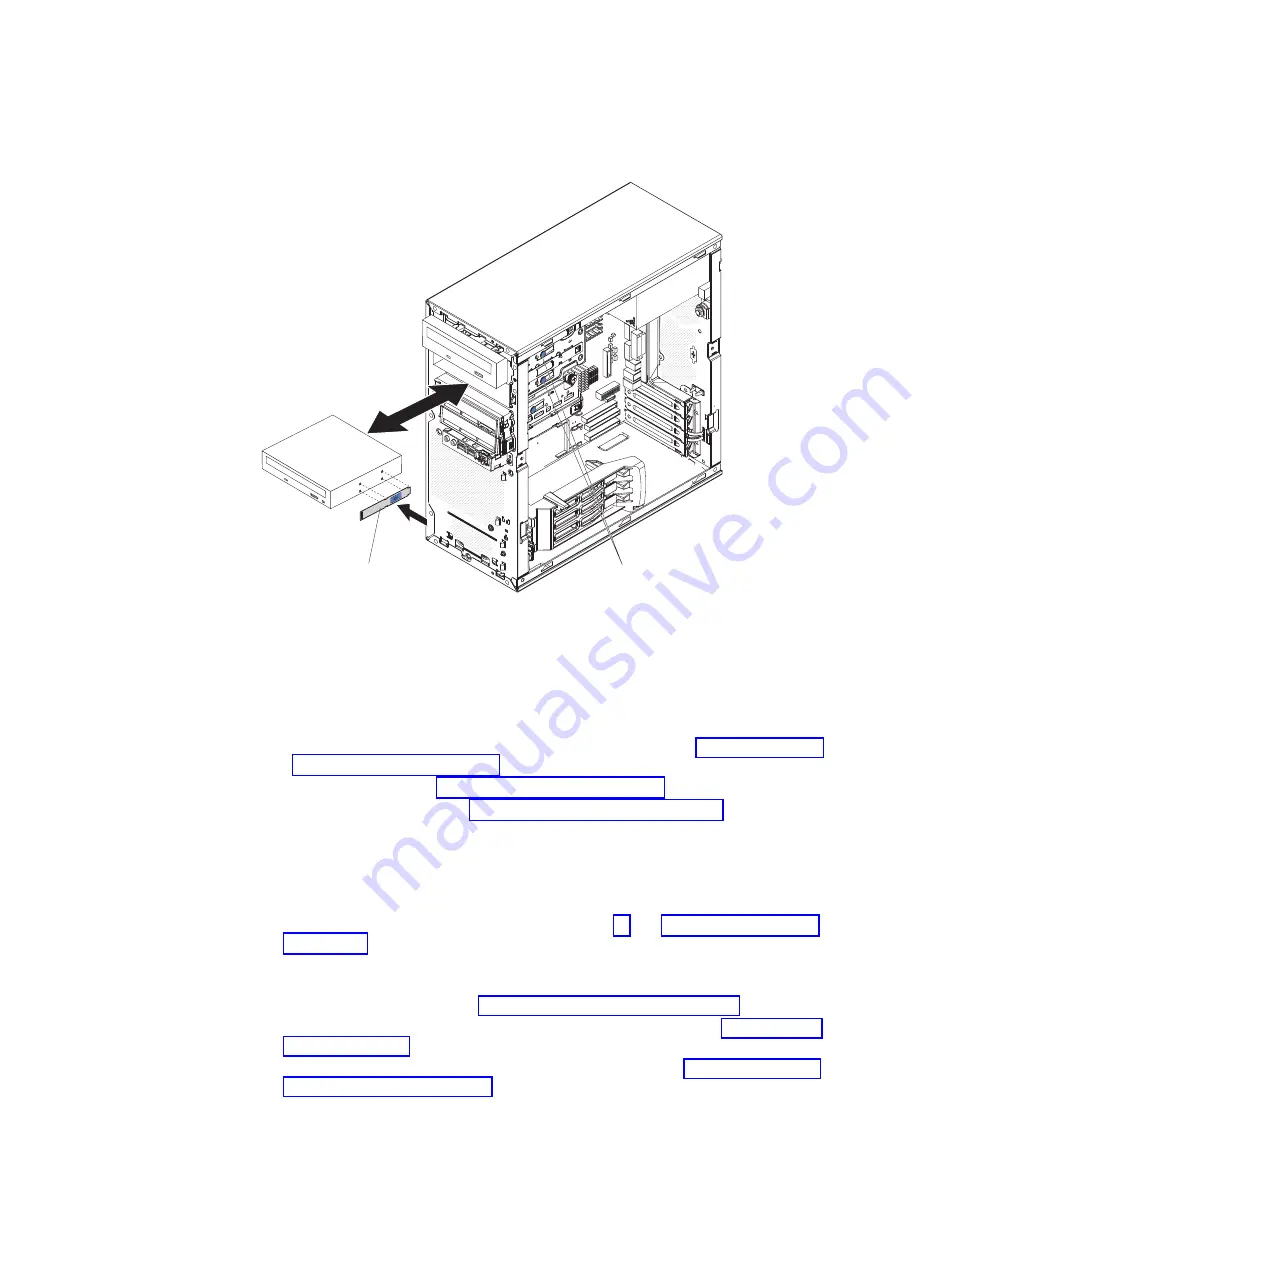
6.
Push
the
drive
into
the
front
of
the
bay
until
it
clicks
into
place.
7.
Reconnect
the
cables
to
the
drive.
Note:
Route
the
signal
cable
so
that
it
does
not
block
the
airflow
to
the
rear
of
the
drives
or
over
the
microprocessor.
8.
Install
the
hard
disk
drive
bracket,
if
one
was
removed
(see
9.
Install
the
bezel
(see
10.
Install
the
side
cover
(see
11.
Reconnect
the
external
cables
and
power
cords;
then,
turn
on
the
attached
devices
and
the
computer.
Removing
a
drive
in
bay
3
or
4
To
remove
a
drive
in
bay
3
or
4,
complete
the
following
steps:
1.
Read
the
safety
information
that
begins
on
page
and
2.
Turn
off
the
computer
and
all
attached
devices;
then,
disconnect
all
external
cables
and
power
cords.
3.
Remove
the
side
cover
(see
4.
If
you
are
removing
a
diskette
drive,
remove
the
front
bezel
(see
5.
Remove
the
hard
disk
drive
bracket,
if
one
is
installed
(see
6.
Disconnect
the
cables
from
the
drive
that
you
are
removing.
Drive retainer clip
Release buttons
Figure
33.
Installing
a
drive
in
bay
1
or
2
Chapter
4.
Removing
and
replacing
computer
components
101
Summary of Contents for IntelliStation M Pro 6218
Page 1: ...IBM IntelliStation M Pro Type 6218 and 9236 Problem Determination and Service Guide...
Page 2: ......
Page 3: ...IBM IntelliStation M Pro Type 6218 and 9236 Problem Determination and Service Guide...
Page 8: ...vi IBM IntelliStation M Pro Type 6218 and 9236 Problem Determination and Service Guide...
Page 16: ...xiv IBM IntelliStation M Pro Type 6218 and 9236 Problem Determination and Service Guide...
Page 26: ...10 IBM IntelliStation M Pro Type 6218 and 9236 Problem Determination and Service Guide...
Page 140: ...124 IBM IntelliStation M Pro Type 6218 and 9236 Problem Determination and Service Guide...
Page 162: ...146 IBM IntelliStation M Pro Type 6218 and 9236 Problem Determination and Service Guide...
Page 167: ......
Page 168: ...Part Number 31R1998 Printed in USA 1P P N 31R1998...


