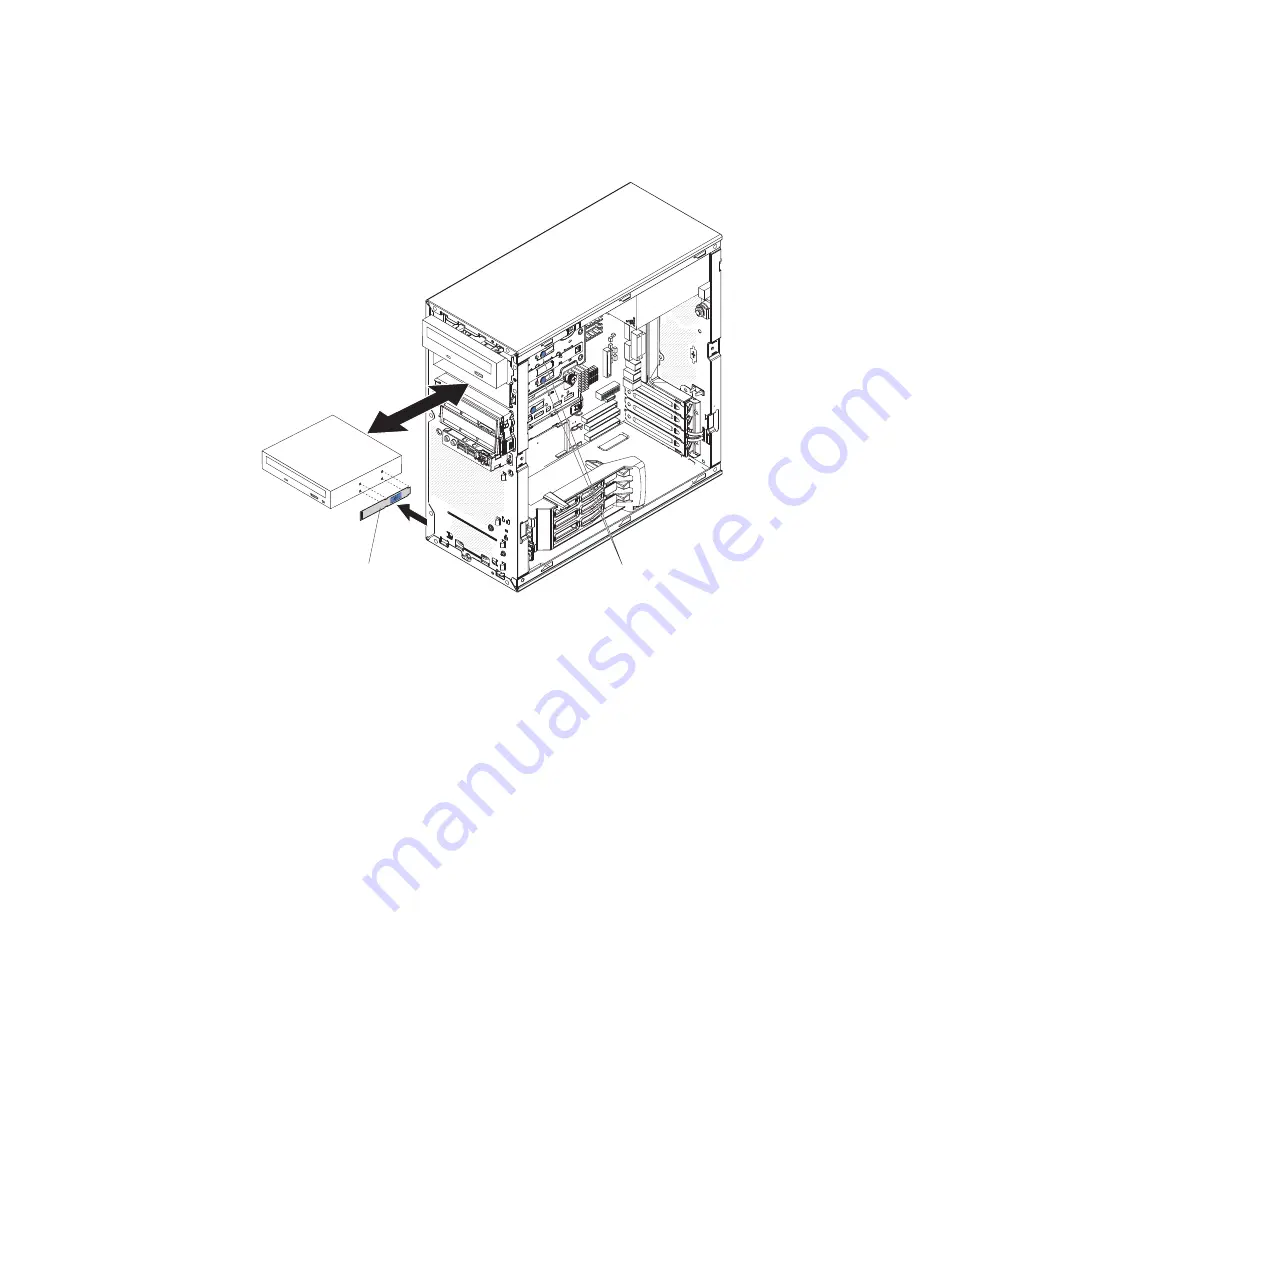
8.
Remove
the
blue
drive
retainer
clip
from
the
side
of
the
drive
and
install
it
on
the
replacement
drive.
9.
If
you
are
instructed
to
return
the
drive,
follow
all
packaging
instructions,
and
use
any
packaging
materials
for
shipping
that
are
supplied
to
you.
Installing
a
drive
in
bay
1
or
2
To
install
a
drive
in
bay
1
or
2,
complete
the
following
steps:
1.
If
you
are
replacing
a
removed
drive
with
a
new
drive,
make
sure
that:
v
You
have
all
the
cables
and
other
equipment
specified
in
the
documentation
that
comes
with
the
new
drive.
v
You
check
the
instructions
that
come
with
the
new
drive
to
determine
whether
you
must
set
any
switches
or
jumpers
on
the
drive.
If
you
are
installing
a
SCSI
device,
make
sure
that
you
select
the
SCSI
ID
for
that
device.
v
You
have
removed
the
blue
drive
retainer
clip
on
the
side
of
the
old
drive
and
have
it
available
for
installation
on
the
new
drive.
Note:
If
you
are
installing
a
drive
that
contains
a
laser,
review
the
following
safety
precaution.
Drive retainer clip
Release buttons
Figure
32.
Removing
a
drive
from
bay
1
or
2
Chapter
4.
Removing
and
replacing
computer
components
99
Summary of Contents for IntelliStation M Pro 6218
Page 1: ...IBM IntelliStation M Pro Type 6218 and 9236 Problem Determination and Service Guide...
Page 2: ......
Page 3: ...IBM IntelliStation M Pro Type 6218 and 9236 Problem Determination and Service Guide...
Page 8: ...vi IBM IntelliStation M Pro Type 6218 and 9236 Problem Determination and Service Guide...
Page 16: ...xiv IBM IntelliStation M Pro Type 6218 and 9236 Problem Determination and Service Guide...
Page 26: ...10 IBM IntelliStation M Pro Type 6218 and 9236 Problem Determination and Service Guide...
Page 140: ...124 IBM IntelliStation M Pro Type 6218 and 9236 Problem Determination and Service Guide...
Page 162: ...146 IBM IntelliStation M Pro Type 6218 and 9236 Problem Determination and Service Guide...
Page 167: ......
Page 168: ...Part Number 31R1998 Printed in USA 1P P N 31R1998...


