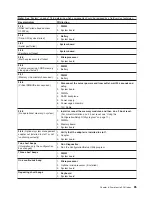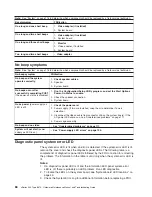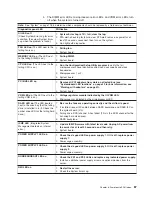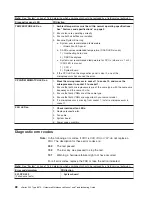
Note:
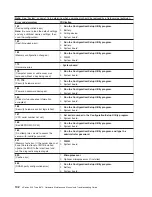
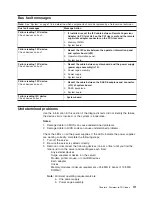
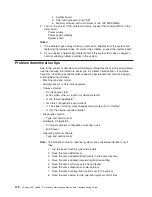
See “System” on page 116 to determine which components should be replaced by a field service technician.
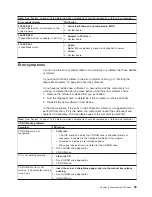
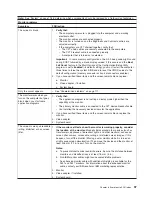
Power problems
Symptom
FRU/action
The computer does not turn on.
1.
Verify that:
v
The power cables are properly connected to the computer.
v
The electrical outlet functions properly.
v
The type of memory installed is correct.
v
If you just installed an option, remove it, and restart the computer. If the
computer now turns on, you might have installed more options than the
power supply supports.
2. Override front panel power button:
a. Disconnect computer power cords.
b. Reconnect power cords.
If computer turns on:
a. Operator information panel
If computer does not turn on:
v
System board
3. See “Undetermined problems” on page 111.
The computer does not turn off.
1.
Verify whether you are using an ACPI or non-ACPI operating system.
If
you are using a non-ACPI operating system:
a. Press Ctrl+Alt+Delete.
b. Turn off the system by holding the power-control button for 4 seconds.
c. If computer fails during BIOS POST and power-control button does not
work, remove the AC power cord.
2. If the problem remains or if you are using an ACPI-aware operating system,
suspect the system board.
Note:
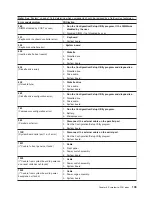
See “System” on page 116 to determine which components should be replaced by a field service technician.
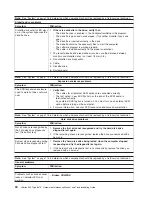
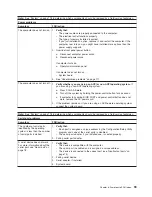
Serial port problems
Symptom
FRU/action
The number of serial ports
identified by the operating
system is less than the number
of serial ports installed.
1.
Verify that:
v
Each port is assigned a unique address by the Configuration/Setup Utility
program and none of the serial ports is disabled.
v
The serial-port adapter, if you installed one, is seated properly.
2. Failing serial port adapter.
A serial device does not work.
For more information about the
serial port, see “Serial port” on
page 76.
1.
Verify that:
v
The device is compatible with the computer.
v
The serial port is enabled and is assigned a unique address.
v
The device is connected to the correct port (see “Input/output ports” on
page 73).
2. Failing serial device.
3. Serial adapter, if installed.
4. System board.
Chapter 6. Symptom-to-FRU index
99
Summary of Contents for eServer xSeries 345 Type 8670
Page 1: ...xSeries 345 Type 8670 Hardware Maintenance Manual and Troubleshooting Guide ERserver...
Page 2: ......
Page 3: ...xSeries 345 Type 8670 Hardware Maintenance Manual and Troubleshooting Guide ERserver...
Page 6: ...iv xSeries 345 Type 8670 Hardware Maintenance Manual and Troubleshooting Guide...
Page 10: ...viii xSeries 345 Type 8670 Hardware Maintenance Manual and Troubleshooting Guide...
Page 18: ...8 xSeries 345 Type 8670 Hardware Maintenance Manual and Troubleshooting Guide...
Page 88: ...78 xSeries 345 Type 8670 Hardware Maintenance Manual and Troubleshooting Guide...
Page 124: ...114 xSeries 345 Type 8670 Hardware Maintenance Manual and Troubleshooting Guide...
Page 130: ...120 xSeries 345 Type 8670 Hardware Maintenance Manual and Troubleshooting Guide...
Page 141: ...Chapter 8 Related service information 131...
Page 142: ...132 xSeries 345 Type 8670 Hardware Maintenance Manual and Troubleshooting Guide...
Page 143: ...Chapter 8 Related service information 133...
Page 144: ...134 xSeries 345 Type 8670 Hardware Maintenance Manual and Troubleshooting Guide...
Page 145: ...Chapter 8 Related service information 135...
Page 146: ...136 xSeries 345 Type 8670 Hardware Maintenance Manual and Troubleshooting Guide...
Page 147: ...Chapter 8 Related service information 137...
Page 157: ...Chapter 8 Related service information 147...
Page 158: ...148 xSeries 345 Type 8670 Hardware Maintenance Manual and Troubleshooting Guide...
Page 159: ...Chapter 8 Related service information 149...
Page 160: ...150 xSeries 345 Type 8670 Hardware Maintenance Manual and Troubleshooting Guide...
Page 161: ...Chapter 8 Related service information 151...
Page 162: ...152 xSeries 345 Type 8670 Hardware Maintenance Manual and Troubleshooting Guide...
Page 166: ...156 xSeries 345 Type 8670 Hardware Maintenance Manual and Troubleshooting Guide...
Page 174: ...164 xSeries 345 Type 8670 Hardware Maintenance Manual and Troubleshooting Guide...
Page 175: ......
Page 176: ...Part Number 48P9718 1P P N 48P9718...

