


1.
From the
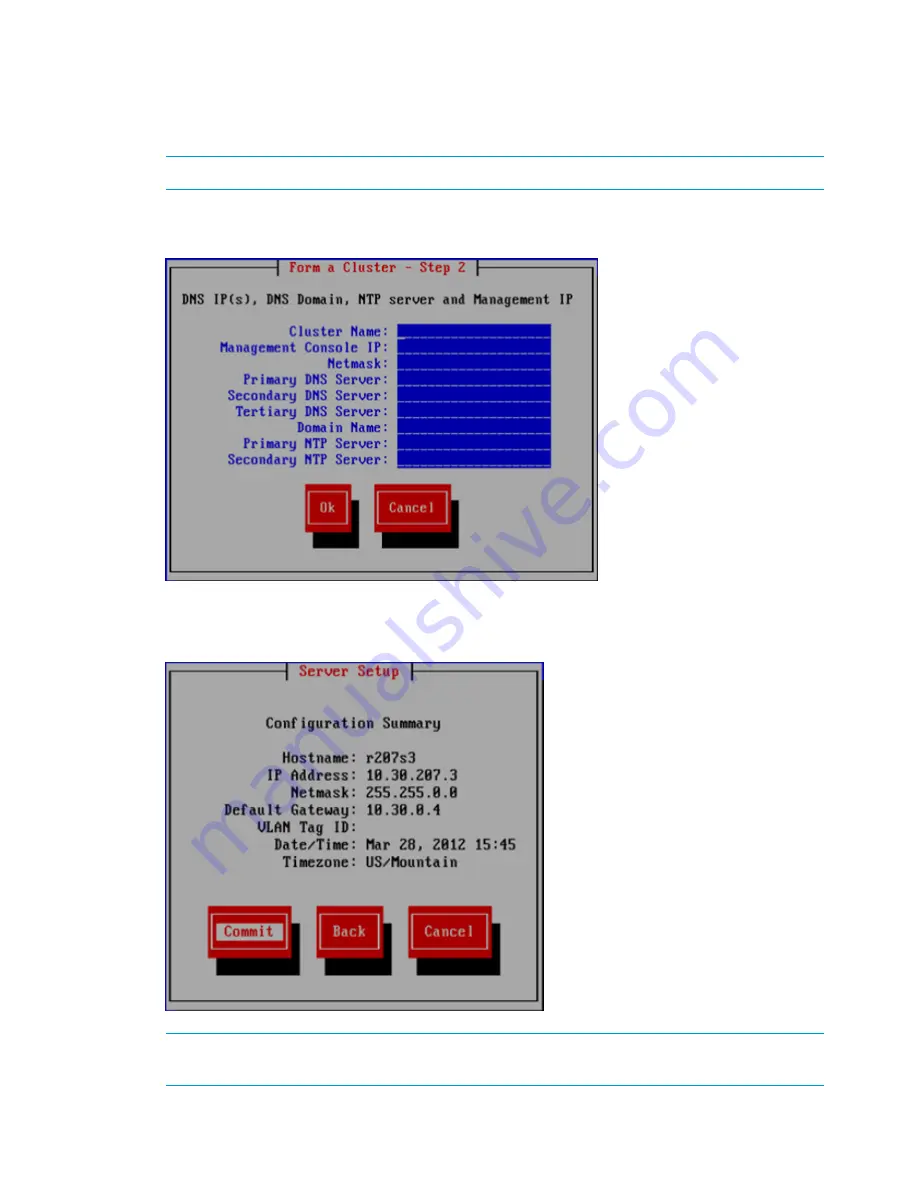
Form a Cluster – Step 2
screen, enter a name for the cluster, and specify the IP address
and netmask for the Management Console IP (also called the Cluster Management IP or
Management IP). This IP address runs on a virtual interface (VIF) assigned to the entire cluster
for management use. Think of it as the IP address of the cluster. Connect to this VIF in future
GUI management sessions. The VIF remains highly available.
NOTE:
If you are using a 2, 3, or 4 network layout, install this IP on the
Bond1
network.
2.
Enter the IP addresses and domain for your DNS servers, and the IP addresses for your NTP
servers, and then select
Ok
.
3.
On the
Configuration Summary
screen, review the configurations that you specified, and then
select
Commit
.
NOTE:
Ensure that the Management IP address is on the same subnet as the cluster network
(
Bond0
for the flat network layout;
Bond1
for all other layouts).
94
Installing the HP StoreAll OS Software and configuring the HP StoreAll Storage system