


•
Select
Continue
to skip the option to add, remove, or modify bond devices, and then
go to
Step 15
to finalize configurations on the
Configuration Summary
screen.
•
Select
Back
to return to the previous screen.
•
Press
F2
to complete single networking configurations.
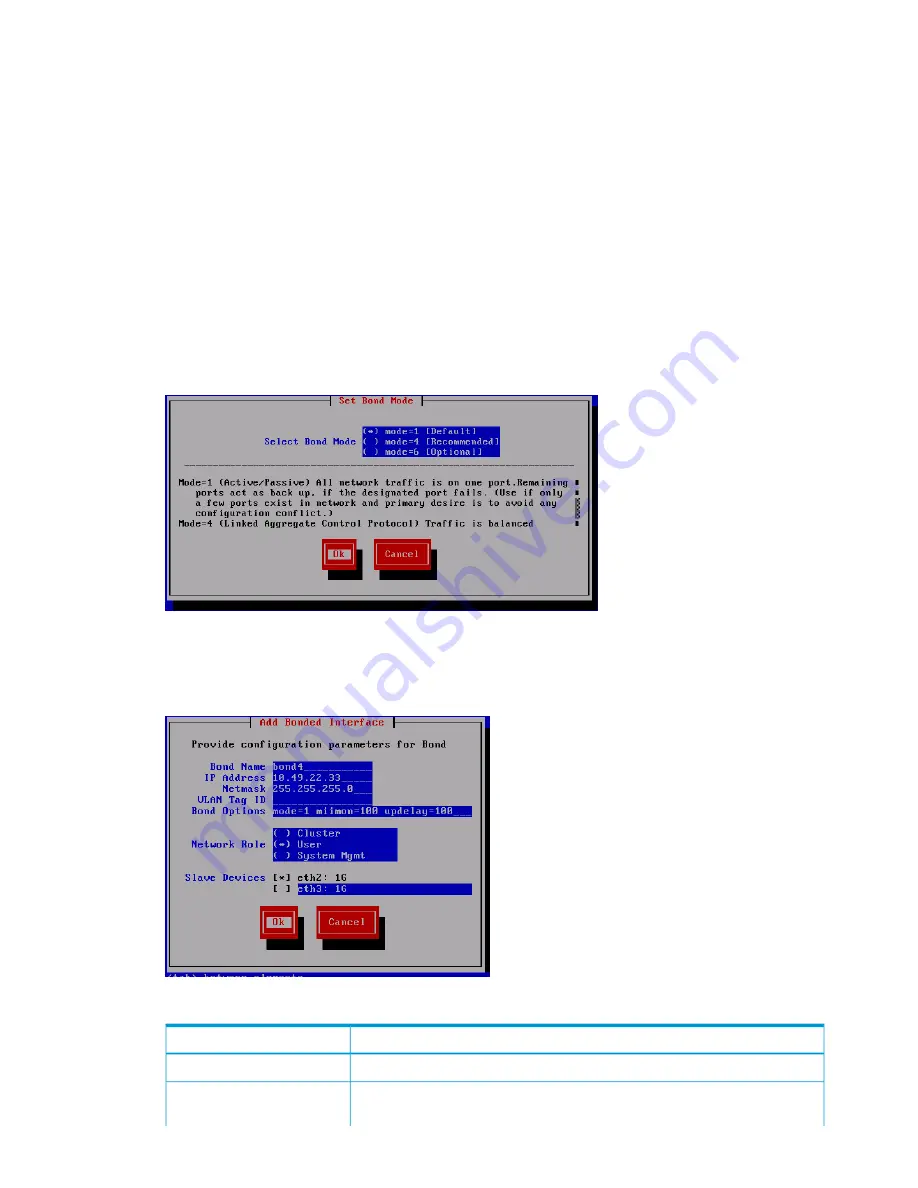
11. If you selected
Add Bond Interface
in
Step 10
, select the appropriate bond mode on the
Set
Bond Mode
screen:
•
Mode=1 (Default)
: Use this mode to direct all network traffic to one port. Remaining ports
act as a backup if the designated port fails. Use this option if only a few ports exist in
the network, and the primary intent is to avoid configuration conflicts.
•
Mode=4 (Recommended)
: Use this option to balance network traffic across multiple ports.
To use this option, an Ethernet switch configuration is required.
•
Mode=6 (Optional)
: Use this option to balance network traffic across all ports and cause
traffic to a given client to be directed to one port. This option is recommended if the switch
cannot be configured.
Click
Ok
, and then go to
Step 12
.
12. If you completed
Step 11
, wait for the
Add Bond Interface
screen to appear, and then fill out
the required fields.
Table 16 Field entry requirements for Add Bonded Interface screen
Description
Field name
Enter the name for the bond device.
Bond Name
Enter the server’s IP address. The IP address is the address of the server on
Bond0
.
For a single network installation, this is the physical address of this node. For a
IP Address
66
Installing the HP StoreAll OS Software and configuring the HP StoreAll Storage system