


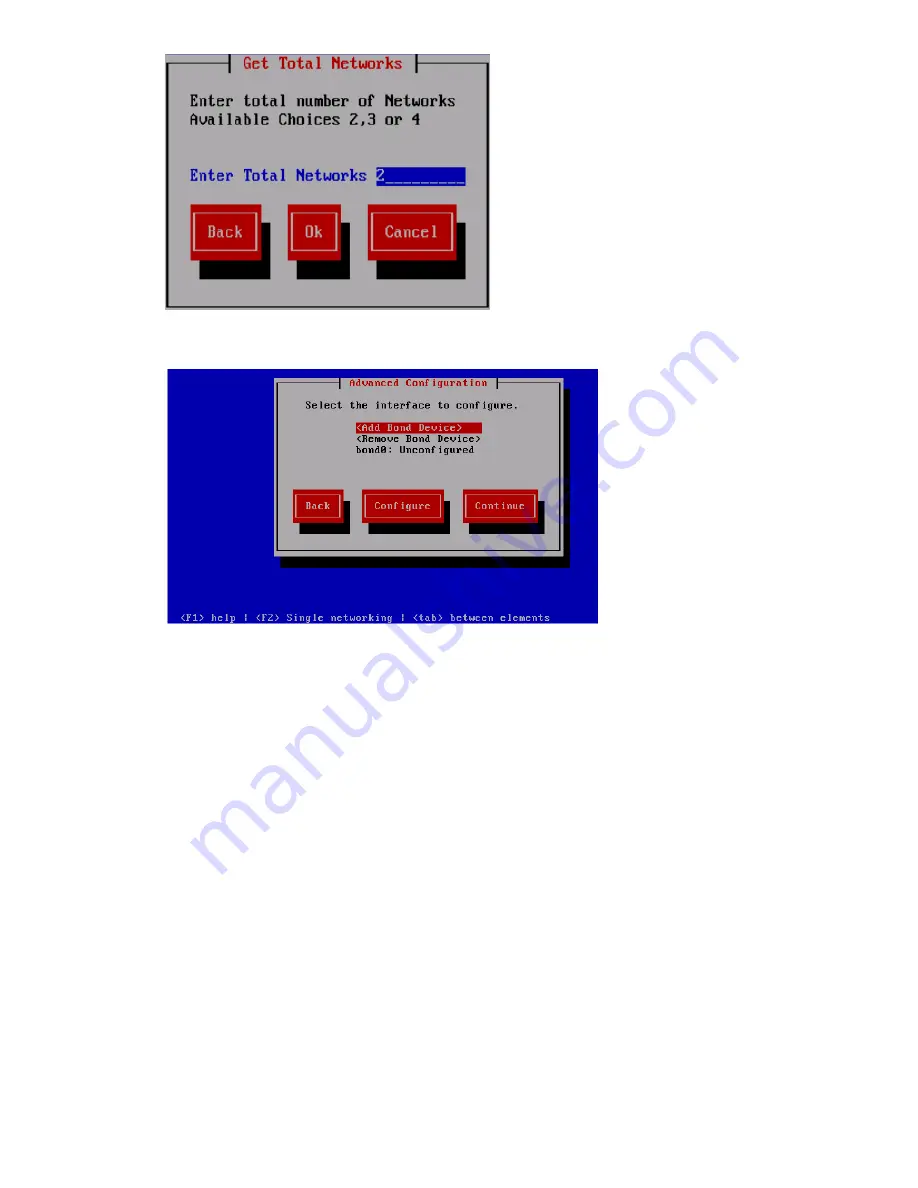
7.
On the
Advanced Configuration
screen, select a bond interface.
8.
On the
Advanced Configuration
screen, do one of the following:
•
To change the number of networks, select
Back
to return to
Step 6
.
•
To configure bond mode, select
Configure
, and then go to
Step 9
.
•
To add a bonded interface, select
Continue
, and then go to
Step 10
•
To return to the
Network Configuration
screen, press
F2
, and then return to
Step 5
.
9.
Select the appropriate bond mode from the
Edit Bond Mode
screen by using the
UP
and
DOWN
arrow keys or the
Tab
key on your keyboard, and then select
Ok
.
•
Mode=1 (Default)
: Use this mode to direct all network traffic to one port. Remaining ports
act as a backup, if the designated port fails. Use this option if only a few ports exist in
the network, and the primary intent is to avoid configuration conflicts.
•
Mode=4 (Recommended)
: Use this option to balance network traffic across multiple ports.
To use this option, an Ethernet switch configuration is required.
•
Mode=6 (Optional)
: Use this option to balance network traffic across all ports and cause
traffic to a given client to be directed to one port. This option is recommended if the switch
cannot be configured.
210
Expanding an existing HP StoreAll Storage system using the Setup Wizard