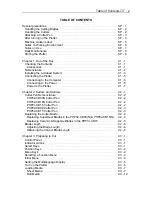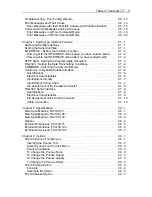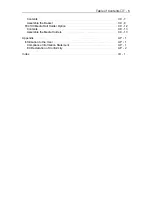
Table of Contents
♦
T - 4
PAGE LENGTH - Setting the Length of the Page with Roll Media
C4 - 16
ROTATE - Rotating the Coordinate Axes
C4 - 17
DATA SORTING - Sorting the cut data
C4 - 18
MIRROR - Reversing the Image
C4 - 20
SCALE - Enlarging and Reducing an Image Size
C4 - 21
AXIS ALIGNMENT - Axis Alignment Parameter Setting
C4 - 22
Selecting the Axis Alignment Tool
C4 - 23
Selecting the Axis Alignment Method
C4 - 24
Axis Alignment Adjustment
C4 - 26
AUTO PRE FEED - Advancing the Media Automatically
C4 - 28
TANGENTIAL EMULATION - Cutting Tiny Letters or Thick & Thin Material
C4 - 30
Selecting Tangential Emulation Mode
C4 - 30
Enabling the Tangential Emulation
C4 - 31
SPEED - Setting the Pen Up Speed
C4 - 32
OFFSET ANGLE - Adjusting the Blade Offset Angle
C4 - 33
OFFSET FORCE - Setting the Offset Cut Pressure
C4 - 34
STEP PASS - Setting the Step Pass
C4 - 35
DISTANCE ADJUST - Adjusting the Length of Cut Line Segments
C4 - 36
Chapter 5 Background Settings
C5 - 1
The MENU TREE of Background Setting
C5 - 2
Background Settings for GP-GL
C5 - 3
LANGUAGE SELECTION
C5 - 3
“:” “;” Command Control (“:” “;” COMMAND)
C5 - 3
Pen UP/DOWN for the “W” Command
C5 - 4
Condition Priority
C5 - 4
Initial Blade Control Position (INIT. BALDE CONTROL)
C5 - 5
Length Unit
C5 - 5
Pen UP Movement Control (PEN UP MOVE)
C5 - 6
Media Size Sensor Control
C5 - 6
Pinch Roller Sensor Control
C5 - 7
Background Settings for HP-GL
C5 - 8
LANGUAGE SELECTION
C5 - 8
Model No. Response (MODEL EMULATED)
C5 - 8
Condition Priority
C5 - 9
Initial Blade Control Position (INIT. BLADE CONTROL)
C5 - 9
Length Unit
C5 - 10
Pen UP Movement Control (PEN UP MOVE)
C5 - 10
Media Size Sensor Control
C5 - 11
Pinch roller Sensor Control
C5 - 11
Circle Resolution
C5 - 12
Chapter 6 Test Modes and Troubleshooting
C6 - 1
CONDITION LIST - Listing the Cutter Conditions
C6 - 1
Sample printout of the CONDITION function
C6 - 2
DATA DUMP - Using the Character Dump Mode
C6 - 3
SELF TEST - Running the Self Test
C6 - 5
Troubleshooting - The Plotter is Turned on but it Doesn’t Work
C6 - 7
Troubleshooting - Improper Initialization
C6 - 8
Troubleshooting - Plotter does not Operate Properly
C6 - 9
Summary of Contents for Cutting Pro FC4100-100
Page 1: ...cutting pro FC4100 series series USER S MANUAL 1 a...
Page 138: ...Setting the Interface Functions C7 7 Input Output Circuitry Input Output Timing Chart...
Page 147: ...Specifications C8 6 FC4100 100 without Stand FC4100 100 with Stand Standard and Basket Option...
Page 148: ...Specifications C8 7 FC4100 130 without Stand FC4100 130 with Stand Standard and Basket Option...


