37-M T STARTER MOTORS 6D4-9
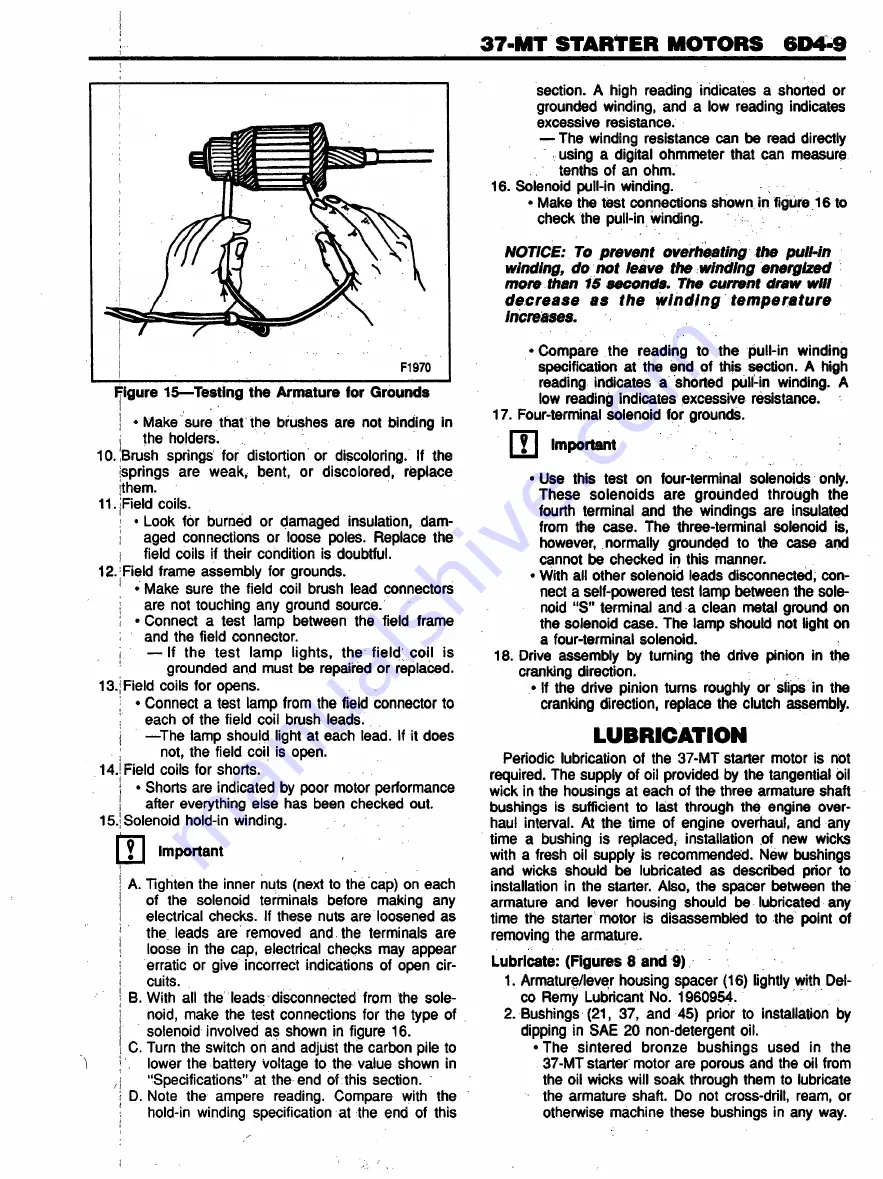
Figure 15—Testing the Armature for Grounds
! • Make sure that the brushes are not binding in
i
the holders.
1 0 . |Brush springs for distortion or discoloring. If the
jsprings are weak, bent, or discolored, replace
jthem.
11. -Field coils.
! • Look for burned or damaged insulation, dam-
j
aged connections or loose poles. Replace the
field coils if their condition is doubtful.
12. Field frame assembly for grounds.
| • Make sure the field coil brush lead connectors
are not touching any ground source,
i • Connect a test lamp between the field frame
and the field connector.
i
— If the test lamp lights, the field coil is
grounded and must be repaired or replaced.
13. | Field coils for opens.
j • Connect a test lamp from the field connector to
each of the field coil brush leads,
j
—The lamp shoujd light at each lead. If it does
not, the field coil is open.
14. | Field coils for shorts.
i • Shorts are indicated by poor motor performance
!
after everything else has been checked out.
15. | Solenoid hold-in winding.
Important
A.
Tighten the inner nuts (next to the cap) on each
of the solenoid terminals before making any
electrical checks. If these nuts are loosened as
the leads are removed and the terminals are
|
loose in the cap, electrical checks may appear
erratic or give incorrect indications of open cir-
!
cuits.
| B. With all the leads disconnected from the sole
noid, make the test connections for the type of
solenoid involved as shown in figure 16.
C.
Turn the switch on and adjust the carbon pile to
1
|
lower the battery voltage to the value shown in
,j
“Specifications” at the end of this section.
I D. Note the ampere reading. Compare with the
!
hold-in winding specification at the end of this
section. A high reading indicates a shorted or
grounded winding, and a low reading indicates
excessive resistance.
— The winding resistance can be read directly
using a digital ohmmeter that can measure
tenths of an ohm.
16. Solenoid pull-in winding.
• Make the test connections shown in figure 16 to
check the pull-in winding.
NOTICE: To prevent overheating the pull-in
winding, do not leave the winding energized
more than 15 seconds. The current draw will
d e c re a s e a s th e w in d in g te m p e ra tu re
increases.
• Compare the reading to the pull-in winding
specification at the end of this section.
A
high
reading indicates a shorted pull-in winding. A
low reading indicates excessive resistance.
17. Four-terminal solenoid for grounds.
| j | Important
• Use this test on four-terminal solenoids only.
These solenoids are grounded through the
fourth terminal and the windings are insulated
from the case. The three-terminal solenoid is,
however, normally grounded to the case and
cannot be checked in this manner.
• With all other solenoid leads disconnected, con
nect a self-powered test lamp between the sole
noid “S" terminal and a clean metal ground on
the solenoid case. The lamp should not light on
a four-terminal solenoid.
18. Drive assembly by turning the drive pinion in the
cranking direction.
• If the drive pinion turns roughly or slips in the
cranking direction, replace the clutch assembly.
LUBRICATION
Periodic lubrication of the 37-MT starter motor is not
required. The supply of oil provided by the tangential oil
wick in the housings at each of the three armature shaft
bushings is sufficient to last through the engine over
haul interval. At the time of engine overhaul, and any
time a bushing is replaced, installation of new wicks
with a fresh oil supply is recommended. New bushings
and wicks should be lubricated as described prior to
installation in the starter. Also, the spacer between the
armature and lever housing should be lubricated any
time the starter motor is disassembled to the point of
removing the armature.
Lubricate: (Figures 8 and 9)
1. Armature/lever housing spacer (16) lightly with Del-
co Remy Lubricant No. 1960954.
2. Bushings (21, 37, and 45) prior to installation by
dipping in SAE 20 non-detergent oil.
• The sintered bronze bushings used in the
37-MT starter motor are porous and the oil from
the oil wicks will soak through them to lubricate
the armature shaft. Do not cross-drill, ream, or
otherwise machine these bushings in any way.
Summary of Contents for C Series 1993
Page 1: ......
Page 12: ...OA 6 GENERAL INFORMATION Figure 11 Allison Transmission I D Location ...
Page 44: ...3B1A 2 POWER STEERING GEAR UNIT REPAIR Figure 1 710 Power Steering Gear ...
Page 62: ......
Page 75: ...3B3 2 POWER STEERING COMPONENTS TRW ROSS ...
Page 121: ...5H 16 AIR BRAKE VALVES Figure 21 Bendix Proportioning Relay Valve Components ...
Page 147: ...5J 10 AIR COMPRESSOR AND GOVERNOR 286 F9051 Figure 18 Bendix BX 2150 Compressor Components i ...
Page 204: ...MODEL 295 TBI UNIT 6C1 3 F7973 Figure 3 Model 295 TBL Unit ...
Page 251: ...6D4 6 37 MT STARTER MOTORS V3022 Figure 8 37 MT Components ...


