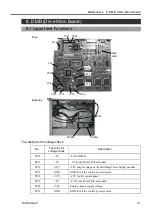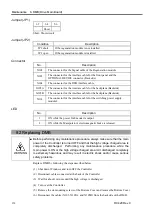
Maintenance 7. DPB (Drive Power Board)
130
RC420 Rev.9
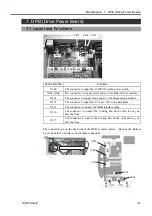
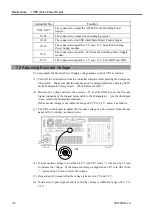
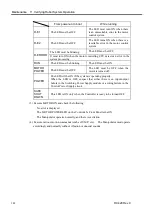
Connector No.
Function
X306, X307
The connector to output the AC200V to the Switching Power
Supply.
X308
The connector to output to the discharging resistor.
X309
The connector for the SSR (Solid State Relay) Control Signal.
X310
The connector to input the +5 V and +12 V from the Switching
Power Supply module.
X311
The connector to input the +24V from the Switching Power Supply
module.
X315
The connector to input the +5 V and +12 V to the HDD and FDD.
7.2 Adjusting Encoder Voltage
You may adjust the Encoder Power Supply voltage using a control, VR1 as follows:
(1) Turn ON the Controller to boot the controller software while pressing the Emergency
Stop switch. Make sure that the encoder power is being supplied by checking LED1
on the Manipulator’s relay board. (The LED must be ON.)
(2) Measure the voltage between the e5V and the GND pin on the Encoder
Signal connector of the longest motor cable in the Manipulator. (As for which pins
to use, refer to the Manipulator manual.)
If the encoder voltage is not within the range of 4.9 V to 5.2 V, adjust it as follows:
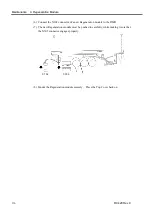
(3) The VR1 control used to adjust the Encoder voltage can be accessed from the rear
panel of the Controller, as shown below.
VR1
(4) If the measured voltage is lower than 4.9 V, turn VR1 in the “+” direction by 1/2 turn
to increase the voltage. If the measured voltage is higher than 5.2V, turn VR1 in the
“
-
” direction by 1/2 turn to lower the voltage.
(5) Repeat step (2) to ensure that the voltage is between 4.9 V and 5.2 V.
(6) If necessary, repeat steps (4) and (5) until the voltage is within the range of 4.9 V to
5.2 V.
Summary of Contents for RC420
Page 1: ...Rev 9 EM073C1492F ROBOT CONTROLLER RC420 ...
Page 2: ...ROBOT CONTROLLER RC420 Rev 9 ...
Page 12: ...Setup Operation ...
Page 20: ...Setup Operation 1 Safety 10 RC420 Rev 9 ...
Page 30: ...Setup Operation 2 3 Controller Part Names and Functions 20 RC420 Rev 9 ...
Page 50: ...Setup Operation 5 5 Circuit Diagrams EMERGENCY Connector 40 RC420 Rev 9 ...
Page 58: ...Setup Operation 6 3 Pin Assignments STANDARD I O Connector 48 RC420 Rev 9 ...
Page 114: ...Setup Operation 10 UPS Uninterruptible Power Supply 104 RC420 Rev 9 ...
Page 115: ...97 Maintenance This manual contains maintenance procedures for the RC420 Robot Controller ...
Page 116: ...Maintenance RC420 Rev 9 106 ...
Page 138: ...Maintenance 6 Motor Driver Module 128 RC420 Rev 9 ...
Page 170: ...Maintenance 12 Recovering the HDD 160 RC420 Rev 9 ...


