Replacing Consumable Products
85
8
8
8
8
8
8
8
8
8
8
8
8
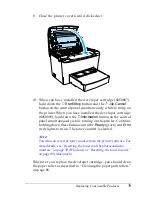
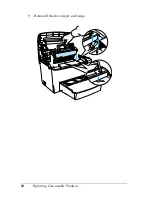
10. Close the printer cover until it clicks shut.
11. Hold down the
N
Start/Stop
and the
@
Information
buttons on
the control panel simultaneously while turning on the printer.
Continue holding down these buttons until the
Ready
(green)
and
Error
(red) lights turn on.
The photoconductor counter is cleared.
Note:
You also can reset the photoconductor counter from the printer
driver. For more details, see “Resetting the photoconductor counter”
on page 40 (Windows) or “Resetting the photoconductor counter”
on page 70 (Macintosh).
Summary of Contents for EPL-6100
Page 2: ...ii ...
Page 4: ...iv ...
Page 34: ...24 Paper Handling ...
Page 86: ...76 Setting Up Your Printer on a Network ...
Page 116: ...14 Installing and Removing Options 6 Set the side cover back into place ...
Page 174: ...72 Using the Remote Control Panel Utility ...
Page 186: ...84 Replacing Consumable Products 9 Reinstall the developer cartridge ...
Page 188: ...86 Replacing Consumable Products ...
Page 218: ...116 Troubleshooting 1 Remove the paper tray from the 500 Sheet Lower Paper Cassette Unit A4 ...


