


D-Show Profile Guide
42
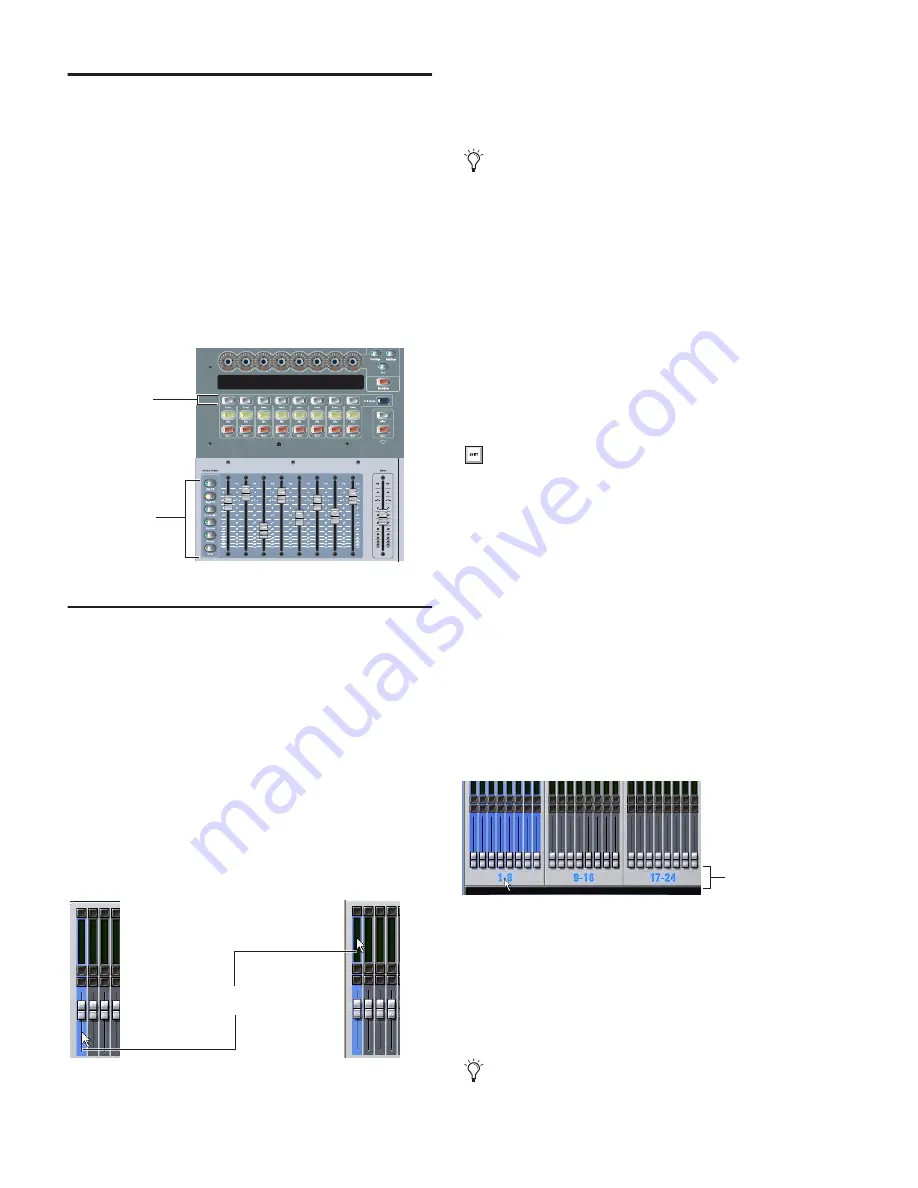
Banking the Output Section
Outputs can be targeted and banked to the Output faders and
Encoders. These can target Auxes, Groups (or Variable
Groups), Matrix mixer outputs, PQ mixer outputs, or VCAs.
The Mains fader provides constant access to the house output
(Mains) bus, and does not follow Output fader banking.
To assign Aux, Group (or Variable Group), Matrix, PQ, or VCA
controls to the Output faders:
■
Press the corresponding switch in the Output Faders sec-
tion. Choices are Aux 1–8, Aux 9–16, Personal Q, Matrixes,
Groups, and VCAs.
Selecting and Targeting Channels
Each D-Show channel strip has a channel Select switch. The
Select switch targets that channel for routing or processing as-
signment. When a single channel is selected it becomes the
targeted channel, which can be adjusted from the ACS or
on-screen. Channels can also be selected by clicking their
fader strips on-screen.
To select a channel, do one of the following:
■
Press the Select switch on the control surface channel strip.
– or –
■
Click anywhere in the on-screen channel fader strip, except
on the fader, mute, solo or safe buttons.
Multi-Select (Shift)
Multi-Select lets you select multiple channels in order to apply
an action to them in one step.
To select multiple channels from the control surface:
1
Press and hold the Multi-Select switch (located next to the
input Bank switches). The switch flashes to indicate Multi–Se-
lect mode.
2
Press Select on each channel you want to include in the se-
lection.
3
Release the Multi-Select switch.
4
Perform a routing assignment or other function (for exam-
ple, press a Bus Assign switch on one of the included chan-
nels). The operation is applied to all selected channels.
To exit Multi-Select mode, do one of the following:
■
Press Cancel.
– or –
■
Press the Select switch on a channel that is currently not se-
lected.
To select multiple channels on-screen:
■
Press and hold the Multi-Select switch (or hold Shift on the
keyboard) and click the fader strips on-screen.
To select an 8-channel bank on-screen:
■
Click the bank name below the on-screen fader strips.
Shift-click to select additional banks or channels.
To select all input channels or all output channels on-screen:
■
Double-click any bank name below the on-screen fader
strips in the Input or Outputs screen.
To remove a channel from a selection:
■
Control-click (or Fine-click) a highlighted channel.
Bank switches for Output channels
Clicking on-screen to select a channel
Press to
assign faders
Select
Click to select channel
Multi-Select is equivalent to the Shift key on the keyboard,
letting you select multiple adjacent items in the Snapshots,
Events, and similar lists.
You can use the Shift key on the keyboard or the Multi-Se-
lect (Shift) switch to select multiple channels.
Clicking a bank display to select multiple channels on-screen
See “Screen Controls and Shortcuts” on page 44 for addi-
tional on-screen features.
Click to select
banks of 8
Summary of Contents for D-Show Profile
Page 10: ...D Show Profile Guide x ...
Page 11: ...Part I Overview and Installation ...
Page 12: ......
Page 16: ...D Show Profile Guide 6 ...
Page 32: ...D Show Profile Guide 22 ...
Page 33: ...Part II System Description ...
Page 34: ......
Page 50: ...D Show Profile Guide 40 ...
Page 58: ...D Show Profile Guide 48 ...
Page 67: ...Part III Signal Routing ...
Page 68: ......
Page 94: ...D Show Profile Guide 84 ...
Page 102: ...D Show Profile Guide 92 ...
Page 110: ...D Show Profile Guide 100 ...
Page 134: ...D Show Profile Guide 124 ...
Page 135: ...Part IV Processing ...
Page 136: ......
Page 144: ...D Show Profile Guide 134 ...
Page 171: ...Part V Shows ...
Page 172: ......
Page 180: ...D Show Profile Guide 170 ...
Page 204: ...D Show Profile Guide 194 ...
Page 227: ...Part VI Specifications ...
Page 228: ......
Page 236: ...D Show Profile Guide 226 D Show Output Signal Flow Diagram Version 1 3 07 07 05 ...
Page 245: ...Part VII Reference ...
Page 246: ......
Page 258: ...D Show Profile Guide 248 ...
Page 269: ......


