Chapter 28: Troubleshooting
231
To re-initialize (reset) the racks:
1
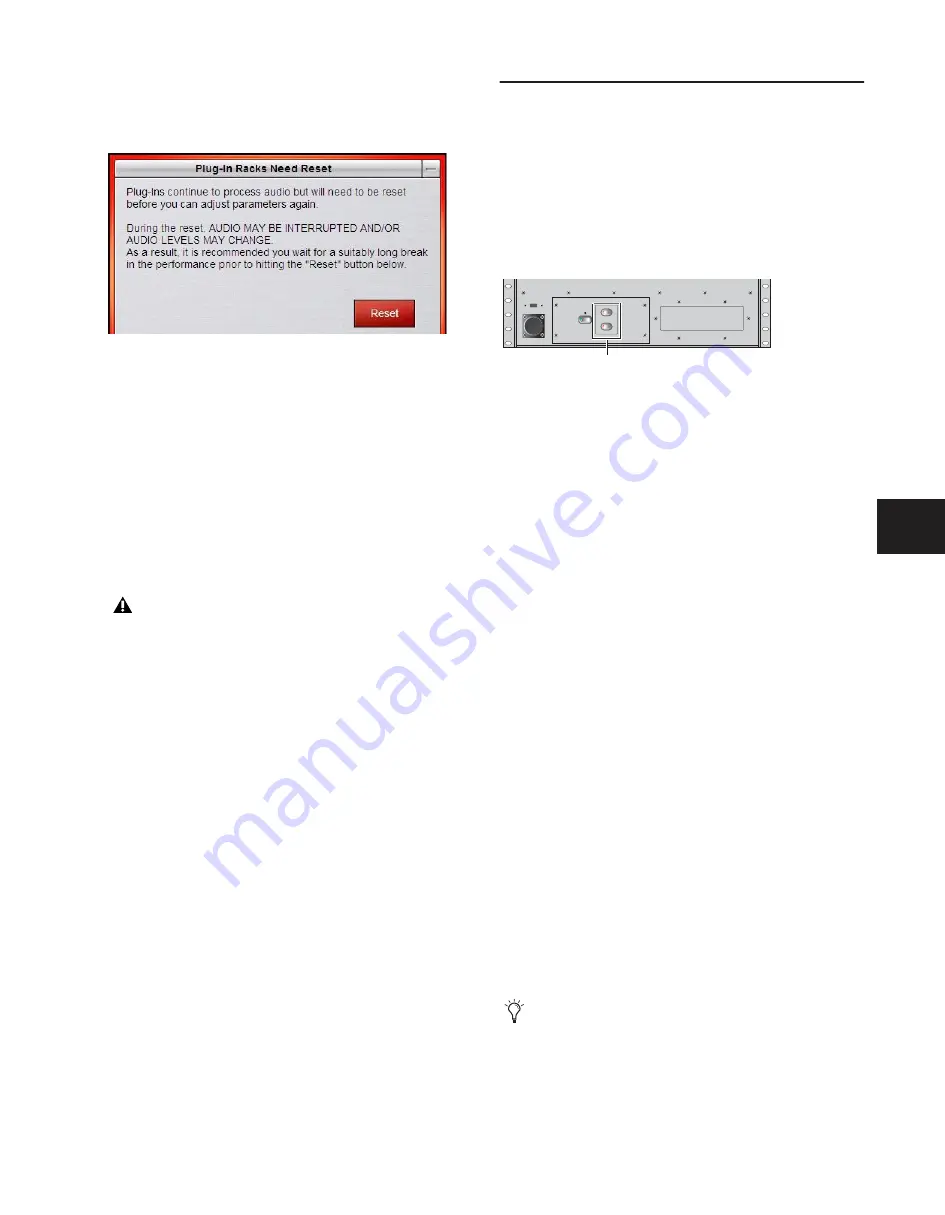
In the Plug-In Racks Reset dialog, click Reset to begin the
plug-in rack re-initialization.
When this step is completed, the Plug-In Racks are Ready dia-
log appears alerting you that the plug-in racks are ready to be
re-activated.
2
Click Use Racks to confirm that you want the racks to be
re-initialized. Status is shown on-screen. After the process is
complete, the console and all plug-ins are operational again.
Reset Mix Engines
Use this option to do a full system reset in one step. Reset Mix
Engines resumes all operations automatically, including the
console, settings, and plug-in racks.
To reset the Mix Engines and all operations immediately:
■
Click Reset Mix Engines in the Ready to Resume dialog.
Operations are brought back online; no further interaction is
required (no warning or confirmation dialogs appear).
More Options
Additional options are provided to clear the console, or to run
DigiTest (hardware diagnostics).
To access additional options:
■
Click More Options.
After clicking More Options, a dialog is displayed that pro-
vides the following options.
Clear Console
■
Click Clear Console to reset all D-Show parameters on all
channels to their factory default settings.
Run DigiTest
DigiTest is hardware diagnostics software for D-Show. Only
use DigiTest at the request of a Digidesign technician to diag-
nose specific hardware problems.
Restarting D-Show
If D-Show ever needs to be restarted, do the following:
To restart D-Show:
1
Turn off all power amps or turn the volume down on all
monitoring equipment.
2
Press both Reset switches on the front of the FOH Rack si-
multaneously.
If restarting the system does not correct a problem, you may
have to reset other hardware components, identify and re-
move any incompatible plug-ins, or reinstall D-Show software
using the D-Show System Restore CD.
Additional Restart Options
Additional shortcuts are provided while restarting the system,
which let you do the following:
• Back up the current show settings and clear the console. Use
this option if you suspect an auto-saved setting has become
corrupted. This lets you save your most recent settings and
clear the console without having to a full system restore.
– or –
• Restart the D-Show processor but launch into Explorer, to
manually manage software components. Use this option if
to troubleshoot the system if problems arise early in the
startup process and persist through repeated restarts.
Backup and Clear Console
To backup and clear the console at restart:
1
Start or restart the system.
2
Watch the screen closely during the startup process. As soon
as the cursor becomes visible (and before the D-Show logo
screen appears) press and hold the C key on the computer key-
board. Continue to hold the C key (do not press it repeatedly).
3
A dialog appears that lets you choose to backup your
auto-saved settings and clear the console, or to continue and
load settings normally.
Resetting the plug-in racks
Audio may be interrupted or may change levels during
this reset procedure.
Location of reset switches on FOH Rack
If you press the C key too early in the startup process, the
USB keyboard is reset instead of calling the Backup and
Clear dialog. If you do not see the backup and clear dialog,
repeat the restart process and try again.
USB
To
Control Surface
Power
Reset
FOH
Link
Reset switches
Summary of Contents for D-Show Profile
Page 10: ...D Show Profile Guide x ...
Page 11: ...Part I Overview and Installation ...
Page 12: ......
Page 16: ...D Show Profile Guide 6 ...
Page 32: ...D Show Profile Guide 22 ...
Page 33: ...Part II System Description ...
Page 34: ......
Page 50: ...D Show Profile Guide 40 ...
Page 58: ...D Show Profile Guide 48 ...
Page 67: ...Part III Signal Routing ...
Page 68: ......
Page 94: ...D Show Profile Guide 84 ...
Page 102: ...D Show Profile Guide 92 ...
Page 110: ...D Show Profile Guide 100 ...
Page 134: ...D Show Profile Guide 124 ...
Page 135: ...Part IV Processing ...
Page 136: ......
Page 144: ...D Show Profile Guide 134 ...
Page 171: ...Part V Shows ...
Page 172: ......
Page 180: ...D Show Profile Guide 170 ...
Page 204: ...D Show Profile Guide 194 ...
Page 227: ...Part VI Specifications ...
Page 228: ......
Page 236: ...D Show Profile Guide 226 D Show Output Signal Flow Diagram Version 1 3 07 07 05 ...
Page 245: ...Part VII Reference ...
Page 246: ......
Page 258: ...D Show Profile Guide 248 ...
Page 269: ......


