Chapter 14: Solo and Monitor Busses
117
Activating Talkback Input and Setting Level
To activate and set the level for Talkback input:
1
Press the Talkback switch in the Talkback/Osc section so
that it is lit.
2
Activate Talkback by doing one of the following:
• Press the On/Talk switch in the Talkback/Osc section.
• Click the on-screen “In” button in the Talkback section
of the Options > Misc page.
3
Set the Talkback input level by doing one of the following:
• Turn the Level knob in the Talkback/Osc section.
– or –
• Drag the on-screen Level knob in the Talkback section of
the Options > Misc page.
Talkback Switch Selectable between
Momentary or Latching
Talkback response can be engaged to follow momentary or
latching control. By default, the Talkback switch is momen-
tary. You can change Talkback response between momentary
and latching at any time.
To enable momentary Talkback:
■
Press and hold the Talkback switch. In this mode, Talkback
is active only while the Talkback switch is held.
To latch Talkback On:
1
Double-press the Talkback switch.
2
To turn off Talkback, press the Talkback switch again.
Setting Talkback Dim Level
When a Talkback signal is sent to an Output bus, the gain on
the corresponding bus is automatically reduced by the
amount specified in the Dim Level setting.
To set the Talkback Dim Level:
1
Go to the Options page and click the Misc tab.
2
In the Talkback section, double-click the Dim Level text box
and enter a Dim Level value in the range –60 dB (maximum
gain reduction) to 0 dB (no gain reduction).
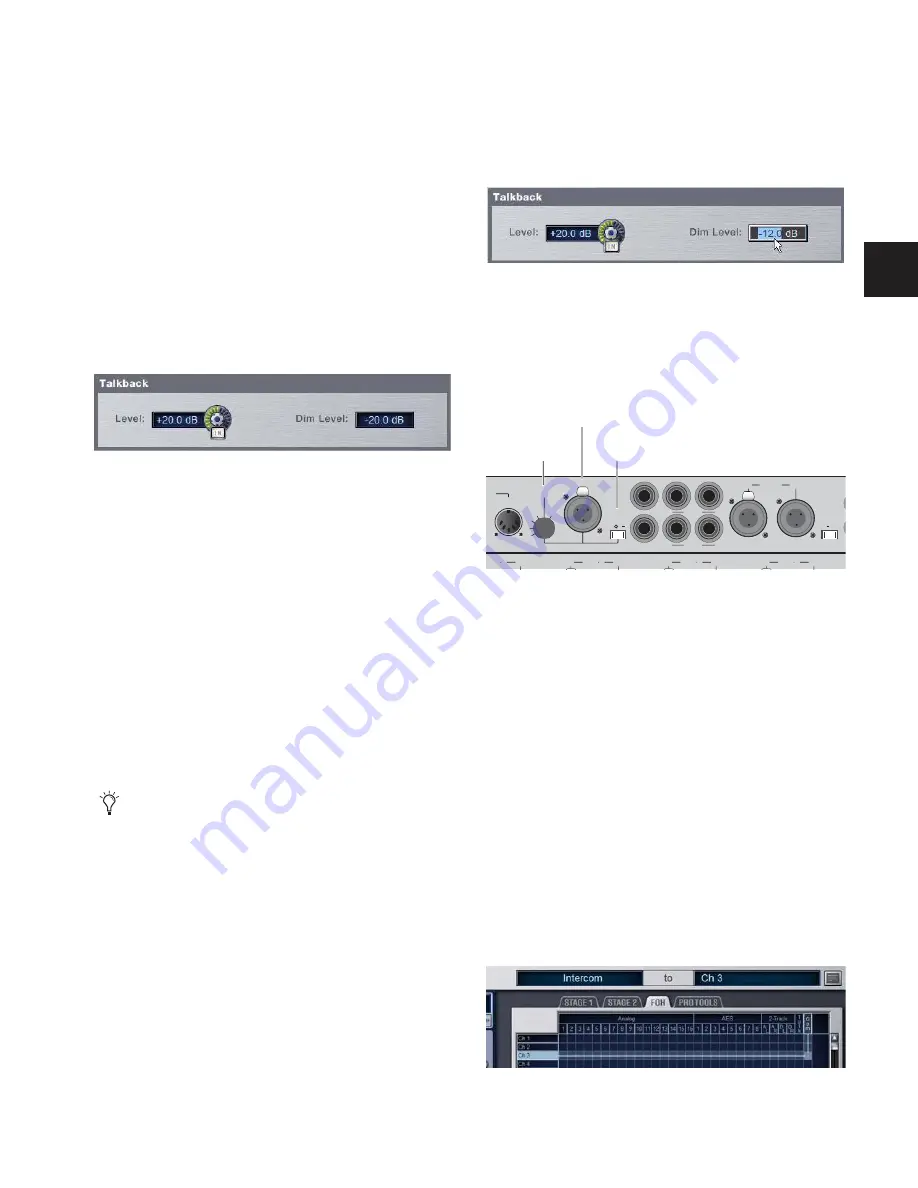
Using the Intercom (“Com”)
The Intercom (“Com”) input on the back panel of the FOH
Rack can accept input from any compatible dynamic or con-
denser microphone.
When activated, the Intercom signal is mixed into the Moni-
tor bus after the source selectors in the Solo/PFL selection, so
is audible no matter what source (AFL/PFL, 2-Track, or Main
Mix) is sent to the Monitor bus.
The Intercom signal can also be routed to any D-Show Input
Channel or FX Return.
Routing Intercom Input
To route Intercom input to any Input Channel or FX Return:
1
Go to the Patchbay and click the Inputs tab.
2
To the left of the channel grid, click the Channels tab or the
FX Returns tab.
3
At the top of the channel grid, click the FOH tab.
4
Click in the channel grid to assign the “Com” input source
(at the top right of the grid) to an Input Channel or FX Return
(listed on the left).
Talkback controls in the Options > Misc page
You can also designate either footswitch for momentary or
latched behavior, or program other triggers to affect Talk-
back using the new Event List features. For more informa-
tion, see Chapter 22, “Events.”
Setting Talkback Dim Level in the Options > Misc page
Intercom controls on the rear panel of the FOH Rack
Routing Intercom input in the Patchbay
R
2TR Out
Mon Left
Mon Right
MIDI
Gain
AES SPDIF
2T
Out
2TR AES
Out
In
Out
AES
1 2
Out
In
Out
In
Out
In
L
2TR In
L
R
Com
Mic
P R
AES
3 4
AES
5 6
AES
7 8
Com Mic
Com Mic Gain
Com Mic
Input
Phantom
Power
Summary of Contents for D-Show Profile
Page 10: ...D Show Profile Guide x ...
Page 11: ...Part I Overview and Installation ...
Page 12: ......
Page 16: ...D Show Profile Guide 6 ...
Page 32: ...D Show Profile Guide 22 ...
Page 33: ...Part II System Description ...
Page 34: ......
Page 50: ...D Show Profile Guide 40 ...
Page 58: ...D Show Profile Guide 48 ...
Page 67: ...Part III Signal Routing ...
Page 68: ......
Page 94: ...D Show Profile Guide 84 ...
Page 102: ...D Show Profile Guide 92 ...
Page 110: ...D Show Profile Guide 100 ...
Page 134: ...D Show Profile Guide 124 ...
Page 135: ...Part IV Processing ...
Page 136: ......
Page 144: ...D Show Profile Guide 134 ...
Page 171: ...Part V Shows ...
Page 172: ......
Page 180: ...D Show Profile Guide 170 ...
Page 204: ...D Show Profile Guide 194 ...
Page 227: ...Part VI Specifications ...
Page 228: ......
Page 236: ...D Show Profile Guide 226 D Show Output Signal Flow Diagram Version 1 3 07 07 05 ...
Page 245: ...Part VII Reference ...
Page 246: ......
Page 258: ...D Show Profile Guide 248 ...
Page 269: ......


