D-Show Profile Guide
156
Output Encoders
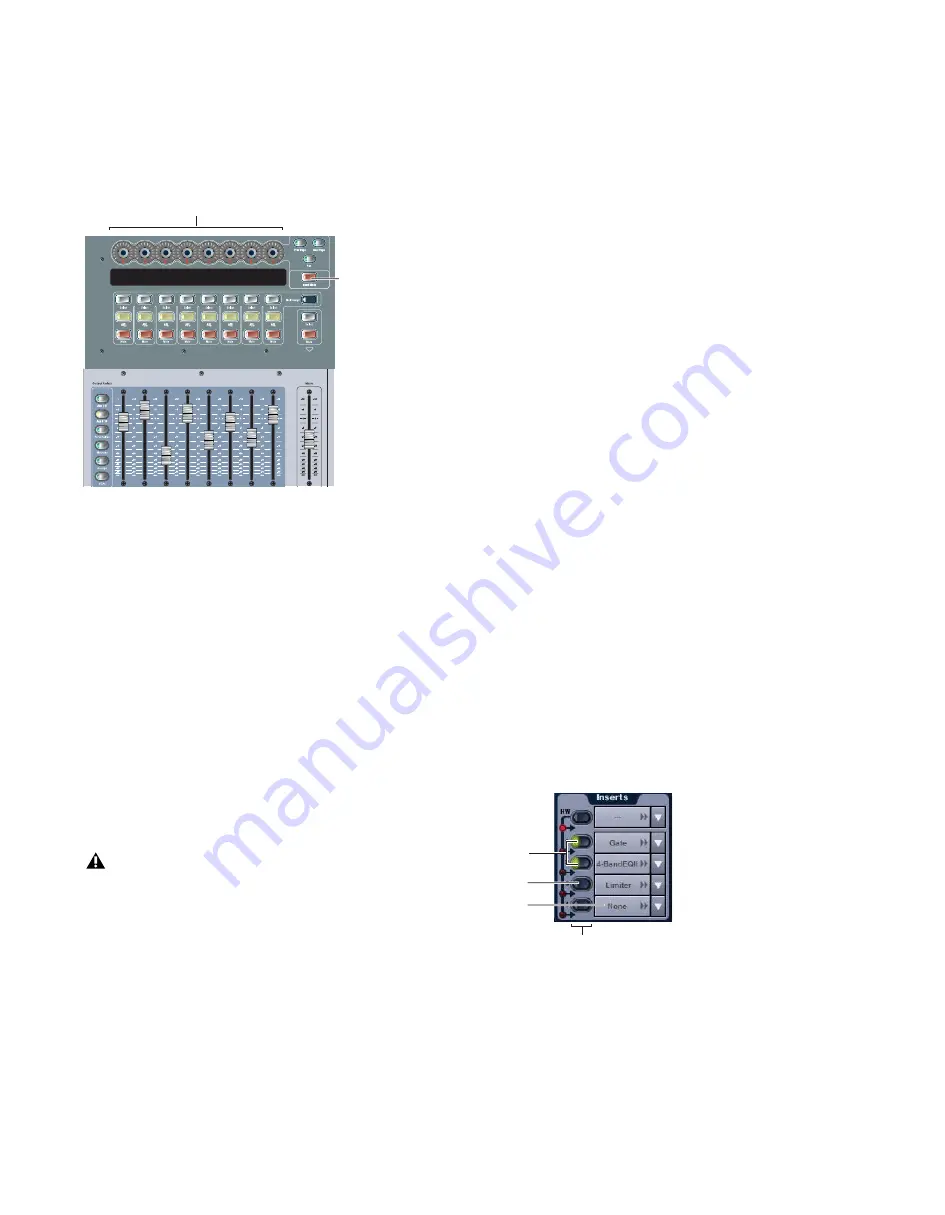
The Output encoders can be placed into Insert mode to adjust
any selected plug-in. Plug-in parameters map to the eight en-
coders and their switches; additional parameters are accessed
with the Previous Page and Next Page switches.
To adjust a plug-in from the control surface:
1
Select the channel or bus on which the plug-in is inserted.
To select a bus processing plug-in, bank to and select the FX
Return or other channel assigned as the plug-in output.
2
In the Insert Processing section of the ACS, press the Select
switch for the plug-in so that its switch is lit.
3
Press the Insert Mode switch, located near the Output en-
coders. The first page of plug-in parameters is mapped to the
eight Output encoders.
4
To reset a parameter to its default value, hold the Alt key
while rotating or pushing an encoder.
5
To adjust with greater resolution, hold the Ctrl key while ro-
tating an encoder.
6
Press Previous Page or Next Page to bank to other plug-in pa-
rameters.
Display of Plug-Ins in Insert Mode
While in Insert Mode, the Output LCD displays the value and
name of the 8 currently banked plug-in parameters in the up-
per and lower row, respectively, for each parameter.
In this default Insert Mode view, adjusting an Output fader
temporarily shows fader level in the lower row of the Output
LCD for that channel, replacing the parameter name display.
Alternate Insert Mode View
You can use an alternate view to have Insert Mode display pa-
rameter values in the upper row and the associated bus name
in the lower row.
To view values and bus names for the Output encoders in Insert
Mode:
■
Press Alt (or DInsert Mode.
Using the Source Switch
The Source switch toggles Input displays to show the names of
bus-fed plug-ins routed to a channel. Use the Source switch to
quickly identify which FX Returns or other channels are being
used as plug-in returns.
To view encoder values and bus names for Input or FX Return
channels:
■
Press the Source switch, to the left of the Input LCD.
Bypassing Plug-Ins
To bypass a plug-in:
1
Select the channel on which the plug-in is inserted.
2
In the Insert Processing section of the ACS, press the In/Out
switch for the plug-in to toggle between in-circuit/out-of-cir-
cuit. When the switch LED is lit, it indicates that the plug-in is
in-circuit. When unlit, the plug-in is out-of-circuit (bypassed).
Encoders and Insert mode switch in the Output section
Some delay plug-ins include automatic beat clock and
tempo controls (such as the Tempo Sync feature in the
Digidesign Mod Delay plug-in). These types of plug-in con-
trols default to On, or active. Be sure to manually deacti-
vate Tempo Sync or the equivalent in these plug-ins.
Output Encoders
Insert Mode
switch
LED indication of in circuit and out of circuit (bypassed) inserts
In
Out
Unassigned
In/Out
Summary of Contents for D-Show Profile
Page 10: ...D Show Profile Guide x ...
Page 11: ...Part I Overview and Installation ...
Page 12: ......
Page 16: ...D Show Profile Guide 6 ...
Page 32: ...D Show Profile Guide 22 ...
Page 33: ...Part II System Description ...
Page 34: ......
Page 50: ...D Show Profile Guide 40 ...
Page 58: ...D Show Profile Guide 48 ...
Page 67: ...Part III Signal Routing ...
Page 68: ......
Page 94: ...D Show Profile Guide 84 ...
Page 102: ...D Show Profile Guide 92 ...
Page 110: ...D Show Profile Guide 100 ...
Page 134: ...D Show Profile Guide 124 ...
Page 135: ...Part IV Processing ...
Page 136: ......
Page 144: ...D Show Profile Guide 134 ...
Page 171: ...Part V Shows ...
Page 172: ......
Page 180: ...D Show Profile Guide 170 ...
Page 204: ...D Show Profile Guide 194 ...
Page 227: ...Part VI Specifications ...
Page 228: ......
Page 236: ...D Show Profile Guide 226 D Show Output Signal Flow Diagram Version 1 3 07 07 05 ...
Page 245: ...Part VII Reference ...
Page 246: ......
Page 258: ...D Show Profile Guide 248 ...
Page 269: ......


