XD20 Installation and Operating Guide
Version 1.1
Document # 9301H264001.1
53
3.
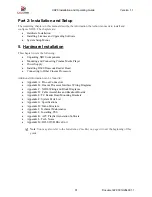
When connecting to a SMART cinema processor, contact SMART directly at
(800) 45-SMART. Datasat Digital Entertainment does offer SMART interface cables: for
MODVI or VII use DDE part #E709.
4.
Connect the supplied power cable between the XD20 unit and your power source.
5.2.2. Rack Mount Recommendations
Follow these recommendations if the XD20 unit is installed in a closed or multi-unit rack assembly.
•
Determine the maximum and ambient temperatures within the rack, since they may be greater
than the maximum and ambient temperatures in the room. The maximum temperature for the
equipment in a closed or multi-rack assembly is 40°C (104F°)
•
Ensure adequate airflow for cooling purposes on all sides of rack-mounted equipment. Make
sure that ventilation fans and louvers are not blocked.
•
Check nameplate ratings to ensure there is no overloading of supply circuits that could have
an effect on over-current protection and supply wiring.
•
Maintain reliable grounding of the equipment. Give particular attention to supply connections
when connecting to power strips, rather than direct connections to the branch circuit.
•
Use a quality surge/spike suppresser power strip to protect the unit.
5.2.3. Power Supply
The XD20 power supply automatically switches itself to accommodate AC input between 110 VAC and
220 VAC.
The cooling fan in the power supply must be rotating after power is applied.
5.2.4. D600 Timecode Reader Head Installation
The D600 Timecode Reader Head is designed to be mounted onto most projectors with a single mounting
bracket.
1.
Position the appropriate mounting bracket on the same bolt pattern as the reel arm and bolt
securely in place. (See Appendix E for reference.)
2.
If both 35mm and 70mm reader heads are to be used on the same bracket, add spacer breakaway
plates to the readers. (See Appendix E for reference.)
3.
Install the D600 Timecode Reader Head onto the mounting bracket and bolt into place with
supplied hardware.
4.
Re-install the reel arm on the top bolt pattern of the mounting bracket.
5.
Align the mounting bracket and the reel arm. Align the film along the path from the reel arm,
through the mounted D600 Timecode Reader Head, to the projector.
Caution
: The D600 timecode reader MUST have a straight film path (no angles or twists)
and at least a small amount of tension. Use the auxiliary flanged roller on the D600 Timecode
Reader Head to avoid film “walk out” and to stabilize the film. (See the section on
Installing
or Changing Auxiliary Timecode Reader Head Roller
in Appendix I:
Technical Maintenance
,
for reference.) Additional guide rollers may be added to ensure proper film tension. This is
most critical on platter systems.
6. Connect the 9-pin timecode cable to the reader and route to the sound rack. Connect the other end
to the XD20 rear panel “Timecode” connector.


