Audio Production System with Optional Networking
REQUIRED I/O BOXES
BRIO 36 has its own built-in I/O but this and all other I/O resources on a Hydra2 network can be used by
all consoles as long as they have been granted access from the network administration tool, H2O, and the
resources have been added to the consoles ‘required list’.
If connected to a network, and due to the scalable nature of Hydra2 the user may have access to a large amount of I/O
resources, some of which they won’t always need. The ‘required list’ provides a way to narrow the scope for individual
consoles, speeding up work-flow and making port identification easier.
Only I/O resources in the ‘required list’ will be available for patching to and from the console. If not connected to the
network only the Built-in I/O box will be shown in the required list. Brio’s internal I/O is identifiable as a console image.
The ID for internal I/O is automatically generated, based on the consoles ID in order to prevent conflict with other I/O on
the network
Viewing Resources
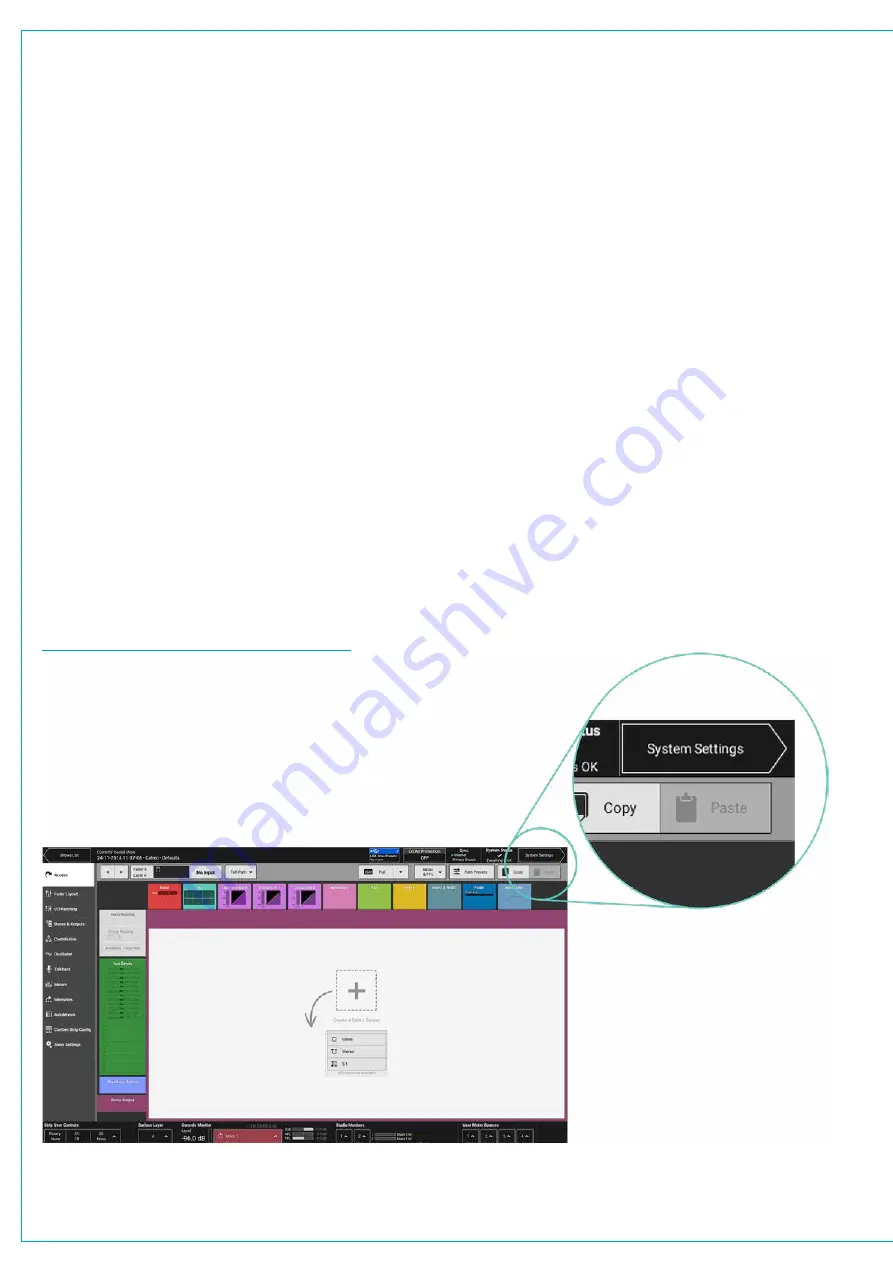
Tap
SYSTEM SETTINGS
in the top right of the touch display, then select ‘Required I/O Boxes’. The user will see a split
screen with all online resources on the left and the ‘required list’ on the right.
Both lists are held in tables with 3 columns: Hardware ID, label and type. It may help to sort these tables by tapping on
column headers. Multiple taps will switch sorting to be either ascending or descending.
Hardware IDs for physical I/O boxes are set from the dip switches on the back of the units (See “Audio I/O Connections”
in the Installation manual for more information). Hydra patchbay IDs are taken from H2O and are related to folder names.
Labels are explained in detail, here:
”INPUT AND OUTPUT PATCHING” on page 74
FIGURE 1 -
ACCESSING SYSTEM SETTINGS
Summary of Contents for BRIO 36
Page 1: ...calrec com Audio Production System with Optional Networking BRIO 36 USER MANUAL V1 1...
Page 12: ...12 BRIO 36 Audio Production System with Optional Networking...
Page 13: ...calrec com BRIO 36 PRODUCT INFORMATION...
Page 20: ...20 BRIO 36 Audio Production System with Optional Networking...
Page 21: ...calrec com BRIO 36 SYSTEM OVERVIEW...
Page 29: ...29 FIGURE 1 BRIO 36 USER INTERFACE DISPLAY...
Page 43: ...calrec com BRIO 36 SETTING UP...
Page 47: ...47 FIGURE 1 SYNCHRONISATION OPTIONS...
Page 67: ...calrec com BRIO 36 GETTING SIGNALS IN AND OUT...
Page 93: ...93 FIGURE 1 THE DIRECT OUTPUT SCREEN...
Page 100: ...100 BRIO 36 Audio Production System with Optional Networking...
Page 101: ...calrec com BRIO 36 PROCESSING...
Page 146: ...146 BRIO 36 Audio Production System with Optional Networking...
Page 147: ...calrec com BRIO 36 MONITORING...
Page 149: ...149 FIGURE 3 EXAMPLE LOUDSPEAKERS SETUP...
Page 155: ...calrec com BRIO 36 METERING...
Page 163: ...calrec com BRIO 36 COMMUNICATIONS...
Page 172: ...172 BRIO 36 Audio Production System with Optional Networking...
Page 173: ...calrec com BRIO 36 ROUTING...
Page 175: ...175 FIGURE 1 CONFIGURING BUSES AND OUTPUTS...
Page 182: ...182 BRIO 36 Audio Production System with Optional Networking...
Page 183: ...calrec com BRIO 36 EXTERNAL INTERFACING...
Page 193: ...calrec com BRIO 36 CONSOLE FACILITIES...
Page 198: ...198 BRIO 36 Audio Production System with Optional Networking...
Page 199: ...calrec com BRIO 36 TERMINOLOGY...
Page 207: ...calrec com BRIO 36 FEATURES BY SOFTWARE VERSION...


