


3-18
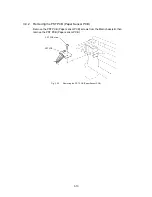
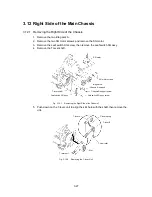
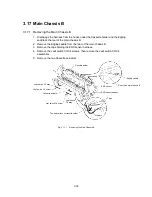
3.6 X-cutter
Unit
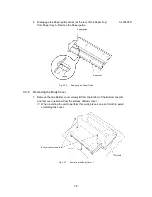
3.6.1
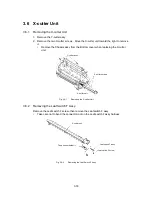
Removing the X-cutter Unit
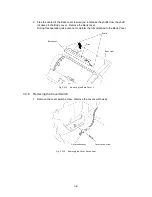
1. Remove the Y-cutter assy.
2. Remove the two X-cutter screws. Move the X-cutter unit toward the right to remove
it.
∗
Remove the Chassis assy from the Bottom cover when replacing the X-cutter
unit.
X-cutter screws
X-cutter unit
Y-cutter assy
Fig. 3.6-1
Removing the X-cutter Unit
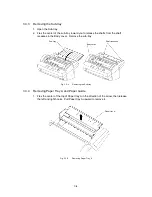
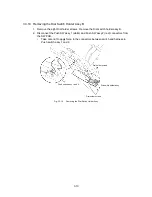
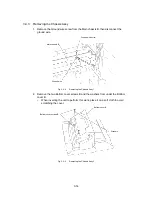
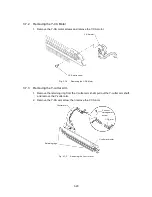
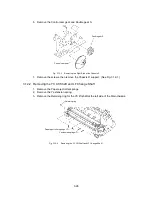
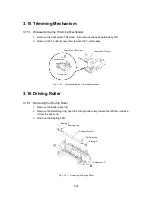
3.6.2
Removing the Leaf Switch F Assy.
Remove the Leaf switch F screw, then remove the Leaf switch F assy.
∗
Take care not to bend the connector root on the Leaf switch F assy harness.
Leaf switch F assy
Tape sensor holder
X-cutter unit
Leaf switch F screw
Fig. 3.6-2
Removing the Leaf Switch F Assy
Summary of Contents for LX-1200
Page 1: ...SERVICE MANUAL MODEL LX 1200 LX 300 ...
Page 2: ...COOL LAMINATOR SERVICE MANUAL MODEL LX 1200 LX 300 ...
Page 5: ...Chapter 1 SPECIFICATIONS ...
Page 9: ...Chapter 2 MECHANISMS ...
Page 20: ...Chapter 3 DISASSEMBLY PROCEDURES ...
Page 58: ...Chapter 4 ASSEMBLY PROCEDURES ...
Page 105: ...Chapter 5 ELECTRONIC CONTROLLERS ...
Page 127: ...Chapter 6 MAINTENANCE ...
Page 149: ...Chapter 7 TROUBLESHOOTING ...


