3-17
3.5.3
Removing the Switch PCB Assy
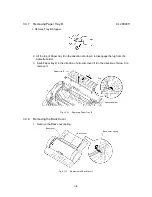
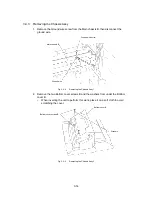
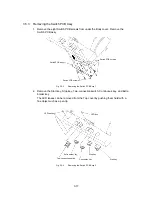
1. Remove the eight Switch PCB screws from under the Body cover. Remove the
Switch PCB assy.
Switch PCB screws
Switch PCB assy
Switch PCB screws
Fig. 3.5-3
Removing the Switch PCB Assy 1
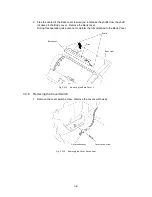
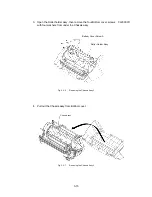
2. Remove the Start key, Stop key, Two-connection switch, Continuous key, and Extra
border key.
The LED lenses can be removed from the Top cover by pushing them hard with a
fine object such as a pen tip.
Start key
LED lenses
LED lens
Stop key
Continuous key
Extra border key
Two-connection switch
Fig. 3.5-4
Removing the Switch PCB Assy 2
Summary of Contents for LX-1200
Page 1: ...SERVICE MANUAL MODEL LX 1200 LX 300 ...
Page 2: ...COOL LAMINATOR SERVICE MANUAL MODEL LX 1200 LX 300 ...
Page 5: ...Chapter 1 SPECIFICATIONS ...
Page 9: ...Chapter 2 MECHANISMS ...
Page 20: ...Chapter 3 DISASSEMBLY PROCEDURES ...
Page 58: ...Chapter 4 ASSEMBLY PROCEDURES ...
Page 105: ...Chapter 5 ELECTRONIC CONTROLLERS ...
Page 127: ...Chapter 6 MAINTENANCE ...
Page 149: ...Chapter 7 TROUBLESHOOTING ...

