7-1
7.1 Outline
It is extremely difficult to determine when and where a problem may arise and to
determine the cause of a problem that did arise. It is even more difficult to formulate
remedies for theoretical problems which may or may not occur. This chapter gives
examples of actual problems that have occurred, together with suggested remedies.
While this chapter may not allow all faults to be remedied, use it as one means of
rectifying problems.
7.2 Precautions during Repair
Always follow the precautions below when repairing the unit.
1. Always unplug the AC adaptor from the main power socket before removing a cover,
adjusting mechanical parts, or removing a PCB.
2. Always unplug the AC adaptor from the main power socket before measuring
conductivity with a circuit tester.
3. When removing a connector, pull on the body of the connector, not on the lead
attached to it.
7.3 After Making a Repair
Always test the unit after diagnosing and repairing a problem to ensure that the problem
is completely remedied.
When the cause of a problem is identified, make a note of it in the troubleshooting
procedures for future reference.
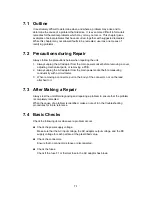
7.4 Basic
Checks
Check the following items whenever a problem occurs.
S
Check the power supply voltage.
Make sure that the AC input voltage, the AC adaptor output voltage, and the DC
supply voltage for each part are at the prescribed value.
S
Check the connectors.
Ensure that no connector is loose or disconnected.
S
Check the fuses.
Check if the fuse F1 or thermal fuse in the AC adaptor has blown.
Summary of Contents for LX-1200
Page 1: ...SERVICE MANUAL MODEL LX 1200 LX 300 ...
Page 2: ...COOL LAMINATOR SERVICE MANUAL MODEL LX 1200 LX 300 ...
Page 5: ...Chapter 1 SPECIFICATIONS ...
Page 9: ...Chapter 2 MECHANISMS ...
Page 20: ...Chapter 3 DISASSEMBLY PROCEDURES ...
Page 58: ...Chapter 4 ASSEMBLY PROCEDURES ...
Page 105: ...Chapter 5 ELECTRONIC CONTROLLERS ...
Page 127: ...Chapter 6 MAINTENANCE ...
Page 149: ...Chapter 7 TROUBLESHOOTING ...


