7-13
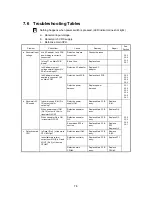
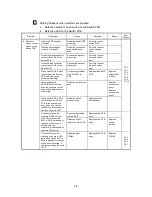
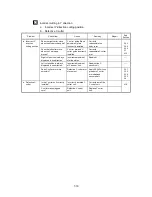
Problem Check
Item
Cause Remedy
Repair
See
Section
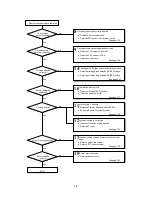
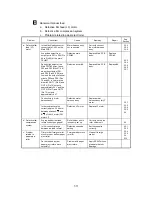
Is the black lead connector
connected to CN13 on the
Main PCB?
Motor harness assy
not connected.
Correctly connect
the motor harness
assy.
3.3.3
3.3.4
3.3.5
Are pulses output from
output ports P44 to P47 (Pin
45 to Pin 48) of the main
CPU#3?
Defective main
CPU#3.
Replace Main PCB
assy.
Replace
CPU#3.
When the output from
output ports P44 to P47 (Pin
45 to Pin 48) of the main
CPU#3 is High, is the output
from transistor array Q17 to
Q20 Low?
Defective transistor
array Q17 to Q20.
Replace Main PCB
assy.
Replace Q17
to Q20.
Is +24V DC applied to Pins
3 and 4 of connector CN13
on the Main PCB?
Conductivity problem
in Main PCB.
Replace Main PCB
assy.
3.3.3
3.3.4
3.3.5
3.4.2
3.5.1
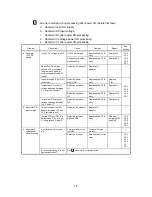
Conductivity in motor
harness assy?
Defective motor
harness assy.
Replace motor
harness assy for SG
motor.
3.3.1
3.3.3
3.3.4
3.3.5
3.4
b. Defective
control (SG)
motor.
Correct resistance value
(approx. 38 ohms) between
each phase of the SG motor
and the COM pin?
Defective SG motor.
Replace SG motor.
3.3.1
3.3.3
3.3.4
3.3.5
3.4
3.12
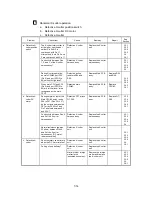
Is the blue lead connector
connected to CN5 on the
Main PCB?
Leaf switch assy not
connected.
Correctly connect
the leaf switch assy.
3.3.3
3.3.4
3.3.5
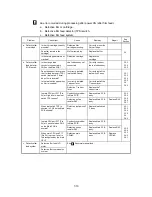
Conductivity problem
in Main PCB.
Replace Main PCB
assy.
Is main CPU port P15 (Pin
22) at High level when leaf
switch SG assy is open?
Defective pull-up
resistor R48.
Replace Main PCB
assy.
Replace R48.
3.3.3
3.3.4
3.3.5
3.4.2
3.5.1
When leaf switch SG assy
is shorted, is CN5 on the
Main PCB shorted?
Defective leaf switch
SG assy.
Replace leaf switch
SG assy.
3.3.1
3.3.3
3.3.4
3.3.5
3.4
3.12.1
Conductivity problem
in Main PCB.
Replace Main PCB
assy.
Is main CPU port P15 (Pin
22) at Low level when CN5
on the Main PCB is
shorted?
Defective series
resistor R44.
Replace Main PCB
assy.
Replace R44.
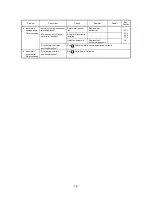
c. Defective
trimming
(TR-G) switch.
When main CPU port P15
(Pin 22) is at Low level, is
this recognized by the main
CPU?
Defective main
CPU#3.
Replace Main PCB
assy.
Replace
CPU#3.
3.3.3
3.3.4
3.3.5
3.4.2
3.5.1
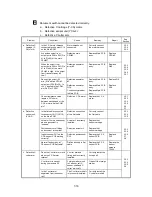
The T-cutter plate is
not installed.
Install the T-cutter
plate.
3.3.1
No cutting occurs despite a
grating noise is heard?
The T-cutter plate is
not installed correctly.
Correctly install the
T-cutter plate.
d. Defective T-
cutter.
Cutting position is correct
but cutting is incomplete?
Defective T-cutter
plate.
Replace the T-cutter
plate.
3.3.1
Summary of Contents for LX-1200
Page 1: ...SERVICE MANUAL MODEL LX 1200 LX 300 ...
Page 2: ...COOL LAMINATOR SERVICE MANUAL MODEL LX 1200 LX 300 ...
Page 5: ...Chapter 1 SPECIFICATIONS ...
Page 9: ...Chapter 2 MECHANISMS ...
Page 20: ...Chapter 3 DISASSEMBLY PROCEDURES ...
Page 58: ...Chapter 4 ASSEMBLY PROCEDURES ...
Page 105: ...Chapter 5 ELECTRONIC CONTROLLERS ...
Page 127: ...Chapter 6 MAINTENANCE ...
Page 149: ...Chapter 7 TROUBLESHOOTING ...


