The NetDoc Environment
3.
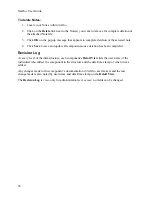
Click
OK
on the pop-up message that appears when you are positive that deletion of the
selected note is needed.
4.
Click the
Save
button once deletion has completed to save and update all components.
Note:
Deleting an attachment does not delete the file from the
NetDoc
server; it only deletes its
connection to the
NetDoc
component.
Notes
NetDoc
has
Notes
capability located throughout the application. This capability can be located at
every level of your infrastructure and also within the
Notes
and
Attachments
tab in the
Detail
pane for every component being tracked. Beyond these areas of the application you can also
attach notes down to the port level of a piece of hardware and also down to the strand level of a
cable for example. With this capability, individuals can relay information to others and save
specific needed notes for future use. By using this functionality, your notes can assist all users in
recalling needed information and also better document your network by providing additional
space for valuable information.
To add Notes:
1.
Within the
Notes
area of the application, type your notes into the given
Notes
box.
2.
Click
Save
in order for your notes to be saved properly.
After the
Save
button has been clicked, your entered note will move below the
Notes
box. The
newly created line with your entered notes will also contain a Time/Date/User stamp.
To add additional Notes to the Port or Strand Level:
This capability can be found in both the hardware or backbone cable portion of the application.
•
In the Termination Hardware area under the
Port/Position
tab this capability will be
found down to the Port/Strand level.
•
In the Backbone Cables area under the
Pair/Strand Details
tab this capability will be
found down to the Pair/Strand level.
Within these tabs, to the far right of each row will be a
Notes
column.
1.
Click on the selection button for the item needed to receive a
Notes
pop-up window.
2.
Type in the needed notes and click
OK
to close the pop-up window.
3.
Click
Save
in order for your notes to be saved properly. Once you have clicked the
Save
button, a check mark appears in the selection box illustrating a saved note for that item.
Note:
At this level, notes can be deleted or changed by going through the same Steps 1-3 as
stated above. No additional links will be found at this level, since all capability is specific to the
level being reviewed for the component in question.
35
Summary of Contents for NetDoc
Page 1: ......

