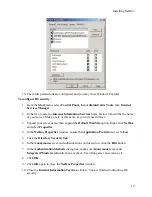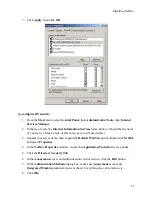
Installing NetDoc
4.
Click the
Save
button, and then close the text box.
5.
Click the
Launch Application
link on the Main Page.
6.
When the cable infrastructure screen appears, select
Contacts
from the drop-down menu
on top.
7.
Click the
Add
button.
8.
Your first user should be the overall administrator of the product, who is responsible for
maintaining access to
NetDoc
. Enter the information for the contact.
9.
Create a
User Name
and
Password
.
10.
Click the
Administrator
checkbox.
11.
Click
Save
.
12.
You can now use this user login information to access
NetDoc
. Repeat steps 6-11 for
each user.
There are three permission levels for users:
•
Admin
–
Admin
checkbox is checked on the Contact screen: User has full
editing rights anywhere in the application, including editing passwords and
password-change requirements.
•
Standard
–
Read Only
checkbox
not
checked on the Contact screen: User may
view and edit component information in existing infrastructures. The user may
not access any of the Setup functions, User Defined Fields, Custom Fields,
Security Log, or password view/edit functions on the Contact screen.
•
Read Only
–
Read Only
checkbox checked on the Contact screen: User can view
all data (except password information on the Contact screen), but has no
copy/add/delete/edit capabilities anywhere in the application.
13.
Close Internet Explorer.
Configuring Security for NetDoc Login (optional)
There are three basic options for configuring the way users log into
NetDoc
:
No login (None)
NetDoc
controlled login (Forms)
Windows/NetDoc controlled login (Windows).
Recommendation:
For ease of use, Brady suggests using the Forms option for Authorization
Mode and Authentication. This will allow
NetDoc
to manage the passwords.
23
Summary of Contents for NetDoc
Page 1: ......


