IP Office Basic Edition - Quick Mode Installation
Page 128
15-601042 Issue 24i (20 December 2011)
IP Office 8.0
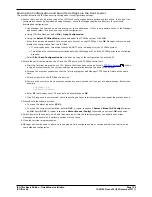
Erasing the Configuration and Security Settings via the Boot Loader
This process defaults the IP Office security settings and its configurations settings.
2. Ensure that you have a backup copy of the IP Office's configuration before performing this action. If a copy of the
configuration cannot be downloaded using Manager, check the Manager application directory for previously
downloaded configurations.
f. Use Manager to download an up to date copy of the configuration. If that is not possible, check in the Manager
application folder for a previous copy of the configuration.
g. Using IP Office Manager, select File | Open Configuration.
h. Using the Select IP Office Menu, locate and select the IP Office system. Click OK.
i. Enter the name and password for a service user account on that IP Office. Click OK. Manager will receive and
display the configuration from the IP Office.
·
If not already done, this action creates a BOOTP entry in Manager for the IP Office system.
·
This action also confirms communication between the Manager PC and the IP Office prior to any following
process.
j. Select File | Save Configuration As... and save a copy of the configuration file onto the PC.
2. Attach the serial cable between the PC and the DTE port on the IP Office control unit.
a. Start the terminal program on your PC. Ensure that it has been setup as listed in
DTE Port Settings
. Within
a HyperTerminal session, the current settings are summarized across the base of the screen.
b. Arrange the program windows so that the Terminal program and Manager TFTP Log are visible at the same
time.
c. Switch off power to the IP Office control unit.
d. Power on the control unit and press the escape key every second until you get a Loader message. Below is an
example.
P12 Loader 2.4
CPU Revision 0x0900
e. Enter AT (note upper case). The control unit should respond OK.
f. If an OK response is not received, check the settings of your terminal program and repeat the process above.
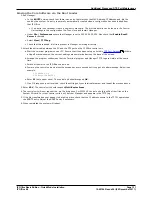
3. Proceed with the erasure process.
·
To erase the alarm log enter AT-X1.
·
To erase the current configuration, enter AT-X2. A typical response if Sector 2 Erase (NV Config) followed
by OK. Enter AT-X3. A typical response is Sector Erases (Config) followed by a series of OK responses.
4. Switch power to the control unit off and then back on. Within the terminal program you should see various
messages as the control unit performs various start up tasks.
5. Close the terminal program session.
6. Manager can now be used to alter and then upload an old configuration file or receive and edit the control unit's
now defaulted configuration.
126


