IP Office Basic Edition - Quick Mode Installation
Page 52
15-601042 Issue 24i (20 December 2011)
IP Office 8.0
Installing the IP Office Admin Applications
1. Using the Add or Remove Programs option in the Windows Control Panel, check that the PC does not already
have a version of the IP Office Admin suite installed.
·
If 'yes' and the suite is a pre-IP Office 3.2 version, remove the existing IP Office Admin suite via Add/Remove
Programs.
·
If the existing suite is IP Office 3.2 or higher, it is possible to upgrade without removing the previous
installation. However, if the system already has a USB Feature Key, the key should be removed prior to
upgrading and then reinserted and the PC restarted.
2. Insert the IP Office Administrator Applications DVD. Select the option for the IP Office Administration Suit. A folder
window will display the installation files for the administration suite.
3. Double-click on setup.exe.
4. Select the language you want to use for the installation process. This does not affect the language used by Manager
when running. Click Next >.
5. Select who should be able to run the Admin Suite applications. Click Next >.
6. If required select the destination to which the applications should be installed. We recommend that you accept the
default destination. Click Next >.
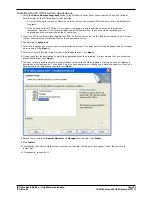
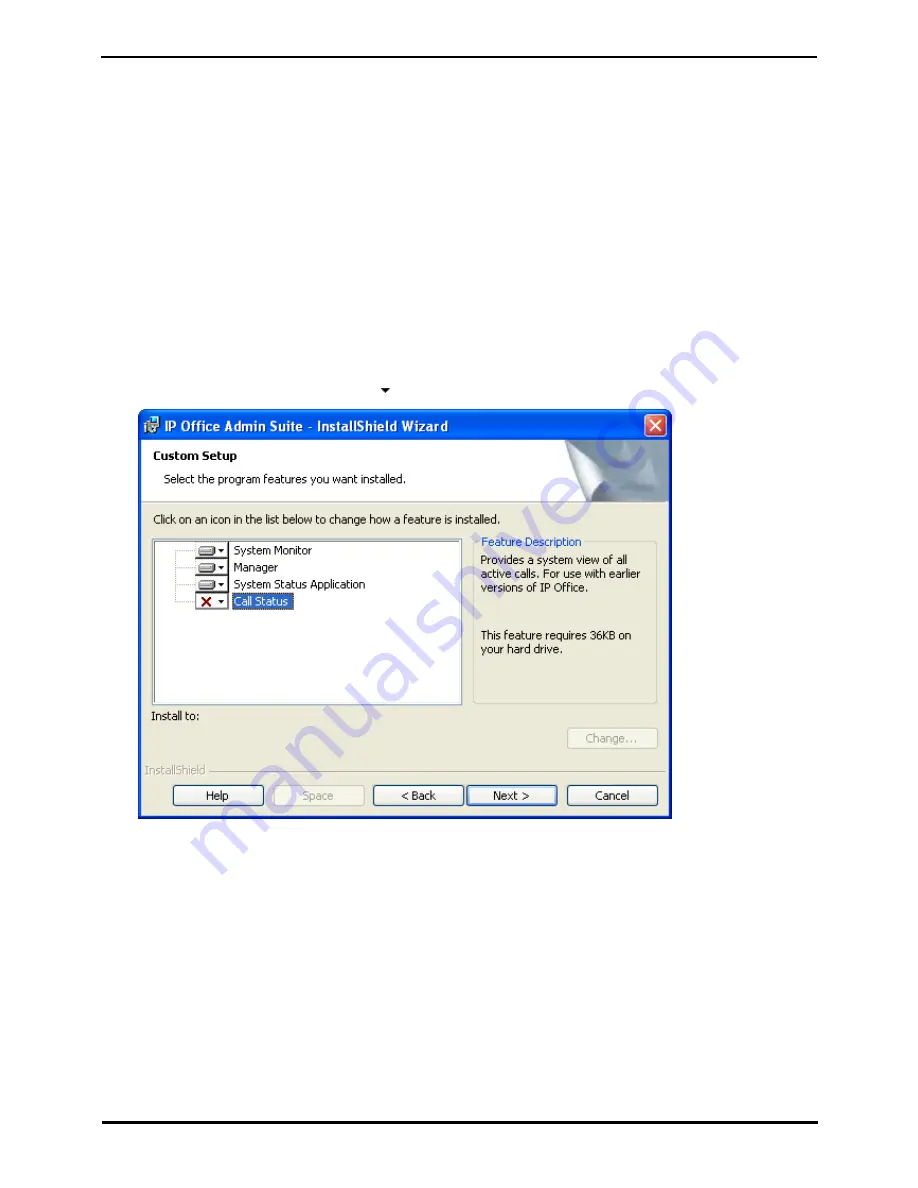
7. The next screen is used to select which applications in the suite should be installed. Clicking on each will display a
description of the application. Click on the next to each application to change the installation selection. When you
have selected the installations required, click Next >.
8. Ensure that at minimum System Monitor and Manager are selected. Click Next >.
9. Click Install.
10.Installation of Windows .Net2 components may be required. If dialogs for this appear, follow the prompts to
install .Net.
11.If requested, reboot the PC.


