


3-13
IM 701210-05E
Making Preparations for Measurements
3
3.5
Setting the Date and Time
Procedure
MEASURE CURSOR
RESET
SELECT
CH
ALL CH
MODE
POSITION
SIMPLE/ENHANCED
ACQ
START/STOP
SETUP
DISPLAY
ZOOM
DUAL
CAPTURE
HISTORY
MATH
1
CH
2
CH
3
CH
4
CH
5
CH
6
CH
7
CH
8
CH
9
CH
10
CH
11
CH
12
CH
13
CH
14
CH
15
CH
16
DELAY
MANUAL TRIG
V/DIV
TIME/DIV
TRIGGER
TRIG D
VERTICAL
HORIZONTAL
CAL
X-Y
SEARCH
7
DSP 1
8
9
DSP 2
6
5
4
1
0
2
3
ENTER
m
DSP 6
DSP 5
LOGIC A
LOGIC B
EVENT
DSP 3
DSP 4
EXP
GO/NO-GO
ACTION
FILE
SHIFT
FILE
SHIFT
HELP
MISC
NUM KEY
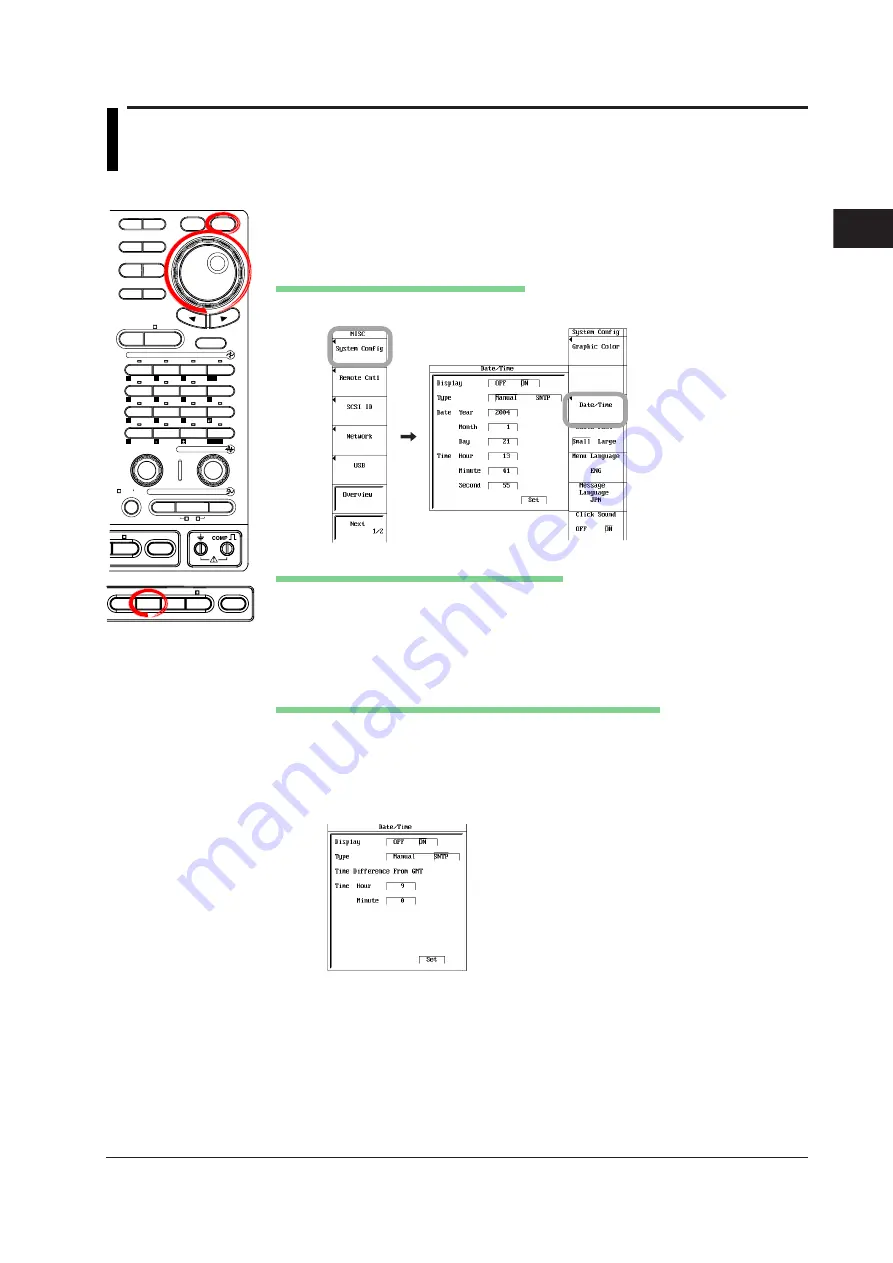
1.
Press
MISC
.
2.
Press the
System Config
soft key.
3.
Press the
Date/Time
soft key. The date/time setting dialog box appears.
Turning ON/OFF the Date/Time Display
4.
Use the
jog shuttle
and
SELECT
to set the
Display
ON or OFF.
Setting the Time and Date Manually (Manual)
5.
Use the
jog shuttle
and
SELECT
to set the Type to Manual.
6.
Use the
jog shuttle
and
SELECT
to set the Date Year.
7.
Likewise, set the Month, Day, Time Hour, Minute, and Second.
8.
Use the
jog shuttle
to move the cursor to Set and press
SELECT.
The date/
time specified in steps 4 and 5 are applied.
Setting the Date and Time Using the SNTP Server (Optional)
To obtain the time from the SNTP server, you must first connect to the network, and then
to the SNTP server. For details, see section 16.2, "Setting up the TCP/IP," and section
16.8, "Setting the Time Difference from GMT (Greenwich Mean Time)/Setting SNTP."
9.
Proceed to step 4, then use the
jog shuttle
and
SELECT
to set the Type to
SNTP.
10.
Use the
jog shuttle
and
SELECT
to set the time difference from GMT
(Greenwich mean time).
11.
Likewise, set the Minute.
12.
Use the
jog shuttle
Set
to move the cursor to Set.
13.
Press
SELECT
to obtain the time from the SNTP server. The time and date
calculated from the entered GMT time difference is set.