Chapter 32. Kickstart Configurator
334
•
Hard Drive
— Choose this option to install or upgrade from a hard drive. Hard drive installations
require the use of ISO (or CD-ROM) images. Be sure to verify that the ISO images are intact
before you start the installation. To verify them, use an
md5sum
program as well as the
linux
mediacheck
boot option as discussed in the
Red Hat Enterprise Linux Installation Guide
. Enter
the hard drive partition that contains the ISO images (for example,
/dev/hda1
) in the
Hard Drive
Partition
text box. Enter the directory that contains the ISO images in the
Hard Drive Directory
text
box.
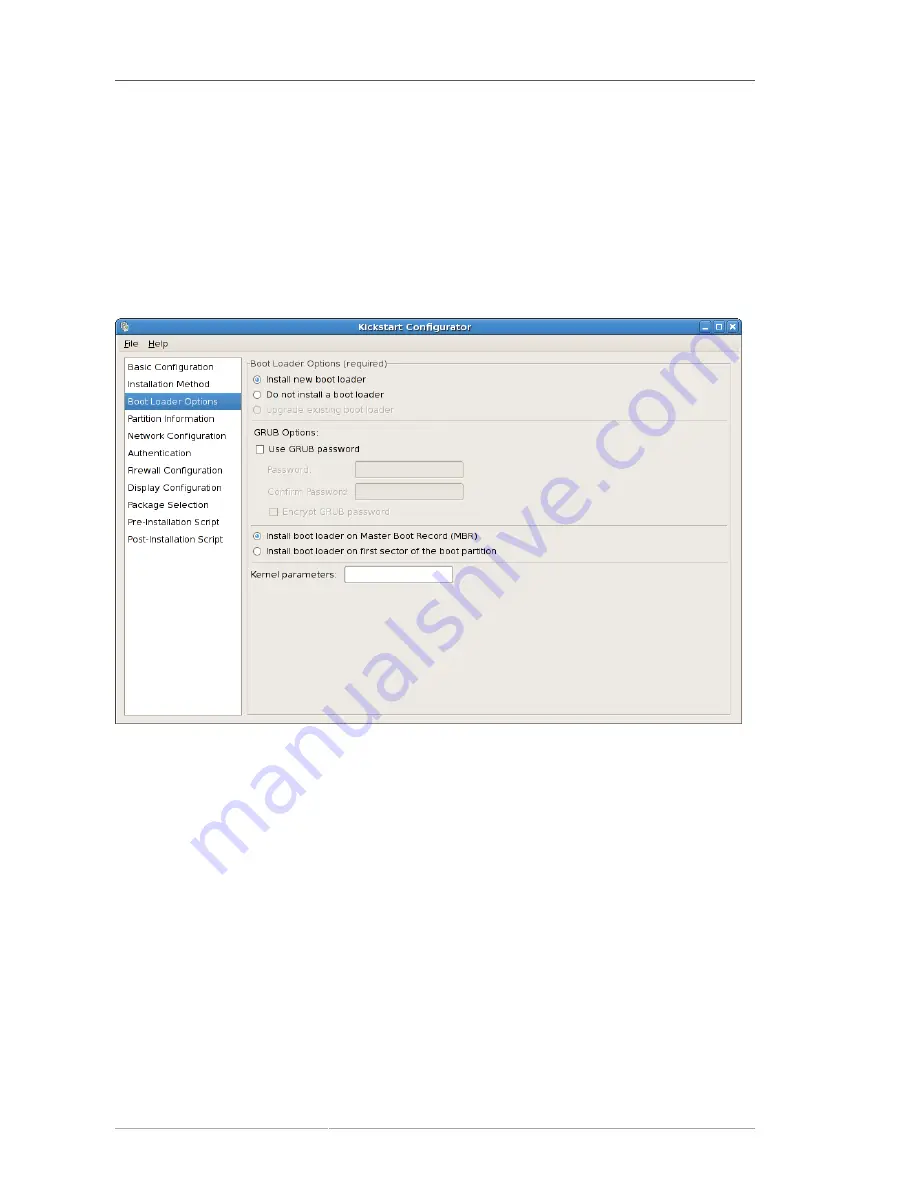
32.3. Boot Loader Options
Figure 32.3. Boot Loader Options
Please note that this screen will be disabled if you have specified a target architecture other than x86 /
x86_64.
GRUB is the default boot loader for Red Hat Enterprise Linux on x86 / x86_64 architectures. If you
do not want to install a boot loader, select
Do not install a boot loader
. If you choose not to install a
boot loader, make sure you create a boot diskette or have another way to boot your system, such as a
third-party boot loader.
You must choose where to install the boot loader (the Master Boot Record or the first sector of the
/
boot
partition). Install the boot loader on the MBR if you plan to use it as your boot loader.
To pass any special parameters to the kernel to be used when the system boots, enter them in the
Kernel parameters
text field. For example, if you have an IDE CD-ROM Writer, you can tell the
kernel to use the SCSI emulation driver that must be loaded before using
cdrecord
by configuring
hdd=ide-scsi
as a kernel parameter (where
hdd
is the CD-ROM device).
You can password protect the GRUB boot loader by configuring a GRUB password. Select
Use GRUB
password
, and enter a password in the
Password
field. Type the same password in the
Confirm
Содержание ENTERPRISE LINUX 5 - VIRTUAL SERVER ADMINISTRATION
Страница 12: ...xii ...
Страница 20: ......
Страница 30: ...12 ...
Страница 32: ...14 ...
Страница 82: ...64 ...
Страница 106: ...88 ...
Страница 122: ...104 ...
Страница 124: ...106 ...
Страница 126: ......
Страница 132: ...114 ...
Страница 168: ...150 ...
Страница 182: ...164 ...
Страница 192: ...174 ...
Страница 194: ......
Страница 236: ...218 ...
Страница 238: ...220 ...
Страница 270: ......
Страница 274: ...256 ...
Страница 278: ...260 ...
Страница 292: ...274 ...
Страница 294: ......
Страница 300: ...282 ...
Страница 304: ......
Страница 316: ...298 ...
Страница 357: ...Creating Partitions 339 Figure 32 7 Creating a Software RAID Device 4 Click OK to add the device to the list ...
Страница 370: ...352 ...
Страница 384: ...366 ...
Страница 385: ...Part VII Appendix ...
Страница 386: ......


