J4350 and J6350 Services Router Getting Started Guide
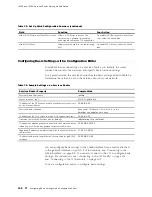
Table 40: Configuring a Secure Web Access (continued)
Task
J-Web Configuration Editor
CLI Configuration Editor
Import the SSL
certificate that you have
generated—for example,
new
.
For information about
generating SSL certificates,
see “Generating SSL
Certificates” on page 117.
1.
Next to Certificates, click
Configure
.
2.
Next to Local, click
Add new entry
.
3.
In the Name box, type a name for the
certificate to be imported—for example,
new
.
4.
In the Certificate box, paste the generated
SSL certificate and private key.
5.
Click
OK
.
Enter
set certificates local new load-key-file
path
Replace
path
with a path or URL to the
file containing an SSL certificate and
private key in PEM format—for example,
/var/tmp/new.pem
Enable HTTPS access
and specify the SSL
certificate to be used for
authentication.
Specify the port on which
HTTPS access is to be
enabled—for example,
TCP port 8443.
NOTE:
You can enable
HTTPS access on specified
interfaces also. If you
enable HTTPS without
specifying an interface,
HTTPS is enabled on all
interfaces.
1.
On the main Configuration page next to
System, click
Configure
or
Edit
.
2.
Select the
Services
check box and click
Edit
next to it.
3.
Next to Web management, click
Edit
.
4.
Select the
Https
check box and click
Edit
next to it.
5.
In the Local certificate box, type the name
of the certificate—for example,
new
.
6.
In the Port box, type
8443
.
7.
Click
OK
.
From the
[edit system]
hierarchy level, enter
set services web-management https
local-certificate new port 8443
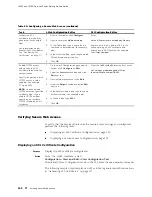
Verifying Secure Web Access
To verify that the Services Router has the secure access settings you configured,
perform the following tasks:
Displaying an SSL Certificate Configuration on page 122
Displaying a Secure Access Configuration on page 123
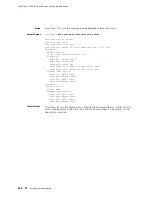
Displaying an SSL Certificate Configuration
Purpose
Display the SSL certificate configuration.
Action
From the J-Web interface, select
Configuration>View and Edit>View Configuration Text
.
Alternatively, from configuration mode in the CLI, enter the
show security
command.
The following sample output displays an SSL certificate generated with instructions
in “Generating SSL Certificates” on page 117.
122
Verifying Secure Web Access
Содержание J4350
Страница 14: ...J4350 and J6350 Services Router Getting Started Guide xiv Table of Contents...
Страница 22: ...2 J series Overview...
Страница 68: ...J4350 and J6350 Services Router Getting Started Guide 48 Field Replaceable PIMs...
Страница 75: ...Services Router User Interface Overview Figure 25 J Web Layout Using the J Web Interface 55...
Страница 88: ...J4350 and J6350 Services Router Getting Started Guide 68 Using the Command Line Interface...
Страница 90: ...70 Installing a Services Router...
Страница 100: ...J4350 and J6350 Services Router Getting Started Guide 80 Site Preparation Checklist...
Страница 112: ...J4350 and J6350 Services Router Getting Started Guide 92 Powering a Services Router On and Off...
Страница 144: ...J4350 and J6350 Services Router Getting Started Guide 124 Verifying Secure Web Access...
Страница 160: ...J4350 and J6350 Services Router Getting Started Guide 140 Verifying J series License Management...
Страница 162: ...142 Maintaining Services Router Hardware...
Страница 194: ...J4350 and J6350 Services Router Getting Started Guide 174 Troubleshooting Hardware Components...
Страница 202: ...J4350 and J6350 Services Router Getting Started Guide 182 Packing a Router or Component for Shipment...
Страница 204: ...184 J series Requirements and Specifications...
Страница 220: ...J4350 and J6350 Services Router Getting Started Guide 200 ISDN RJ 45 Connector Pinout...
Страница 267: ...Part 5 Index Index 247...
Страница 268: ...248 Index...

