Cuelists
••••
59
Setting the Wait Time
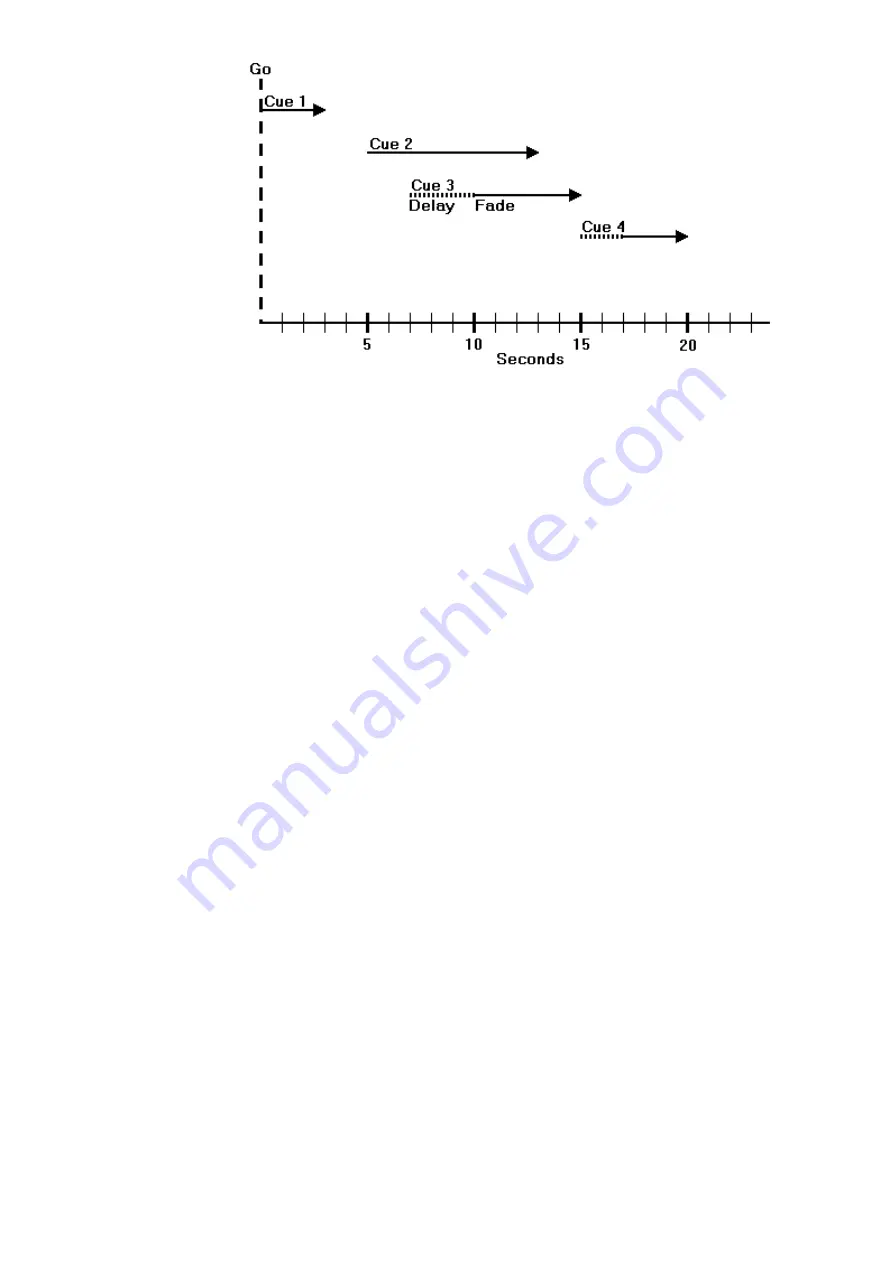
The wait time can only be adjusted using the cuelist window. There are five options for a wait time:
Halt
Represented by an empty wait box; the cuelist stops executing cues and waits for
Go
.
Wait
The cuelist waits this time after the first cue starts before starting this one.
Follow
The cue starts immediately after the previous one has ended.
Timecode
This is discussed in the MIDI and Timecode chapter.
Learn
The console monitors the go button for the cuelist and learns the timing based on the button
pushes. This is discussed later in this chapter.
To change a wait time, select a cue’s wait box using the cursor keys, and press
Set
. To enter a standard
wait time use the keypad to type the amount of time to wait and press
ENTER
. If the time is in minutes,
press
Minutes
after typing the number, or press
Pig
and “
.
”
.
Timecode can be entered by typing in a
frame number, distinguished by using a
/
to indicate 00/00/01.00, hours/minutes/seconds.frames.
Otherwise, pick one of the options from the toolbar at the top of the screen and press
ENTER
.
Changing Several Cues at Once.
You can select several cues to change at once. Move the cursor to the start cue, then hold
Pig
and use the
cursor keys to move the entry box down several wait boxes. The wait boxes will turn dark grey showing
your selection. Then press
Set
, edit as desired and press
ENTER
. The edits will be applied to all the wait
boxes you selected.
Setting the Fade and Delay times
Fade and delay times can be adjusted by selecting the appropriate boxes, pressing
Set
, and typing in a new
time. Again, several cues can be adjusted at once by selecting several boxes together. Times can have up to
two decimal points of precision.
Timing values that are entered in the cuelist window are applied to all parameters of the recorded fixtures.
It is not possible to assign or edit multi-part cue timings in this window. If a multi-part cue time exists, and
you enter a new value in the cuelist window, your multi-part timing structure will be lost.
To edit a multi-part cue timing, the cue must be loaded back into the programmer to modify the timing
using the Time Window.
It’s also possible to enter split fade or delay times (and split paths) to give different values to the fixtures
whose intensities are coming up or going out in a cue. Use the
/
to enter a split time. For example, entering
2/3 in the fade window gives a 2 second fade to the fixtures fading up (the “in” time) time and a 3 second
fade to those fading out (the “out” time).
Learn Timing
You can automatically set up cue wait times by using the
Learn
function. While this function is turned
on, every time you press the master’s
Go
, the console will store the correct wait time for the cues in the
currently selected cuelist. If Timecode is running, it will store the current Timecode frame instead.
The Learn Timing function only over-rides empty (ie. Halt) wait boxes. It will not replace a pre-existing
wait setting.
To use the Learn Timing function:
Содержание HOG 1000
Страница 1: ...Software Version 3 20...
Страница 12: ...6 HOG Version 3 20 This Page intentionally Left Blank...
Страница 22: ...16 HOG Version 3 20 This Page intentionally Left Blank...
Страница 50: ...44 HOG Version 3 20 This Page intentionally Left Blank...
Страница 62: ...56 HOG Version 3 20 This Page intentionally Left Blank...
Страница 74: ...68 HOG Version 3 20 This Page intentionally Left Blank...
Страница 90: ...84 HOG Version 3 20 This Page intentionally Left Blank...
Страница 94: ...88 HOG Version 3 20 This Page intentionally Left Blank...
Страница 119: ...Fixture Library 113...
Страница 123: ...Hardware Notes 117 This Page intentionally Left Blank...


