Software
Crestron
D3 Pro
™
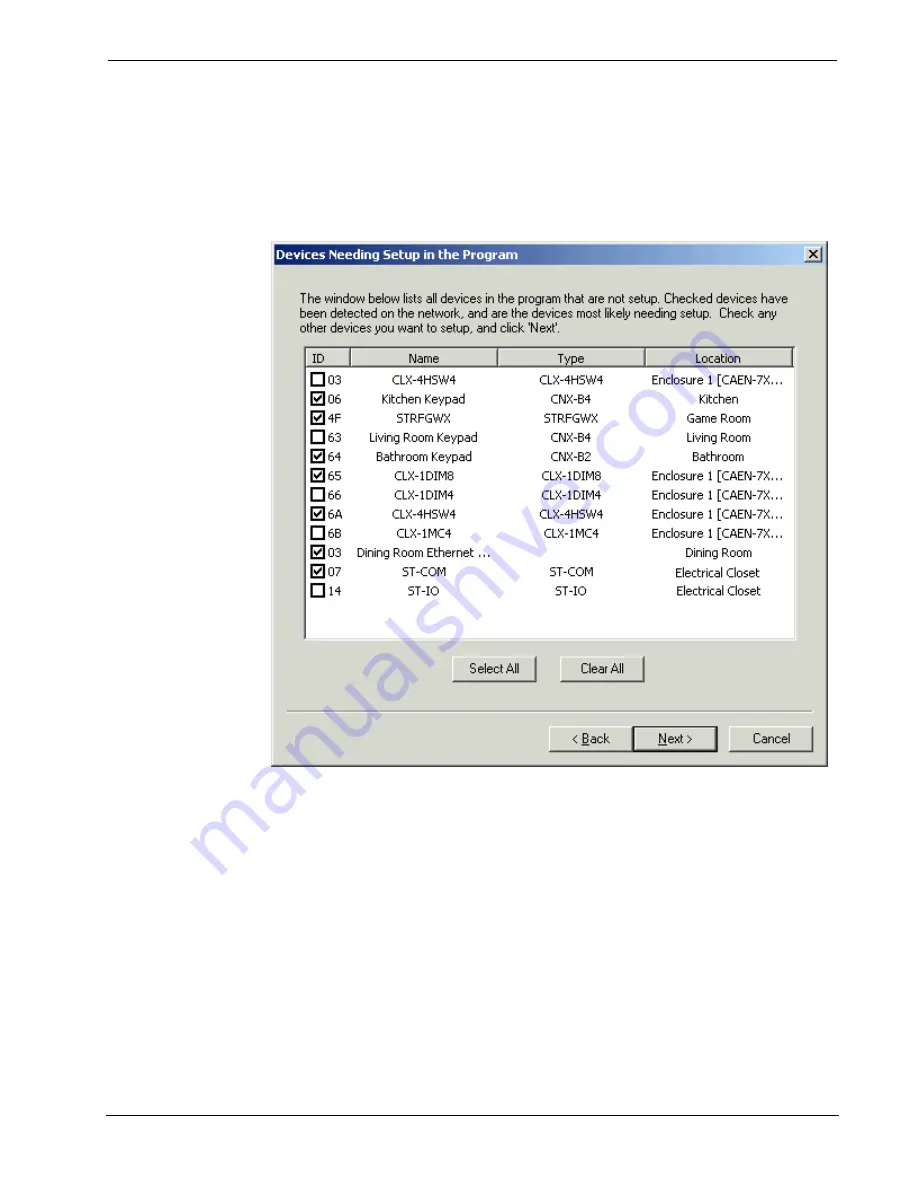
Click
Next
to view the list of all devices (including those that are not touch settable)
that have been defined in your project, but have not yet been configured. The
information listed here includes the Cresnet ID assigned in the project, the name and
type of device, and its location. If devices have been detected on the network, then all
devices of this type will be checked off. You can check any additional devices you
want to configure and click
Next
.
If your network includes devices that are not touch-settable, the Wizard displays
screens to configure those devices first. The exact procedure for setting the ID differs
depending on the device and will be described in the Setup Instructions. In most
cases, you have to connect
only
the indicated device to the network and click
Set ID
.
D3 pro will then automatically set the internal Cresnet ID of that device. Some non
touch-settable devices must have their IDs set manually according to the instructions
in the user manual. As you set each ID, click
Next
to continue to the next device.
With touchpanels, click the
Setup Mode
button to put all the panels into setup mode.
You can then go to the setup screen of each panel to set the Cresnet ID.
After you have gone through each non touch-settable device and configured its
Cresnet ID, click
Finish
to continue with touch-settable devices. Here the Wizard
will open the
Assign Device Network IDs
screen.
88
•
Crestron D3 Pro™
Reference Guide – DOC. 5998a


