Advanced Guide
>
Printing Using the Operation Panel of the Machine
>
Printing from a Memory Card
>
Using Useful
Display Functions
> Printing a Specified Area (Trimming)
Printing a Specified Area (Trimming)
You can edit images displayed on the LCD by cropping them.
Note
Crop images after specifying the page size, media type, and bordered or borderless printing in the
print settings screen. If you change the paper settings after cropping, the cropped area may be
adjusted to match the paper, or be disabled completely.
1.
Select the photo to crop.
2.
Press the right Function button when Edit is displayed on the screen.
3.
Select Trimming, then press the
OK
button.
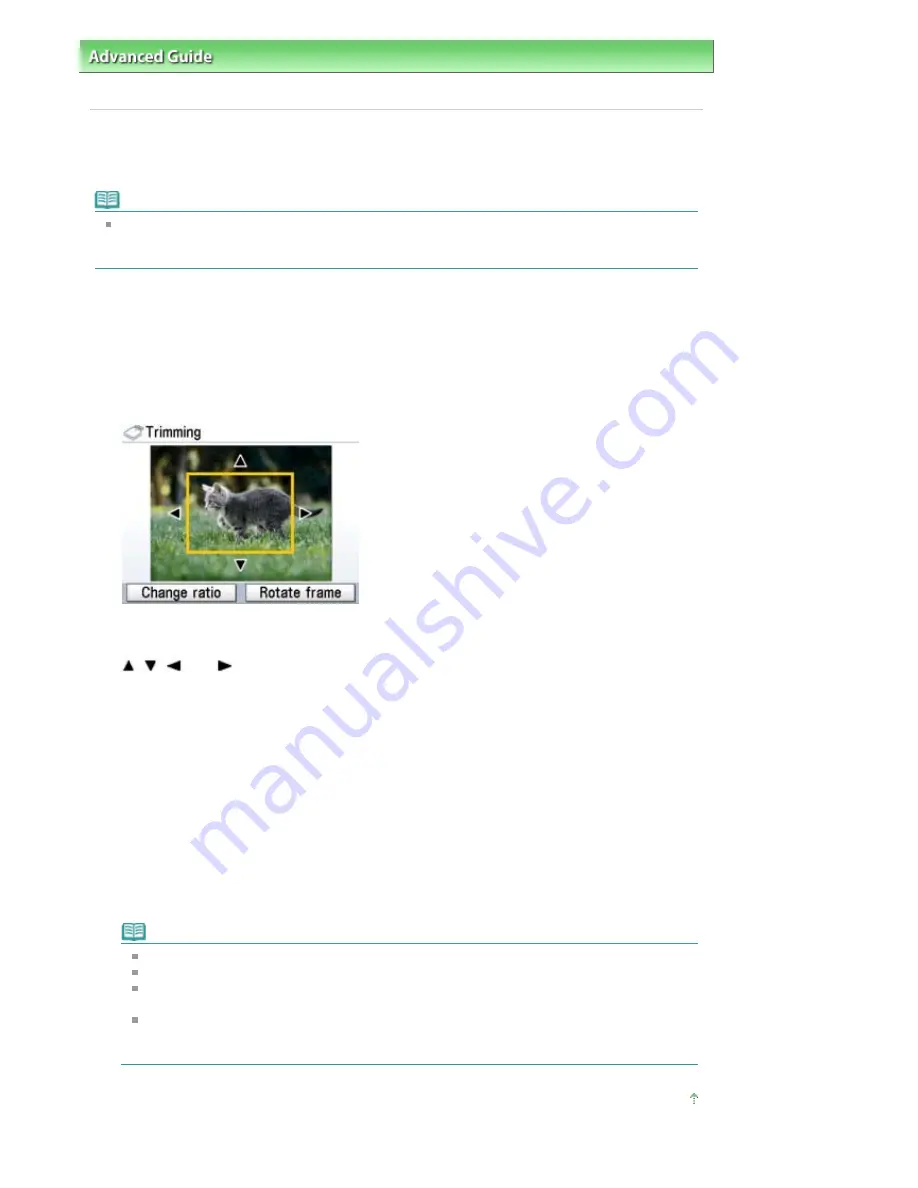
The cropping edit screen is displayed.
4.
Choose the area to print.
,
,
, and
buttons:
Position the cropping frame.
Easy-Scroll Wheel:
Sets the cropping frame size.
Turn the Easy-Scroll Wheel clockwise to enlarge the size of the cropping frame or counterclockwise
to reduce it.
Left Function button:
Changes the aspect ratio of the cropping frame.
Right Function button:
Rotates the cropping frame.
To switch the cropping frame between portrait and landscape orientations, press this button.
5.
Press the
OK
button to finalize your selection of cropping area.
The area to be cropped is specified, and the original photo is displayed.
Note
The cropped image cannot be newly saved on the memory card.
The cropping area is displayed only for photos which have been cropped.
To change the cropped area once it has been set, press the right Function button again when
Edit is displayed on the screen, select Trimming, then press the
OK
button.
To cancel cropping after cropping has been set, press the right Function button again when
Edit is displayed on the screen, select Cancel trimming, then press the
OK
button. Select
Displayed images only or All images, then press the
OK
button.
Page top
Page 395 of 947 pages
Printing a Specified Area (Trimming)
Содержание MP980 series
Страница 18: ...Page top Page 18 of 947 pages Printing Photos Saved on the Memory Card ...
Страница 29: ...Page top Page 29 of 947 pages Making Copies ...
Страница 62: ...Page top Page 62 of 947 pages Printing Documents Macintosh ...
Страница 68: ...Page top Page 68 of 947 pages Printing Photos Directly from Your Mobile Phone or Digital Camera ...
Страница 75: ...Page top Page 75 of 947 pages Loading Paper ...
Страница 100: ...Page top Page 100 of 947 pages When Printing Becomes Faint or Colors Are Incorrect ...
Страница 103: ...Page top Page 103 of 947 pages Examining the Nozzle Check Pattern ...
Страница 105: ...Page top Page 105 of 947 pages Cleaning the Print Head ...
Страница 107: ...Page top Page 107 of 947 pages Cleaning the Print Head Deeply ...
Страница 159: ...Page top Page 159 of 947 pages Selecting a Photo ...
Страница 161: ...Page top Page 161 of 947 pages Editing ...
Страница 163: ...Page top Page 163 of 947 pages Printing ...
Страница 240: ...Page top Page 240 of 947 pages Attaching Comments to Photos ...
Страница 244: ...See Help for details on each dialog box Page top Page 244 of 947 pages Setting Holidays ...
Страница 317: ...Page top Page 317 of 947 pages Setting Paper Dimensions Custom Size ...
Страница 332: ...Page top Page 332 of 947 pages Printing with ICC Profiles ...
Страница 441: ...8 Save the scanned images Saving Saving as PDF Files Page top Page 441 of 947 pages Scanning Film ...
Страница 468: ...Printing Photos Sending via E mail Editing Files Page top Page 468 of 947 pages Saving ...
Страница 520: ...taskbar and click Cancel Printing Page top Page 520 of 947 pages Print Document Dialog Box ...
Страница 670: ...2 Remove the 8 cm disc from the CD R Tray Page top Page 670 of 947 pages Attaching Removing the CD R Tray ...
Страница 746: ...Page top Page 746 of 947 pages Printing with Computers ...
Страница 780: ...Page top Page 780 of 947 pages If an Error Occurs ...
Страница 870: ...Page top Page 870 of 947 pages Before Printing on Art Paper ...
Страница 882: ...Before Installing the MP Drivers Page top Page 882 of 947 pages Installing the MP Drivers ...


