background image

Configuration

20

UDM-0102 and UDM-RX02 Operation/Reference Guide

After setup you can change TCP/IP address and connect the UDM-0102 to your network equipment (switch, 
Hub, or serial port).

Use the links in the left-pane of the page to access each of the main Configuration pages, as described in the 
following sections.

For the initial setup, you will probably need to visit the Setup page first, to establish network settings for the 
UDM-0102 (see th

Configuration - Setup Page

section on page 33).

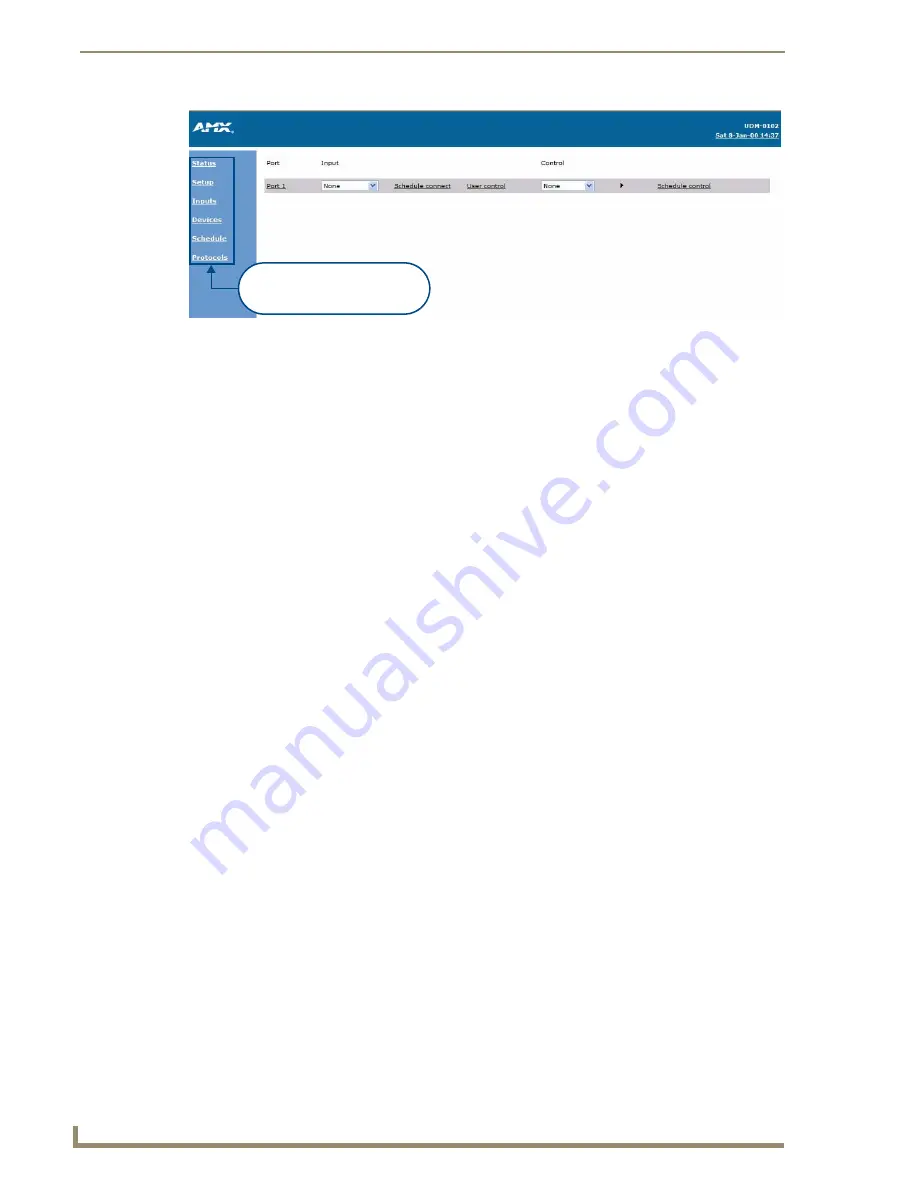
FIG. 14  

 UDM-0102 WebConsole - Initial View (Status page)

Click links to access the main 
areas of the WebConsole
(initial view is the 

Status 

page)

Содержание Endeleo Multi-Format Receiver UDM-RX02

Страница 1: ...Operation Reference Guide Universal Distribution Matrix UDM 0102 1x2 Multi Format Distribution Hub UDM RX02 Multi Format Receiver Last Updated 11 15 2010 ...

Страница 2: ...rked on the outside of each box The RMA is valid for a 30 day period After the 30 day period the RMA will be cancelled Any shipments received not consistent with the RMA or after the RMA is cancelled will be refused AMX is not responsible for products returned without a valid RMA number AMX is not liable for any damages caused by its products or for the failure of its products to perform This incl...

Страница 3: ...PLIED WARRANTIES OF MERCHANTABILITY AND FITNESS FOR A PARTICULAR PURPOSE WITH REGARD TO THE AMX SOFTWARE THIS LIM ITED WARRANTY GIVES LICENSEE SPECIFIC LEGAL RIGHTS Any supplements or updates to the AMX SOFTWARE including without limitation any if any service packs or hot fixes provided to Licensee after the expiration of the ninety 90 day Limited Warranty period are not covered by any warranty or...

Страница 4: ......

Страница 5: ...re are NO user serviceable parts within the UDM 0102 or UDM RX02 Rating Label The rating label containing important safety information is found on the underside of the UDM 0102 and UDM RX02 Symbols used on this label are explained below FIG 1 Voltage symbol FIG 2 Rating Label The UDM is powered from a suitable 24 VDC supply FCC Federal Communications Commission Standards TESTED TO COMPLY FOR HOME ...

Страница 6: ...ct and safe installation operation or maintenance of your UDM 0102 and UDM RX02 Failure to comply with such instruction may result in injury to person or damage to the UDM hardware FIG 3 Date Of Manufacture Sticker on bottom panel UDM 0102 RX02 Date of Manufacture Sticker Model Number Model number and designation comprised of up to seven characters Vendor ID One or two character ID code Date Code ...

Страница 7: ...DM RX02 in an area in which the ambient relative humidity exceeds 85 or an area that is prone to condensation Water Liquids DO NOT install or operate the UDM 0102 or UDM RX02 near water or in a location which may be prone to water seepage dripping or splashing DO NOT place objects containing liquids on the appliance The Hub is not waterproof External use DO NOT operate the UDM 0102 or UDM RX02 out...

Страница 8: ...Important Safety Markings UDM 0102 and UDM RX02 Operation Reference Guide ...

Страница 9: ...Format Distribution Hub 1 Overview 1 Common Application 1 Features 1 Compatibility 2 Product Specifications 2 UDM 0102 Wiring and Connections 3 Overview 3 UDM 0102 Front Panel Components 3 Power Status LED 4 ETHERNET Port RJ45 4 Pinout Configuration 4 Default IP Address 4 Serial RJ12 Port 4 Serial Port Default Communication Settings 5 RS01 DB9F to RJ12 Adapter Cable Pinouts 5 Active Input A B LEDs...

Страница 10: ...11 IRRX IR Receiver Port 11 Connecting an External IR Receiver Module 11 DC IN Power Input 11 UDM RX02 Multi Format Receiver 13 Overview 13 Common Application 13 Features 13 Compatibility 13 Product Specifications 13 UDM RX02 Wiring and Connections 15 Overview 15 24 DC Power Input 15 Using the UDM PS External Power Supply 15 UDM Hub Port RJ45 16 Serial RJ12 Port 16 IR Rx IR Receiver Port 16 Connec...

Страница 11: ...ting an IR Command 30 Scheduled Control 31 Configuration Setup Page 33 Overview 33 Setup Page Options 33 Network Configuration 34 Date and Time Configuration 34 Refreshing the Date and Time Display 35 Restore Options 35 Restoring Configuration and Connections 35 Restoring Connections On Power Up 35 Resetting the UDM 0102 35 Configuration Inputs Page 37 Overview 37 Inputs Page Options 37 Inputs A B...

Страница 12: ...g an IR Protocol 59 Creating an IR Protocol 59 IR Learning With a Device s Remote Control 60 Updating the UDM RX02 With the IR Protocol 61 Deleting Protocols 61 Endeleo IR Codes 62 Upgrading Firmware 63 Overview 63 Determining the Current Firmware Versions 63 Downloading New Firmware From WWW AMX COM 64 Establishing a TFTP Session with the Hub and or Receiver 65 Upgrading Firmware and Web Pages On...

Страница 13: ...ting Video Via the UDM RC10 Remote 75 Video Compensation 77 Overview 77 Default Video Compensation Settings 77 Video Compensation Guidelines 77 Advanced Video Compensation 78 Compensating Video Via the UDM RC10 Remote Controller 79 UDM 0102 Control Protocol 81 Overview 81 Command Format 81 Command and Reply Example Port Connection 81 Command and Reply Example Authentication Login 82 UDP Over Netwo...

Страница 14: ...or Input Name 88 Get Receiver Info 88 Send Remote Command 88 Set Remote Control Receiver Protocol 89 Send Control Operation To Connected Device 89 Send Non Specific Serial Command 90 Set Serial Parameters 90 Get Remote Serial Buffer 91 Enable Disable Remote Key Messages 91 Set Hub Identification 91 Get Hub or Port Identification and System Information 92 Reset Controller 92 Status Values 92 Ascii ...

Страница 15: ...Composite Component or S Video feed and output is presented as an RJ45 port for connection to Cat5 5e 6 twisted pair Ethernet cable Video inputs are connected via the HD15 VIDEO IN Input connectors on the rear of the UDM Adapters are used to bring the different types of video source into the UDM To use Component or Composite input you will need the UDM HD15RCA3F HD 15 to 3x RCA Breakout Cable FG H...

Страница 16: ...l as control via Cat5 5e 6 to a UDM RX02 Receiver Rear Panel Connectors Source Inputs A B Two sets of input connectors for A V source devices labelled A and B VIDEO IN HD 15 input connector female supports VGA Component S Video and Composite formats Analog Audio Left white and Right red stereo RCA input connectors female Digital Audio SPDIF female input connector IRTX Ports Two 3 5mm stereo IR Tra...

Страница 17: ...ck devices UDM 0102 Front Panel Components FIG 3 shows the components on the front panel of the UDM 0102 FIG 2 UDM 0102 System Diagram FIG 3 UDM 0102 front panel components Ethernet Serial Audio Video Cat5 IR Control SWT Laptop Internet HDTV Satellite Receiver LCD UDM 0102 UDM RX02 UDM 0102 UDM RC02 ETHERNET port RJ45 Serial port RJ12 Power LED Status LED Active input A B LEDs Preset buttons 1 2 I...

Страница 18: ...address may also be configured via the serial port refer to the Backend Commands section on page 71 Serial RJ12 Port The SERIAL RJ12 port on the front panel labelled 10101 is available for diagnostic and troubleshooting purposes The Serial port on the UDM 0102 requires a DB9 to RJ12 adapter cable FG RS01 included to connect to a PC for Terminal control RJ45 Ethernet Port Pinouts and Signals Pin Si...

Страница 19: ...es a valid UDP command and returns to red after 30 seconds if it has not received anything SELECT Pushbutton Press the SELECT pushbutton to manually switch the currently active input A B Default Serial Settings Baud Rate 9600 Data Bits 8 Parity None Stop Bits 1 Flow Control None DB9F to RJ12 Adapter Cable Pinouts DB9F connector RJ12 connector Pin Function Pin Function 1 not used 1 not used 2 RX Re...

Страница 20: ...eceiver to the UDM 0102 The RJ45 port on the front panel of the UDM 0102 Hub labelled UDM supports one UDM RX02 Receiver The UDM RX02 is then be connected to a display device FIG 3 1 Connect a standard Cat5 5e 6 Ethernet cable to the RJ45 port labelled UDM on the front panel of the UDM Hub 2 Connect the other end of the cable to the RJ45 port labelled UDM Hub on the rear panel of the UDM RX02 A V ...

Страница 21: ...as well as comms if uploading protocols etc the Amber LED may flicker Refer to the UDM RX02 Wiring and Connections section on page 15 for details on installing the UDM RX02 FIG 6 Connecting the UDM RX02 Receiver to the UDM 0102 Cat5 5e 6 cable Ensure the port the UDM RX02 is attached to is configured correctly within the Status option of the WebConsole for example if a UDM RX02 is connected to the...

Страница 22: ...RCA Audio IN A RCA Audio IN B connector A SPDIF Digital Audio IN connector B 1 2 3 4 5 6 7 8 9 10 11 12 13 14 15 HD15 Pinouts Input Pin 1 2 3 4 5 6 7 8 9 10 11 12 13 14 15 VGA Red Red Ground Green Green Ground Blue Blue Ground Horz Synch Vert Synch n c n c n c n c n c n c n c Component Y Y Ground Pb Pb Ground Pr Pr Ground n c n c n c n c n c n c n c n c n c S Video Luminance Luminance Ground n c n...

Страница 23: ...et to the audio type Analog L R or S PDIF used by this device See the Inputs A B Configuration section on page 38 for details 1 Connect the UDM SVID01 HD15 to SVideo cable FG UDM SVID01 not included to the video source s S Video output connector 2 Attach the other end of the cable to the appropriate VIDEO IN connection A or B on the UDM 0102 3 Connect any audio to the appropriate analog RCA audio ...

Страница 24: ...gth Excessive skew can adversely affect video image quality especially at long cable lengths and high signal resolutions IRTX 1 2 IR Transmit Ports Two IR controlled devices such as DVD players or VCRs can be connected to the UDM 0102 via the 3 5mm stereo IRTX ports on the rear panel see FIG 7 on page 8 This allows device control via the WebConsole or remote control Use two IR01 IR Emitter Modules...

Страница 25: ...ternal IR Receiver Module FG IR03 The IRRX port has two purposes To learn and create new IR protocols Refer to the Creating and Learning an IR Protocol section on page 59 for details To control an IR controlled device via Passthrough mode Refer to the Passthrough Mode section on page 29 for information Connecting an External IR Receiver Module If pass through mode where a device such as a DVD or V...

Страница 26: ...UDM 0102 Wiring and Connections 12 UDM 0102 and UDM RX02 Operation Reference Guide ...

Страница 27: ...oms conference rooms or other presentation rooms Features Video Support for 1600 x 1200 UXGA 1920 x 1080 HDTV Component YPbPr S Video Composite PAL NTSC S PDIF Digital and analog stereo audio support IR blaster and receiver ports Compatibility The UDM RX02 is compatible for use with the following UDM Hubs UDM 0102 FG UDM 0102 supports Common Synch Mode UDM 0404 FG UDM 0404 supports Common Synch Mo...

Страница 28: ...onal wired IR emitter Audio Connectors Black RCA connector Digital audio White Red RCA connectors Analog audio L R Video Connectors Yellow RCA female connector CVBS supports composite video S Video S video female connector VGA HD15 female connector supports VGA video Green RCA female connector Component output Y Blue RCA female connector Component output Pb Red RCA female connector Component outpu...

Страница 29: ...ecting the UDM PS power supply may provide a visible improvement To connect the UDM PS power supply to the UDM RX02 insert the barrel connector into the 24 DC connector on the UDM RX02 To power down the UDM RX02 remove the barrel connector of the power supply from the power connector and then remove the Ethernet cable from the UDM Hub connector To connect the UDM PS power supply to an UDM RX02N th...

Страница 30: ...or may need a link between RTS CTS at the DB9 end For example NEC LCD panels act as DTE equipment and work with standard serial cable while Fujitsu and Panasonic Plasma screens act as DCE equipment and therefore require cross connections To connect to a display device using a serial cable 1 Connect a serial cable to the UDM RX02N s SERIAL port 2 Run the serial cable observing distance limitations ...

Страница 31: ...g the cover on the reverse side of the IR Emitter 3 The UDM RX02 is now capable of issuing IR commands to the display device IR commands for each device on the system have to be learned by the UDM 0102 in order to function properly Refer to the Creating and Learning an IR Protocol section on page 59 for instructions on learning a device s IR commands AUDIO Outputs The UDM RX02 provides standard RC...

Страница 32: ...UDM RX02 Wiring and Connections 18 UDM 0102 and UDM RX02 Operation Reference Guide ...

Страница 33: ...Setup Inputs Devices Schedule and Protocols However on initial connection you ll probably need to visit the Setup page first to specify network configuration and other basic device setup options for the Hub See the Configuration Setup Page section on page 33 for details Connecting to the UDM 0102 1 The default IP address of the UDM 0102 is 192 168 0 96 2 Enter the IP address into the address field...

Страница 34: ...ne of the page to access each of the main Configuration pages as described in the following sections For the initial setup you will probably need to visit the Setup page first to establish network settings for the UDM 0102 see the Configuration Setup Page section on page 33 FIG 14 UDM 0102 WebConsole Initial View Status page Click links to access the main areas of the WebConsole initial view is th...

Страница 35: ...section on page 25 for details Schedule connect Click this link to schedule the selected Input Device to connect at specific times See the Scheduling Input Device Connections section on page 25 for information User Control Click this link to access the User Control page The User Control page lists all commands available to the Input Device based on the Remote Controller currently selected Note tha...

Страница 36: ...commands to be issued to the selected Input Device at a specified time See the Scheduled Control section on page 31 for details FIG 16 Port 1 Link on the Status Page FIG 17 Port Configuration page Port Configuration page User control Click to access the User Control options for this Port to allow Administrators to issue commands from the UDM WebConsole See the Defining User Control section on page...

Страница 37: ... the appropriate color hyperlink FIG 19 Port Configuration Options Cont Bright Up Down Once any skew has been eliminated the video should be adjusted for brightness using a grey scale or equivalent test card Click Update to apply changes Sharp Up Down The sharpness of the video should be adjusted last to eliminate any over or under shoot of the video Horizontal black and white bars are one useful ...

Страница 38: ...e protocols are available for selection in the Protocol drop down menu in the Port Configuration page FIG 20 Dual Output Mode Dual Output mode permits a single output to be viewed as two separate output types For example a port could be configured for the dual output of VGA and Component video This means at the UDM RX02 end the video could be delivered to two separate display devices over the rele...

Страница 39: ...onnections The Schedule Connect link at the top of the Status page allows you to schedule a connect time for the selected Input Device Once a Scheduled Connect is defined for an Input Device that device will automatically connect to the UDM 0102 at the specific time 1 Click on the Schedule Connect link at the top of the Status Page FIG 23 This link opens the Schedule page FIG 24 Ensure the correct...

Страница 40: ...ect Click the Execute link to execute the associated event immediately Click the Preset link to add this Scheduled Connect to a Preset Schedule Multiple scheduled events can be combined into a single Preset Schedule For example you could create a Preset Schedule that powers up devices 1 2 connected to the IRTX Ports on the rear panel then powers up display devices 1 4 connected to the RJ 45 Output...

Страница 41: ... Device from the drop down menu The devices available for selection are defined in the Devices page see the Configuration Devices Page section on page 39 for details Input refers to devices connected directly to the UDM Hub Inputs A B Control IR Commands are selected from the Control drop down menu provided for each Key FIG 26 Status Page Selecting User control FIG 27 User Control page with UDM RC...

Страница 42: ... menu for any Key and select the command which this key on the UDM RC02 Remote Control will issue FIG 28 4 Select either the Port or Device radio button to specify whether this button on the remote should be associated with the Port display device or an actual Device e g a DVD player added to the system as a device when it is pushed 5 Click the Schedule drop down menu to add each Control to a user...

Страница 43: ...ntrol the selected Input device FIG 30 The example in FIG 30 indicates that Key 1 on the UDM RC02 remote control will put device DVD into Passthrough mode Alternatively selecting Input A on the UDM RC02 will also enable passthrough control of the source Using Passthrough Mode Once a device has been configured for Passthrough Mode the relevant remote control is used to control the device Press the ...

Страница 44: ...d type in the IR code for the command Refer to the Endeleo IR Codes section on page 62 for information It is also possible to control centrally located hardware such as DVD players via options on the Devices page Refer to the Sending a Command to IR Controlled Devices section on page 43 Ensure the device s IR commands have been learned by the Hub first Refer to the Creating and Learning an IR Prot...

Страница 45: ...s the Schedule page with the newly added command listed FIG 34 FIG 32 Status Page Control drop down menu and Schedule control link FIG 33 Schedule Page command added from Status page via Schedule control Hour Event happens at a specified time and then every 60 minutes Day Event happens at a specified time and then every 24 hours Weekday Event happens at a specified time and then every 24 hours Mon...

Страница 46: ...er to the Configuration Schedule Page section on page 45 for additional information on scheduling commands FIG 34 Schedule page showing newly added Scheduled control FIG 35 Scheduled control Enabled Click Add to add this Scheduled control to the Schedule page Schedule Control information complete on Port Configuration page Schedule Control information added to Schedule page Click Enable to enable ...

Страница 47: ...ble advanced options Enable this option to access the advanced video compensation settings in the Port Configuration options page see the Audio Video Formats Resolutions Distance section on page 10 Network Configuration IP Address Enter edit the IP address for this UDM 0102 in this set of text fields The default IP address is 192 168 0 96 The UDM 0102 does not support DHCP please configure a stati...

Страница 48: ... format dd mm yy Click the Set Time link to update the date setting Time Enter the current time in this set of text fields in 24 hour format Click the Set Time link to update the time setting Restore Options Restore configuration on power up Select this option to restore network configuration and port configuration settings on when the UDM 0102 is powered up Default enabled Restore connections on ...

Страница 49: ...t up select Restore configuration on power up option see FIG 40 Restoring Connections On Power Up To ensure inputs are transmitted to the outputs or ports on boot up select the Restore connections on power up option see FIG 40 Resetting the UDM 0102 Where appropriate the Hub can be reset from the Browser interface 1 In the Setup page click the Reset Hub button FIG 41 The UDM 0102 s network connect...

Страница 50: ...Configuration Setup Page 36 UDM 0102 and UDM RX02 Operation Reference Guide ...

Страница 51: ... on the Inputs page The device connected to the Input B connectors should be represented as Input B on the Inputs page Type These drop down menus allow you to specify the video type provided by each Input Device The options are VGA Composite S Video and Component Name These text fields display the name currently assigned to each of the Input Devices The names assigned here manifest in the Status p...

Страница 52: ...t However if the Input Type is set to Composite additional Name fields are provided to name each of the three composite sources separately as shown in FIG 45 3 In the Audio column select the type of audio provided by each input device from the drop down menus provided FIG 46 The options are Analog L R S PDIF and None FIG 44 Inputs page Input Type drop down menu FIG 45 Inputs page Name text fields ...

Страница 53: ...nd to devices connected to the IRTX1 and IRTX2 connectors on the rear panel of the UDM 0102 see FIG 48 The device connected to the IRTX1 connector is represented as Device 1 on the Devices page The device connected to the IRTX2 connector is represented as Device 2 on the Devices page Name These text fields display the name currently assigned to each of the centrally located devices The device name...

Страница 54: ...s page see the Configuration Protocols Page section on page 51 Devices Page Control Bar Options The options in the Control Bar FIG 49 allow you to schedule commands to these devices or send commands directly to any or all of these devices Devices Page Options Cont Control Bar The options in the Control Bar allow you to schedule commands to these devices or send commands directly to any or all of t...

Страница 55: ... down menu FIG 50 2 Select an IR protocol for each device from the Protocol drop down menu FIG 51 3 Select the Include checkbox for each device that you want to include in this scheduled event FIG 52 FIG 50 Devices page Control drop down menu FIG 51 Devices page Protocol drop down menu The IR protocols available for selection here are defined in the Protocols page see the Configuration Protocols P...

Страница 56: ...wo or more pre defined Scheduled events see the Creating a Preset Schedule section on page 46 for details Remove click to delete this scheduled event FIG 53 Schedule page new scheduled event entry top of page Hour Event happens at a specified time and then every 60 minutes Day Event happens at a specified time and then every 24 hours Weekday Event happens at a specified time and then every 24 hour...

Страница 57: ...on page 41 2 Select an IR protocol for each device from the Protocol drop down menu see FIG 51 on page 41 3 Select the Include checkbox for each device that you want to include in this scheduled event FIG 52 4 Click the Send to included link on the Control Bar to send the selected command to the Included devices only The IR protocols available for selection here are defined in the Protocols page s...

Страница 58: ...Configuration Devices Page 44 UDM 0102 and UDM RX02 Operation Reference Guide ...

Страница 59: ...rocess of creating a Preset entails selecting two or more existing Scheduled Events and saving them as a Preset see below Schedule Page Options FIG 56 Schedule page initial view You can create and store up to 16 scheduled events including Presets Schedule Page Options Event Select an event command to schedule and or send to the included devices Included devices are all devices that have the Includ...

Страница 60: ... page click the Preset link for each Scheduled Event that you want to add to the new Preset FIG 58 3 As each Scheduled Event is added to the new Preset it is indicated in the Preset bar by their respective Event numbers FIG 59 Schedule Page Options Cont Add Click this checkbox to add a new Preset to the schedule list Clear Click this checkbox to remove a Preset from the schedule list FIG 57 Schedu...

Страница 61: ...ule page assign a Name Interval and Frequency to this Preset Hour Event happens at a specified time and then every 60 minutes Day Event happens at a specified time and then every 24 hours Weekday Event happens at a specified time and then every 24 hours Mon through Fri Sunday Event happens every Sunday at the specified time Monday Event happens every Monday at the specified time Tuesday Event happ...

Страница 62: ...ort Configuration options shown in FIG 62 2 Click on the User Control link at the top right of the page see FIG 62 This invokes the Control Options page for the selected Port FIG 63 3 Keys 0 to F represent the keys on the UDM RC02 Remote Control For each Key select the schedule from the Schedule drop down menu to be issued by the selected Key on the UDM RC02 Remote Control FIG 64 The relevant sche...

Страница 63: ...e relevant command from the UDM RC02 Remote Control FIG 64 Control Options page Schedule drop down menu For each Device selected you must specify a Protocol from the Protocol drop down menu Protocols are not used for Ports Ensure the correct key on the UDM RC02 Remote Control corresponds with the correct schedule ...

Страница 64: ...Configuration Schedule Page 50 UDM 0102 and UDM RX02 Operation Reference Guide ...

Страница 65: ...e UDM 0102 For IR devices the device s IR controls remote control key presses will have to be learned by the UDM 0102 FIG 65 Protocols Page Protocols Page Options Serial Protocol used This read only field indicates the amount of available commands currently used for Serial protocol Command drop down menu This menu provides a list of all commands available to add to a Serial protocol Delete Click t...

Страница 66: ...rom the Settings drop down menus The baud rate options are 1200 2400 4800 9600 19200 38400 57600 and 115200 The parity options are None Odd and Even 3 Click on Initialize to clear the UDM Receiver of any pre loaded serial commands and invoke the additional options Action and Serial Command shown in FIG 68 FIG 66 Serial Protocol drop down menu FIG 67 New serial protocol options Name Enter a name fo...

Страница 67: ...p down menu select Serial to enable the Serial specific configuration options shown in FIG 70 Action Select the action to be performed by this command from this drop down menu Serial Command Enter the serial string associated with the selected action The serial string must be accurate for the serial command to work Consult the Manufacturer s documentation to ascertain the correct string for each s...

Страница 68: ...the string click the Test hyperlink to send the string to the device connected Repeat the process as many times as required to test a complete set of controls before saving them to the protocol library Examples of Serial Controls The video mode select commands VGA select etc are extremely useful commands and enable a serial string to be associated with a change of input type allowing a display aut...

Страница 69: ...M C0 WAIT 2 SEND_STRING UDM 01 00 04 042 01 00 WAIT 4 SEND_STRING UDM C0 Byte Numbers and Values Byte 0 1 2 3 4 5 Byte Value 1 User Defined Port Input SubInput Input Type Input Type Value Input Type 0 VGA 1 Composite SVBS 2 S Video 3 Component Analog YPhPr 4 TV from TVM Byte Number and Value Byte Value Description 0 1 Command value for Connect Input to Port 1 0 User defined can be any value this f...

Страница 70: ...AIT 4 SEND_STRING UDM C0 Send Volume up to Screen connected to Port 2 SEND_STRING UDM C0 WAIT 2 SEND_STRING UDM 87 01 02 01 02 14 WAIT 4 SEND_STRING UDM C0 Third party control Local Send Play to DVD connected to TX 1 SEND_STRING UDM C0 WAIT 2 SEND_STRING UDM 87 01 02 01 02 70 WAIT 4 SEND_STRING UDM C0 Send Stop to DVD connected to TX 2 SEND_STRING UDM C0 WAIT 2 SEND_STRING UDM 87 01 03 01 02 72 WA...

Страница 71: ...r Off These commands are found below IR Codes IR Code Description IR Code Description 0 9 Keys 0 to 9 56 Esc 10 Channel up 57 Info 11 Channel down 58 Help 12 Power off 59 Teletext 13 Mute 60 Services 14 Volume up 61 Box office 15 Volume down 62 Interactive 16 Program up 63 TV guide 17 Program down 64 Red 18 10 key for two digit channel entry 65 Green 20 Channel restore back 66 Blue 21 Power up 67 ...

Страница 72: ... This may take a few minutes depending on how many commands are contained in the protocol 5 A message will appear saying Loading Protocol Please wait Once this has disappeared the Serial protocol has been downloaded to the UDM Receiver Commands can now be sent from the Hub WebConsole to the serial device A new table for this device s Serial control is what is actually being created When the admini...

Страница 73: ...otocol in the Name text field 5 Click Initialize This invokes the Action drop down menu FIG 74 6 Select an action to be performed from the Action drop down menu This invokes the Step 1 option FIG 75 7 Click Step 1 to ready the device to receive the IR code the system prompts you to press the desired key on the remote control 8 Press the corresponding button on the remote 9 Click Step 2 on the page...

Страница 74: ...within IR range of any remote control devices to be used 3 In the Protocols page click on the IR Protocol drop down menu and select New FIG 76 This invokes the Name text field 4 Enter a name for the IR protocol in the Name text field FIG 73 5 Click Initialize This invokes the Action drop down menu FIG 74 6 Select an action to be performed from the Action drop down menu This invokes the Step 1 opti...

Страница 75: ... properties become visible select the IR protocol which this UDM RX02 will download from the Protocol drop down menu This may take a few minutes depending on how many commands are within the table 4 A message will appear saying Loading Protocol Please wait once this has disappeared the IR protocol has been downloaded to the UDM RX02 IR commands can now be sent from the UDM 0102 to the device Delet...

Страница 76: ...Keys 0 to 9 52 Cursor up 10 Channel up 53 Cursor down 11 Channel down 54 Cursor left 12 Power Off 55 Cursor right 13 Mute 56 Esc 14 Volume up 57 Info 15 Volume down 58 Help 16 Program up 59 Teletext 17 Program down 60 Services 18 10 key for two digit channel entry 61 Box office 20 Channel restore back 62 Interactive 21 Power On 63 TV guide 30 A V select 1 64 Red 31 A V select 2 65 Green 32 A V sel...

Страница 77: ... UDM 0102 s WebConsole and click on the Setup link to invoke the main Setup page The firmware version currently loaded n the UDM 0102 is indicated at the top of the page FIG 80 Alternatively you can retrieve firmware version information in a Command Line session Establish a Command Line session with either the UDM 0102 or UDM RX02 and type a period This will return the current firmware version Alt...

Страница 78: ...oduct is included in the right hand pane under Firmware Files FIG 81 3 Click the link under Firmware Files UDM 0102 Firmware to download the Firmware ZIP file 4 The AMX License Agreement is displayed Read this agreement and click I Accept to proceed with the download or Back to return to the previous page 5 Open the ZIP file and open the README TXT file for instructions on using the included BAT f...

Страница 79: ...munication settings 3 Start a Command Line session on the PC and run the TFTP client Upgrading Firmware and Web Pages On a UDM 0102 1 Ensure the TFTP client has been installed on the PC which will be used to send files to the Hub Install TFTP client if necessary consulting with AMX support as to the appropriate client 2 Run the TFTP client 3 Start a command session on the PC Change to the director...

Страница 80: ...nt if necessary consult with AMX support as to the appropriate client 1 Run the client 2 Start a command session on the PC Change to the directory where the ROM files are stored on the PC e g cd Hub 3 Type in the following command at the prompt observing the parameters below TFTP i IP address PUT filename portnumber 4 For example typing in TFTP i 192 168 0 96 PUT R26201610800 001 will upload the f...

Страница 81: ...located on the rear panel and is labelled SERIAL 1 Use the RS01 DB9 to RJ12 adapter cable to connect an available DB9 Serial port on the PC to the RJ12 Serial port on either the UDM 0102 or the UDM RX02 2 Ensure the TFTP client software has been installed on the PC and is configured to use default Serial communication settings 3 Start a Command Line session on the PC and run the TFTP client Copyin...

Страница 82: ...M For example typing in TFTP i 192 168 0 96 PUT FUDM129 ROM will upload the file FUDM129 ROM to the UDM Hub with IP address 192 168 0 96 4 Once the command has been typed in push Enter to execute the command 5 Upload the file to any other ports requiring this upgrade by changing the last 3 digits of the command to the relevant port number For example type TFTP i 192 168 0 96 PUT R26201610800 002 t...

Страница 83: ... the RX is connected C RX copy isony 001 isony 002 enter 7 Repeat for other extensions C RX copy isony 001 isony 003 enter C RX copy isony 001 isony 004 enter 8 Use the put command to send to the RX units on the other Hub ports that need the IR Serial file C RX TFTP i 192 168 0 96 put isony 002 enter Once an IR protocol has been learned for a specific port it can simply be copied across to other p...

Страница 84: ...ble name 5 When complete close the command window Restoring the Hub Configuration File 1 Run your TFTP client If using the Windows client move to step 2 2 Start a command session on the PC Change to the directory where the Hub Configuration file is to be stored on the PC For example cd udm and cd protocol 3 Type in the following command at the prompt observing the parameters below TFTP i IP addres...

Страница 85: ...assword 3 Reset the Hub A power off then on is now required Obtaining the Hub s IP Address Via the Command Line 1 Type i at the command prompt FIG 85 2 Push Enter Setting the Hub s IP Address Via the Command Line 1 Type i ip address at the command prompt 2 Push Enter Multi Format Inputs The multi format inputs located at the rear of the Hub are numbered 129 132 for administrative purposes 1 To che...

Страница 86: ... to DB9 that is supplied with the UDM Hub 5 Open a Hyperterminal session and connect to the UDM Hub 9600 8 None 1 None 6 Type the following command at the prompt TFTP i ip address of the udm Hub get ixxxx hub enter Example C AMX TFTP i 192 168 1 201 get iudm hub enter Multi Format Input Configuration Value Description 129 Input A 00 06 00 Input Controller Version XGA Extended Graphics Array 1024x7...

Страница 87: ...r terminal to connect to the UDM RX02 via its serial port 2 At the command prompt type in setup Once in setup mode to view the compensation settings type in z FIG 90 Resetting Video Compensation Settings The x command resets all compensation settings at the UDM RX02 back to default 1 Use hyper terminal to connect to the UDM RX02 via its serial port 2 At the command prompt type in setup Once in set...

Страница 88: ...Advanced Administration 74 UDM 0102 and UDM RX02 Operation Reference Guide ...

Страница 89: ...Use the buttons on the remote control to adjust appropriately the following up or down Sharpness Gain Red Green and Blue 5 Once the image displayed is of an acceptable quality push the A button on the remote control to exit compensation mode FIG 91 UDM RX02 with IR03 IR Receiver Module IR RX port UDM RX02 Amber LED indicates that UDM RX02 is in Compensation mode IR03 IR Receiver Module FG IR03 The...

Страница 90: ...UDM RC10 Remote Control 76 UDM 0102 and UDM RX02 Operation Reference Guide ...

Страница 91: ...Skew AMX recommends that the video compensation is first adjusted to eliminate any skew using vertical red green blue lines 2 Brightness Once any skew has been eliminated the video should be adjusted for brightness using a grey scale or equivalent test card 3 Sharpness Finally the sharpness of the video should be adjusted eliminating any over or under shoot of the video Horizontal black and white ...

Страница 92: ... 0102 to the UDM RX02 in meters This value is used to automatically adjust the brightness and sharpness of the image 4 To make manual adjustments to Brightness and Sharpness click on the Advanced checkbox see FIG 94 to enable the Bright and Sharp fields FIG 95 FIG 93 Setup Page Enable advanced options checkbox FIG 94 Port Configuration options with Enable advanced options selected in the Setup pag...

Страница 93: ...e buttons on the remote control to adjust appropriately the following up or down Sharpness Gain Red Green and Blue 5 Once the image displayed is of an acceptable quality push the A button on the remote control to exit compensation mode FIG 95 Port Configuration options Enable advanced options selected in the Setup page and Advanced selected FIG 96 UDM RX02 with IR03 IR Receiver Module IR Rx port U...

Страница 94: ...Video Compensation 80 UDM 0102 and UDM RX02 Operation Reference Guide ...

Страница 95: ... bytes in total which are transmitted to the Hub generally described as follows The data packet returned by any command may be longer than described any additional data in a packet may be ignored Command and Reply Example Port Connection Command values differ for each command as do the values and length of the accompanying data For example to connect port 1 to VGA input 2 on the UDM the command fo...

Страница 96: ...work packet This is normally done transparently by the host software The Hub communicates over a 10BaseT network over UDP port 2008 UDM Over Serial Port SLIP Encapsulation The UDP packets may also be transported over a serial connection to the serial port on the Hub The UDP data is transferred using SLIP Serial line internet protocol encapsulation This scheme is defined in RFC1055 and involves fra...

Страница 97: ...0 send fifth parameter input type SendChar 192 send end character The Hub would reply with eight serial characters six for the reply described in this document together with the SLIP encapsulation characters of 192 at the beginning and 192 at the end i e the Hub reply string would look like Similarly the login example in 1 3 above would result in the following In this example we have assumed that ...

Страница 98: ...acket are specified Authentication Before any SLIP ethernet UDP commands do not require authentication commands can be executed the user must be authenticated this uses the same password mechanism as authentication from the console command line or from a web browser Authenticate Login Provides authentication information for this UDP session the password is the same as for web browser and console s...

Страница 99: ...ite inputs on an Input to use for this connection Input A would come from the A labelled VGA connector Port Numbering There is a single output port numbered 1 Status value Description 1 Command completed successfully 70 System is already logged out UDP Command 0 1 2 3 4 5 6 Connect 1 X Port Input Sub input Video input type Disconnect 6 X Port Connect video 11 X Port Input Sub input Video input typ...

Страница 100: ... the following values Return status Byte 0 1 2 3 4 5 Byte value 1 User defined Port Input Sub input Input type Value Description 0 VGA 1 Composite CVBS 2 S Video 3 Component analog YPbPr Byte 0 1 2 3 4 5 Byte value 1 Status Port Input selected Sub input Input type Byte 0 1 2 3 4 5 Byte value 6 User defined Port User defined User defined User defined Byte 0 1 2 3 4 5 Byte value 6 Status Port User d...

Страница 101: ...he flags byte about current connection status Return status The Flags byte contains additional information about the input selected defined as follows Byte 0 1 2 3 4 5 Byte value 16 User defined Port Input Sub input Input type Byte 0 1 2 3 4 5 Byte value 16 Status Port Input selected Sub input Input type Byte 0 1 2 3 4 5 Byte value 11 User defined Port Input Sub input Input type Value Description ...

Страница 102: ...nal parameters Return status All these commands start with the header above bytes 0 3 but use the remote device command value to perform separate functions as described below Byte 0 1 2 3 4 5 Byte value 79 User defined Port Sub port Port type User defined Value Description 1 Output port 2 Video input port 3 Audio input port 4 Device Byte 0 1 2 3 4 5 6 7 7 length Byte value 79 Status Port Sub port ...

Страница 103: ...control protocol Device address for remote IR protocol Description Default handset address 3 UDM RC02 110 4 Sky 1 5 Sky 1 6 Tivo 5 7 DirecTV 1 8 AMX Endeleo RC03 58 Byte 4 5 Byte value 2 IR code IR code Description IR code Description 0 9 Keys 0 to 9 57 Info 10 Channel up 58 Help 11 Channel down 59 Teletext 12 Power off 60 Services 13 Mute 61 Box office 14 Volume up 62 Interactive 15 Volume down 6...

Страница 104: ...erial port parameters for use with direct serial string transmission The serial parameter code is defined as follows Byte 4 5 n Byte value 3 Serial string for onward transmission Byte 4 5 6 7 Byte value 10 Serial parameter code User defined User defined Serial parameter code Description 112 1200 baud 113 2400 baud 114 4800 baud 115 9600 baud 116 1200 baud odd parity 117 2400 baud odd parity 118 48...

Страница 105: ...DM automatically times out this facility to reduce the possibility of sending UDP messages to a non existent host so this command must be renewed on a regular basis to continue to process keystrokes The timeout is currently set to 15 minutes Return status Set Hub Identification Stores a string identifier in the Hub This may be used to subsequently identify the Hub or for storage of user defined va...

Страница 106: ...the returned status packet In general success is indicated by a single value failure is indicated by as specific a return value as possible Byte 0 1 2 3 4 5 Byte value 78 User defined Port User defined User defined User defined Byte 0 1 2 3 4 127 128 Length 128 Byte value 78 Status Port Length Predefined values Identification string Byte offset from 4 Hub information Port information 0 Chassis typ...

Страница 107: ...h 01 21 A 41 a 61 stx 02 22 B 42 b 62 etx 03 23 C 43 c 63 eot 04 24 D 44 d 64 enq 05 25 E 45 e 65 ack 06 26 F 46 f 66 bel 07 27 G 47 g 67 bs 08 28 H 48 h 68 ht 09 29 I 49 I 69 nl 0a 2a J 4a J 6a vt 0b 2b K 4b k 6b np 0c 2c L 4c l 6c cr 0d 2d M 4d m 6d so 0e 2e N 4e n 6e si 0f 2f O 4f o 6f dle 10 0 30 P 50 p 70 dc1 11 1 31 Q 51 q 71 dc2 12 2 32 R 52 r 72 dc3 13 3 33 S 53 s 73 dc4 14 4 34 T 54 T 74 ...

Страница 108: ...registered trademarks of AMX AMX reserves the right to alter specifications without notice at any time It s Your World Take Control 3000 RESEARCH DRIVE RICHARDSON TX 75082 USA 800 222 0193 469 624 8000 469 624 7153 fax 800 932 6993 technical support www amx com ...

Отзывы: