


LearningCheck™ Creator
167
4.
Type a title for the question in the
Title
box.
5.
Type the question in
Text
box.
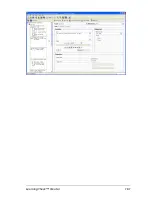
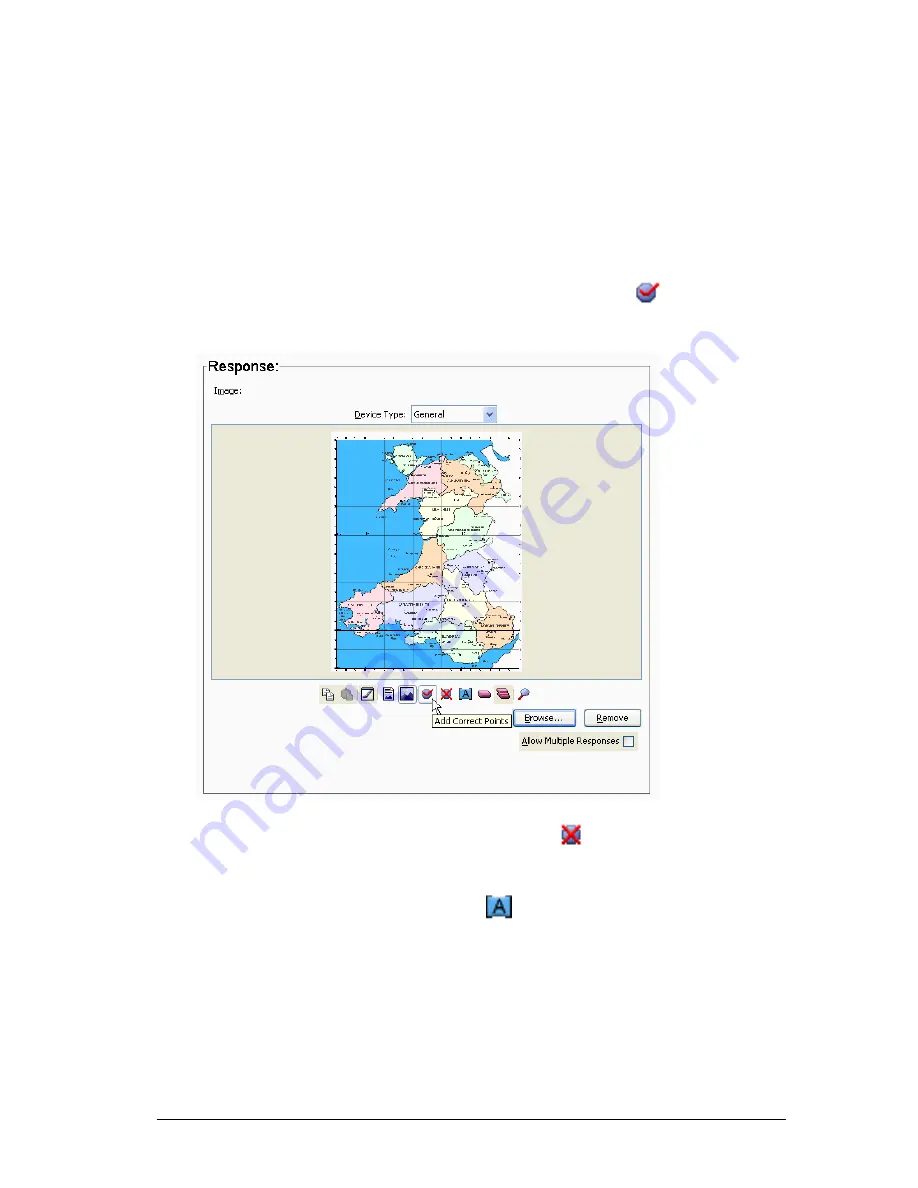
6.
In the Response area, click
Browse
, navigate to the image and Insert
it into the template.
The image appears in the Image area of the dialog box.
7.
To add points to the image, click on the image toolbar, and move the
cursor to the point on the image. Click to add the point.
8.
To add the correct answer point to the image, click
on the image
toolbar, and then click the correct location on the image.
9.
To create additional answer choices, click
and then click other
locations on the image.
10. To apply labels to the points, click
on the image toolbar and then
click on each point.
The points are labeled
A, B, C
, etc. in the order in which you
click on them.
a)
To move a point (and its label) to a different place on the
image, click the point and drag it to the new place.
Summary of Contents for Navigator
Page 1: ...TI Navigator Reference Guide ...
Page 46: ...40 Managing student accounts ...
Page 64: ...58 Exchanging files with students ...
Page 145: ...Running interactive activities 139 ...
Page 146: ...140 Running interactive activities ...
Page 158: ...152 Polling students ...
Page 164: ...158 Capturing calculator screens ...
Page 167: ...LearningCheck Creator 161 ...
Page 254: ...248 The Class Analysis Tool ...
Page 259: ...Installing Apps and OS files 253 ...
Page 260: ...254 Installing Apps and OS files ...
Page 278: ...272 Glossary ...
Page 302: ...296 Legal Information ...
Page 314: ...308 ...


