i.LINK optical (disc) drives
The i.LINK drive enables you to read data stored on a DVD or CD. Your computer may come with an external i.LINK drive,
depending on the model you purchased. Once the i.LINK drive is connected, you can use the preinstalled software to create
CDs or play DVDs.
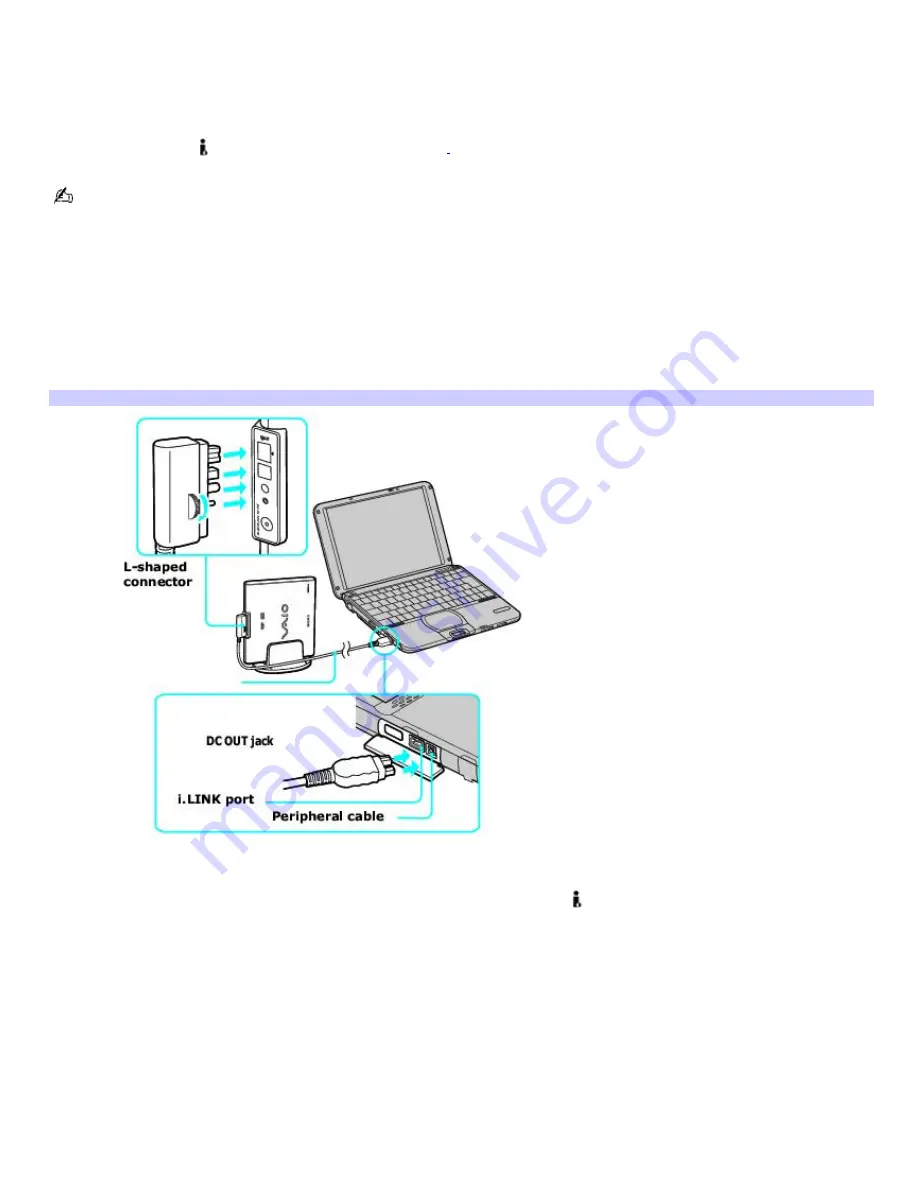
The i.LINK optical drive draws power from the computer through a peripheral cable. You must connect the peripheral cable
to both the i.LINK port and DC OUT jack on your computer.
1
Do not use the i.LINK optical drive and the PC Card drive at the same time. Connecting both devices may cause the
computer to malfunction.
To connect an i.LINK optical drive
1.
Close any active programs to prevent data loss.
2.
Turn on power to the computer.
3.
Insert the L-shaped connector on the peripheral cable (supplied with the i.LINK optical drive) into the matching
port on the rear panel of the i.LINK optical drive.
Connecting the i.LINK Optical Driv e
4.
Turn the LOCK device clockwise to secure the L-shaped connector.
5.
Insert the two-prong peripheral cable connector into both the i.LINK port and DC OUT jack on the computer.
The i.LINK drive power indicator turns on, and the computer automatically detects the connected drive.
6.
Restart your computer.
To use the i.LINK optical drive
1.
Double-click the
My Computer
icon on the desktop. The
My Computer
window appears.
2.
Double-click
DVD/CD-RW Drive
. The
DVD/CD-RW Drive
window appears.
To disconnect the i.LINK optical drive
1.
Close any active programs to prevent data loss.
Page 42
Summary of Contents for PCG-SRX99K VAIO User Guide (primary manual)
Page 23: ...3 Follow the on screen instructions Page 23 ...
Page 48: ...4 Lift the disc from the drive 5 Push the drive tray gently to close it Page 48 ...
Page 56: ...Printer Connections Printing With Your Computer Page 56 ...
Page 73: ...Locating the Jog Dial Control The Jog Dial Control Page 73 ...
Page 88: ...Connecting Mice and Keyboards Using External Mice and Keyboards Page 88 ...
Page 93: ...Floppy Disk Drives and PC Cards Using Floppy Disk Drives Using PC Cards Page 93 ...
Page 104: ...hardware device 6 Eject the PC Card from the PC Card slot Page 104 ...
Page 182: ...Memory Upgrades Upgrading Your Computer s Memory Page 182 ...
Page 189: ...Using the Recovery CDs Application and System Recovery CDs Using Your Recovery CDs Page 189 ...


