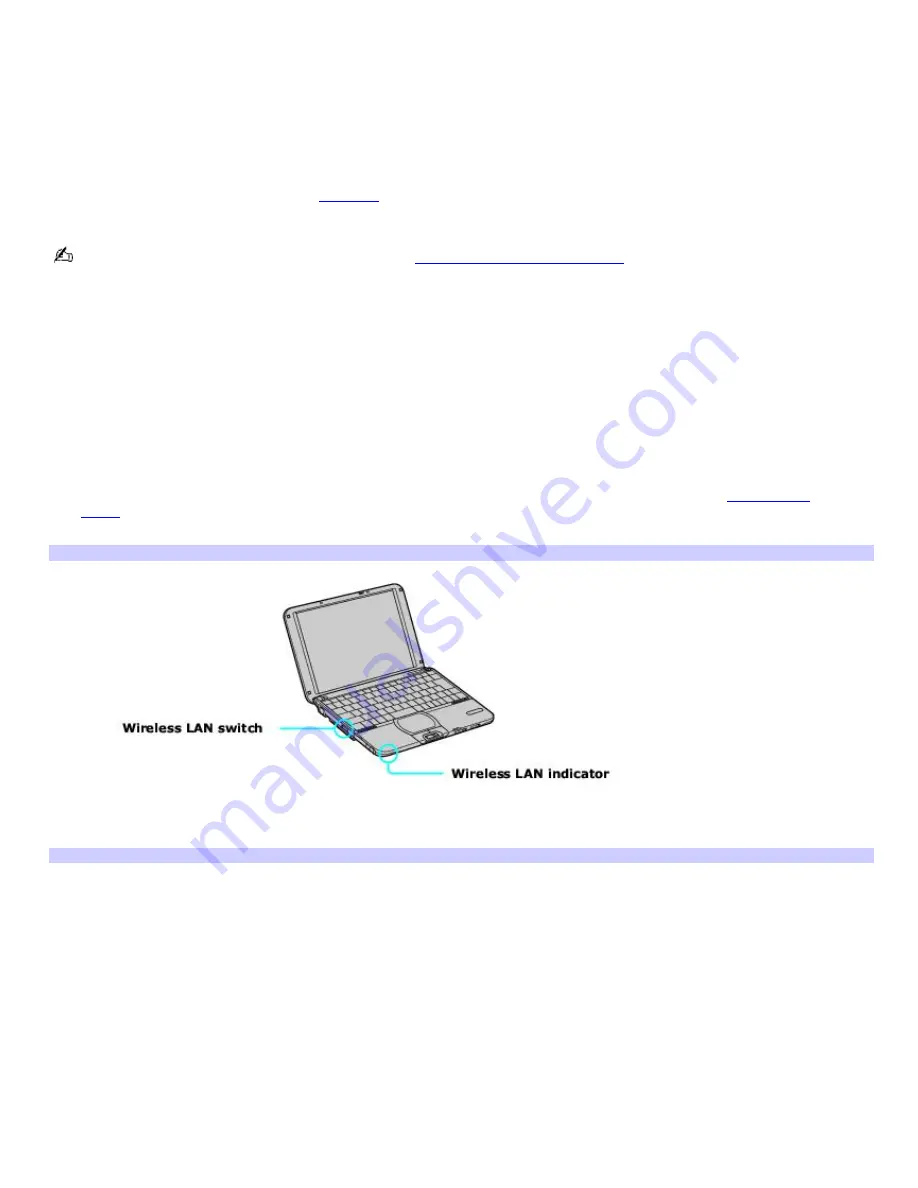
Using wireless LAN connections
A wireless local area network (LAN) is a network in which you can connect to a LAN through a wireless (radio) connection.
You can opt to purchase a Sony Wireless LAN Access Point to set up a LAN.
The Wireless LAN Access Point is designed for building a wireless LAN environment. Because a wireless LAN configuration
requires no wiring, you can operate multiple computers more freely than ever before.
You can also purchase an external Wireless LAN PC Card separately, but your computer (depending on the model you
purchased) may already come with a built-in mini PCI card that allows for wireless connections. For information about your
computer's wireless capabilities, see the
Welcome
page to view your VAIO
®
Computer Specifications. The Wireless LAN PC
Card is designed for a wireless LAN environment. You can use the Wireless LAN PC Card with or without the access point.
For more information on Sony Wireless LAN, go to
http://www.sonystyle.com/vaio
.
There are two types of wireless connections:
An infrastructure network is one that extends an existing wired local network to wireless devices by providing an
access point. The access point bridges the wireless and wired LAN and acts as a central controller for the Wireless
LAN. The access point coordinates transmission and reception from multiple wireless devices within a specific range.
A peer-to-peer group (ad-hoc) network is one in which a local network is created only by the wireless devices
themselves, with no other central controller or access point. Each device communicates directly with other devices in
the network. You can set up an ad-hoc network easily at home.
To connect to an existing wireless network
1.
Move the Wireless LAN switch to
ON
or insert a Wireless LAN PC Card into the PC Card slot. See
Inserting PC
Cards
for more information.
The Wireless LAN indicator turns on.
Connecting to a Wireless LAN
2.
Click
Start
, point to
Settings
,
Control Panel
, and click
Wireless Network
. The
Add/Edit Configuration Profile
window appears.
Add/Edit Configuration Profile Window
Page 30
Summary of Contents for PCG-SRX99K VAIO User Guide (primary manual)
Page 23: ...3 Follow the on screen instructions Page 23 ...
Page 48: ...4 Lift the disc from the drive 5 Push the drive tray gently to close it Page 48 ...
Page 56: ...Printer Connections Printing With Your Computer Page 56 ...
Page 73: ...Locating the Jog Dial Control The Jog Dial Control Page 73 ...
Page 88: ...Connecting Mice and Keyboards Using External Mice and Keyboards Page 88 ...
Page 93: ...Floppy Disk Drives and PC Cards Using Floppy Disk Drives Using PC Cards Page 93 ...
Page 104: ...hardware device 6 Eject the PC Card from the PC Card slot Page 104 ...
Page 182: ...Memory Upgrades Upgrading Your Computer s Memory Page 182 ...
Page 189: ...Using the Recovery CDs Application and System Recovery CDs Using Your Recovery CDs Page 189 ...


