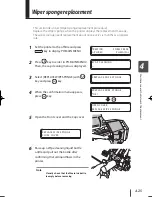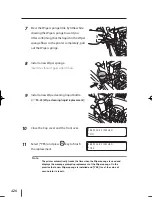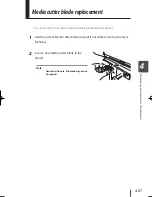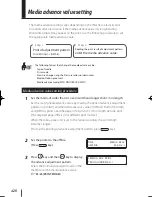
4-35
M
ain
te
na
nc
e a
nd A
dj
us
tm
en
t / R
ep
la
ce
m
en
t
4
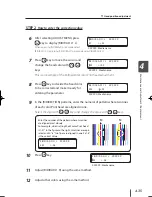
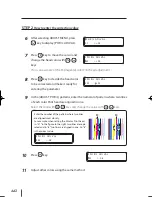
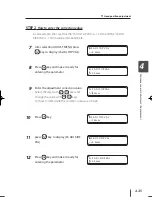
STEP 2
How to enter the correction value
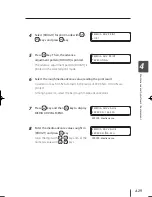
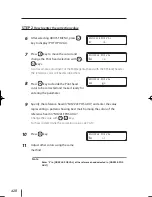
6
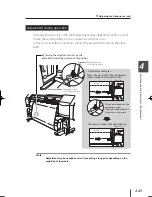
After selecting ADJUST MENU, press
key to display [BIDIR ADJ1 L].
When adjusting [NORMAL2] print mode, select
[BIDIR ADJ2 L], adjusting [FINE DRAFT] print mode, select [BIDIR ADJ3 L]
7
Press
key to move the cursor and
change the head color with
,
keys.
This is an example of the M (magenta) color Print head adjustment.
8
Press
key to decide the head color
to be corrected and make it ready for
entering the parameter.
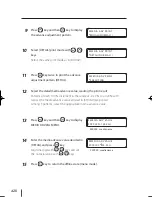
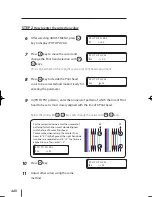
9
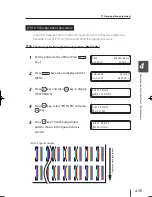
In the [BIDIRECTION] patterns, enter the numeral of pattern where two lines
of each color Print head are aligned in one.
Select the digit with
,
keys and change the value with
,
keys.
10
Press
key.
11
Adjust [BIDIR ADJ1 R] using the same method.
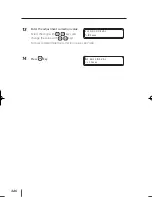
12
Adjust other colors using the same method.
#
BIDIR ADJ1 L XXXXXX
#Y >+00
XXXXXX : Media name
#BIDIR ADJ1 L
XXXXXX
#M
*
+00
XXXXXX : Media name
#BIDIR ADJ1 L
XXXXXX
#
M >+00
XXXXXX : Media name
q
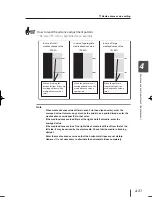
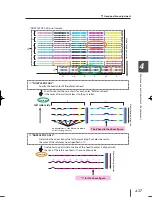
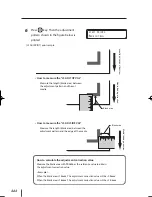
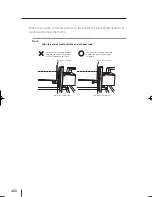
Head position adjustment
Enter the number of the pattern where two lines
are aligned most closely.
For example, when setting the M color Print head,
in “-21” in the figure to the right, two lines are sepa-
rated and in “-8” two lines are aligned in one. So “-8”
is the correct value.
#BIDIR ADJ1 L XXXXXX
#M >-08
-8
-21
M
M
#BIDIR ADJ1 L XXXXXX
#
M >-08
XXXXXX : Media name
IP-5610取説_E.indb 35
09.4.3 3:15:23 PM

