Adding Memory to the Printer
135
9.
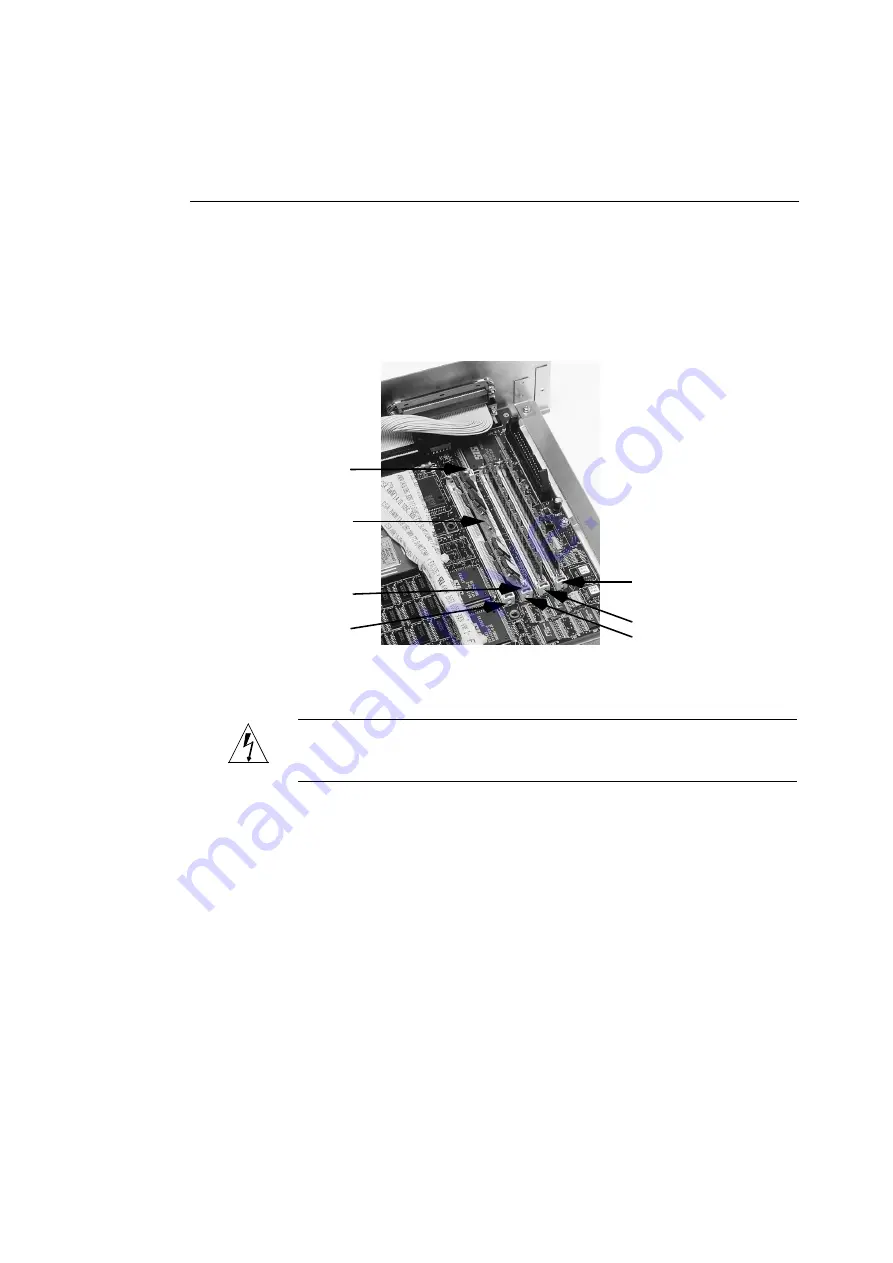
Position the first SIMM at a 45° angle in the first
available SIMM slot.
72-pin SIMMs have a notch slightly off center in the row of
pins. If this notch does not fit directly over the matching
ridge in the SIMM slot, rotate the SIMM 180° and try again.
Figure 6-4 Positioning the SIMM in the SIMM Slot
WARNING:
Bank 1 must always be filled. Do not install SIMMs
in Bank 2 only.
10.
Press the SIMM into the SIMM clips.
Rotate the SIMM from 45° to 90° (vertical) and snap the
SIMM securely into the SIMM clips.
11.
Repeat Steps 9 and 10 for the second SIMM.
Add the SIMM to the other SIMM slot of the same bank. If
you installed the first SIMM in slot 1, install the second
SIMM in slot 2. If the first bank is already filled, and you
SIMM Slot 1
SIMM Clip
SIMM
SIMM Slot 3
SIMM Clip
SIMM Slot 2
SIMM Slot 4
Summary of Contents for ColorScript 310
Page 1: ...ColorScript 310 330 Printer User s Guide...
Page 2: ...This page is intentionally left blank...
Page 3: ...ColorScript 310 330 Printer User s Guide Revision 1 1 March 1997...
Page 4: ...This page is intentionally left blank...
Page 12: ...Table of Contents x This page is intentionally left blank...
Page 16: ...List of Figures xiv This page is intentionally left blank...
Page 37: ...Switching the Printer On 21 This page is intentionally left blank...
Page 38: ...Chapter 1 Installing Your Printer 22...
Page 54: ...Chapter 3 Changing Printer Ribbons 36 This page is intentionally left blank...
Page 90: ...Chapter 4 Printing from the Mac OS 72 This page is intentionally left blank...
Page 128: ...Chapter 5 Printing from Windows 110 Figure 5 21 Corel Draw 6 0 Print Window...
Page 146: ...Chapter 5 Printing from Windows 128 This page is intentionally left blank...
Page 164: ...Chapter 7 Storing and Ordering Supplies 146 This page is intentionally left blank...
Page 186: ...Glossary 168 This page is intentionally left blank...
Page 192: ...Index 174 This page is intentionally left blank...


