Adding Memory to the Printer
133
4.
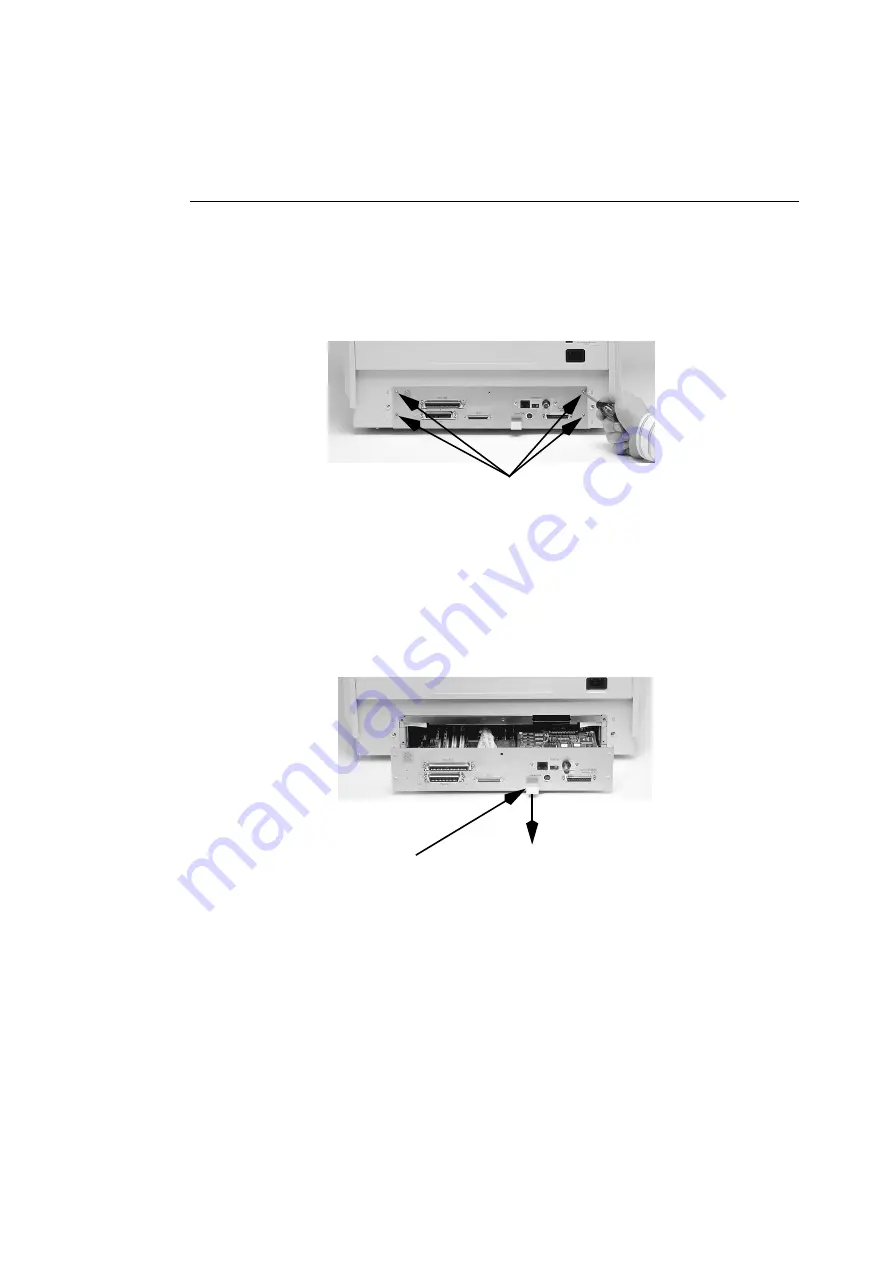
Use a Phillips screwdriver to remove the screws
connecting the printer’s metal back plate.
The logic board is directly connected to the back plate of the
printer.
Figure 6-1 Removing the Back Plate Screws
5.
Pull the back plate and logic board out of the printer.
Grip the back plate by the grey plastic handle and pull
straight back on the handle until the entire logic board is out
of the printer.
Figure 6-2 Removing the Back Plate
Back Plate Screws
Pull Straight out on Handle
Grey Plastic Handle
Summary of Contents for ColorScript 310
Page 1: ...ColorScript 310 330 Printer User s Guide...
Page 2: ...This page is intentionally left blank...
Page 3: ...ColorScript 310 330 Printer User s Guide Revision 1 1 March 1997...
Page 4: ...This page is intentionally left blank...
Page 12: ...Table of Contents x This page is intentionally left blank...
Page 16: ...List of Figures xiv This page is intentionally left blank...
Page 37: ...Switching the Printer On 21 This page is intentionally left blank...
Page 38: ...Chapter 1 Installing Your Printer 22...
Page 54: ...Chapter 3 Changing Printer Ribbons 36 This page is intentionally left blank...
Page 90: ...Chapter 4 Printing from the Mac OS 72 This page is intentionally left blank...
Page 128: ...Chapter 5 Printing from Windows 110 Figure 5 21 Corel Draw 6 0 Print Window...
Page 146: ...Chapter 5 Printing from Windows 128 This page is intentionally left blank...
Page 164: ...Chapter 7 Storing and Ordering Supplies 146 This page is intentionally left blank...
Page 186: ...Glossary 168 This page is intentionally left blank...
Page 192: ...Index 174 This page is intentionally left blank...


