


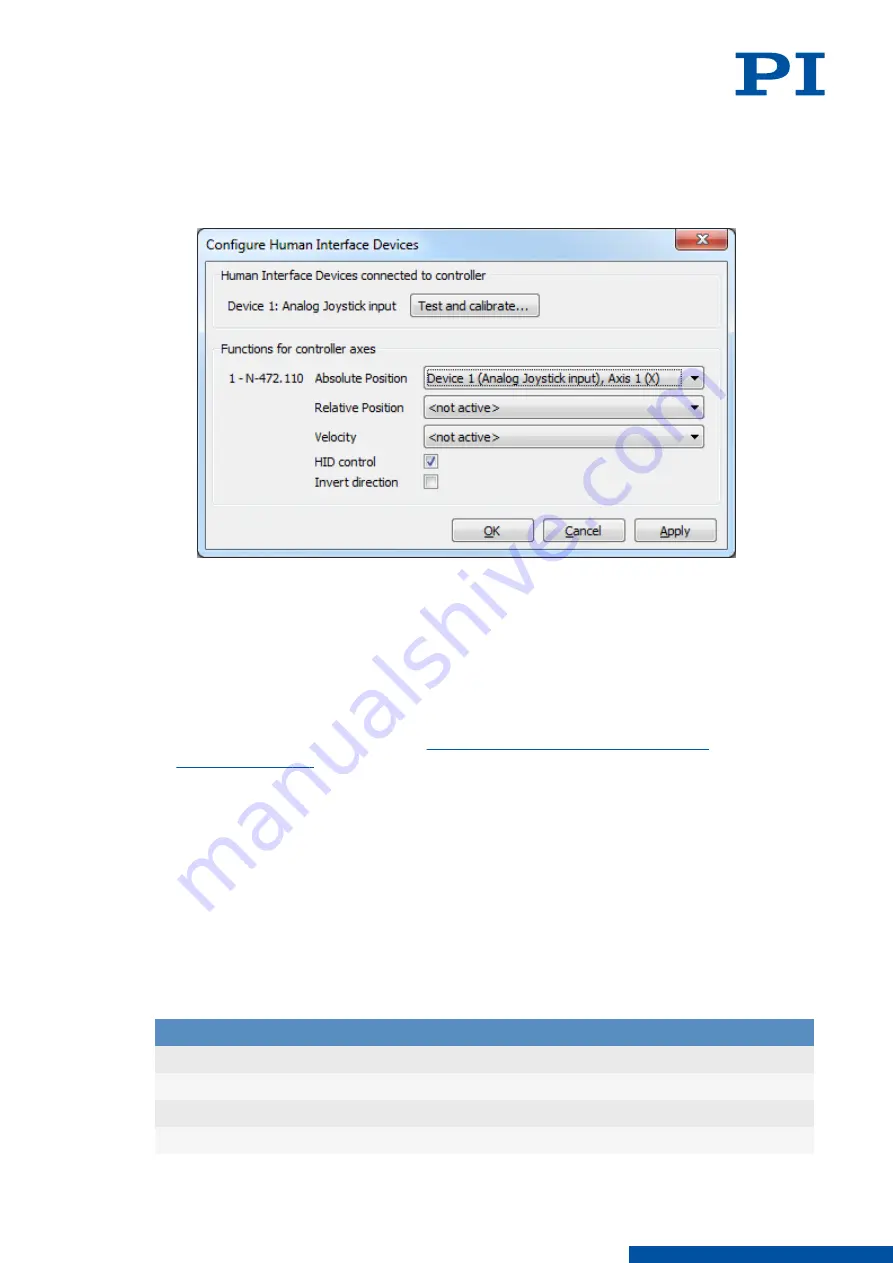
b) Activate HID control by clicking the
HID control
checkbox.
c) If the direction of motion is to be inverted during HID control, click the
Invert direction
checkbox.
➔
In the example shown, the X axis of HID 1 is set and HID control is activated for the
controller's axis.
3. Click the
Apply
button in the
Configure Human Interface Devices
window to activate the
settings.
4. Send the settings for setting up HID control to the E-871.1A1N by clicking the
OK
button.
➔
The
Configure Human Interface Devices
window closes.
5. Make sure that servo mode for the E-871.1A1N's axes is switched on in PIMikroMove (e.g.,
by clicking the
Servo
checkbox in the
Axes
tab in PIMikroMove's main window).
➔
The E-871.1A1N's axes can now be controlled by the HID according to the settings made.
6. If you want to save the new settings for HID control to the E-871.1A1N's nonvolatile
memory, continue as described in "
Saving the Configuration of HID Control
".
Saving the Configuration of the HID Control Permanently
Select the
E-871.1A1N > Save parameters to non-volatile memory
menu item in
PIMikroMove's main window.
➔
The
Save Parameters to Non-Volatile Memory
dialog opens.
1. Enter either the password HID in the selection field of the
Save Parameters to Non-
Volatile Memory
dialog, or select the
Settings of HDT, HIA, HIT (HID)
entry.
2. Click
OK
to save and to close the dialog.
8.5.7
Commands
H
Page
HDT
Set HID Default Lookup Table
134
HDT?
Get HID Default Lookup Table
135
HIA
Configure Control Done By HID Axis
136
HIA?
Get Configuration Of Control Done By HID Axis
137
8 E-871.1A1N FUNCTIONS
PZ285EN
‒
1/30/2019
92
M O T I O N | P O S I T I O N I N G