


2. If the
Start up controller window does not automatically open, select the Connections >
New... menu item in the main window.
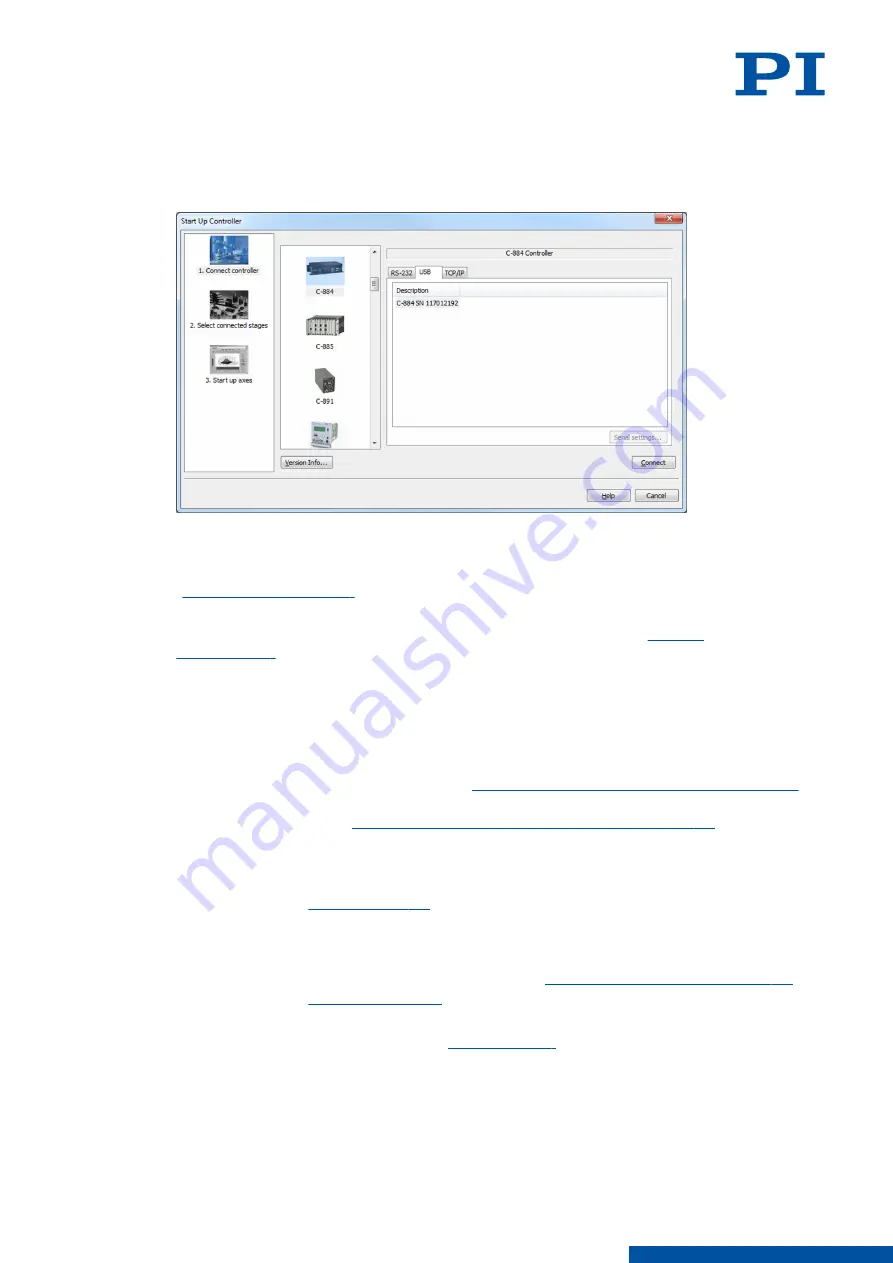
3. Select
E-871 in the field for controller selection.
4. Select the
USB tab on the right-hand side of the window.
5. Select the connected E-871.1A1N in the
USB tab.
6. Click
Connect to establish communication.
➔
If communication could not be established, look for a solution to the problem in the
" chapter.
➔
If communication was established successfully, PIMikroMove guides you through the
configuration of the E-871.1A1N for the connected positioner, see "
7.2.3
Establishing Communication via TCP/IP
Before communication is established, it can be necessary to adapt the interface parameters
once, depending on the type of networking:
■
Network with DHCP server: No adjustment of the factory settings of the E-871.1A1N
interface parameters is required. You can
begin with setup of the communication (p. 57)
■
Network without DHCP server or direct connection of the E-871.1A1N to the PC's Ethernet
socket: it is necessary to
adapt the E-871.1A1N's interface parameters (p. 56)
. Make the
necessary adaptations before establishing communication.
Requirements
✓
The E-871.1A1N is
to the network or directly to the PC via the RJ45
Ethernet socket.
✓
If several E-871.1A1Ns are connected to the same network via their TCP/IP interfaces: You
have the serial number of the E-871.1A1N ready with which the communication is to be
established. The serial number can be found on the
type plate of the E-871.1A1N (p. 14)
✓
The E-871.1A1N is
✓
The PC is switched on.
✓
The required software and drivers are
on the PC.
✓
You have read and understood the manual for the PC software used. The software
manuals are on the product CD.
7 STARTUP / OPERATION
PZ285EN
‒
1/30/2019
55
M O T I O N | P O S I T I O N I N G