


5. Start the jump in the positive direction as well as the recording by clicking the button
in the
Data Recorder
window.
➔
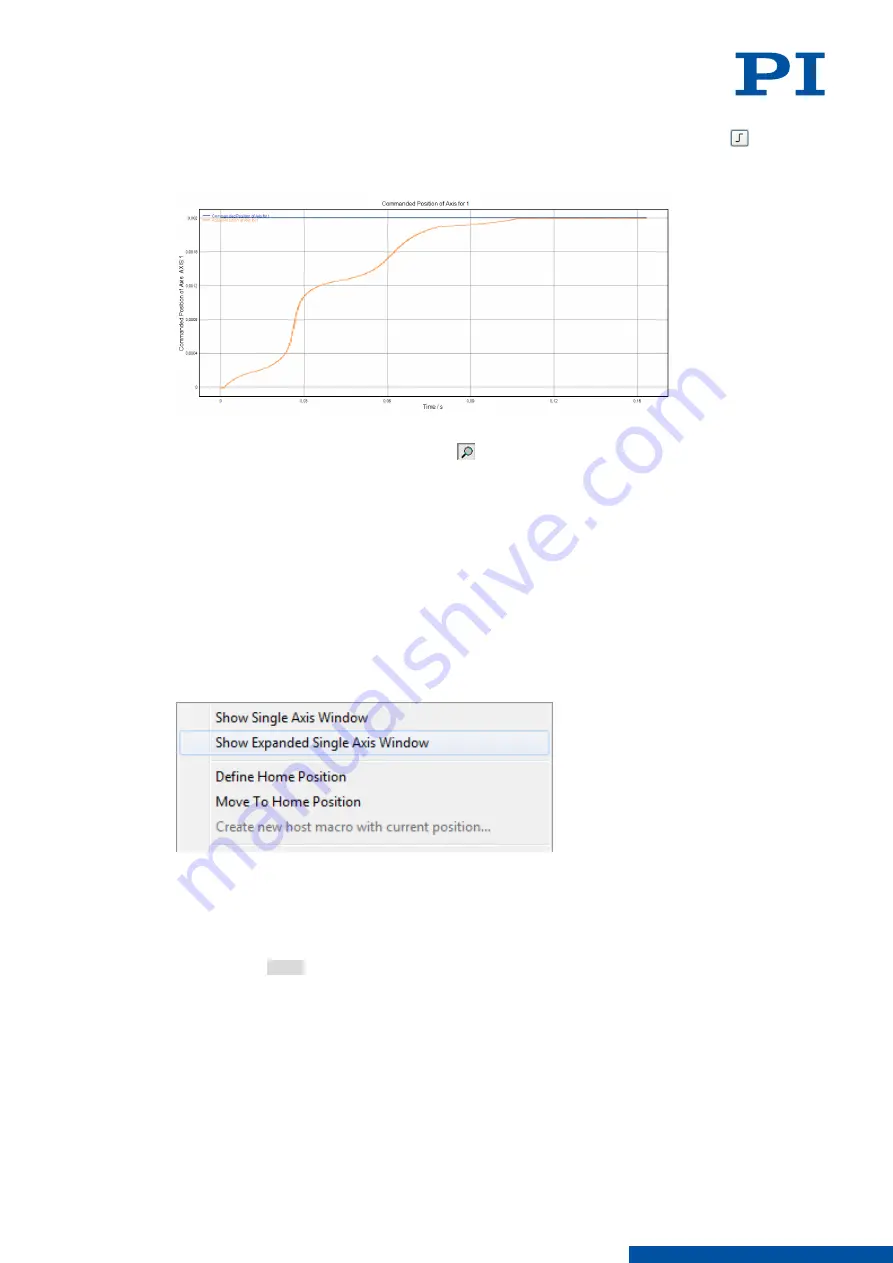
The axis performs the step and the step response is recorded and displayed graphically.
6. Check the displayed step response.
If necessary, enlarge the view: Click the button, press and hold down the left mouse
button, and drag the magnifying glass symbol over an area in the graphical display
(clicking with the right mouse button in the graphic field returns the view to its original
size).
■
If the result is satisfactory (i.e., minimum overshoot, settling time not too long):
You already have optimum parameter settings and do not have to do anything further.
■
If the result is not satisfactory:
Optimize the servo control parameters, see below.
Setting the Servo Control Parameters
1. Open the expanded single axis window of the connected positioner in the main window
of PIMikroMove: Click on the corresponding line of the
Axes
tab with the right mouse
button and select the
Show Expanded Single Axis Window
in the context menu.
2. Enter new values for the parameters to be adapted into the expanded single axis window:
a) If the parameters to be changed are not included in the list on the right side of the
window, click on
Configure View -> Select parameters...
and add them to the list.
b) Type the new parameter value into the corresponding input field in the
Active Value
column of the list.
c) Press the Enter key on the PC keyboard or click outside the input field with the mouse
to transfer the parameter value to the volatile memory of the controller. Note: If a
parameter value in the volatile memory (
Active Value
column) is different to the
parameter value in the nonvolatile memory (
Startup Value
column), the line in the list
is highlighted in color.
7 STARTUP / OPERATION
PZ285EN
‒
1/30/2019
69
M O T I O N | P O S I T I O N I N G