


FASTCAM-APX RS Hardware Manual
-70-
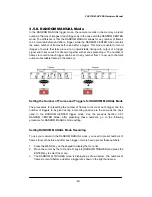
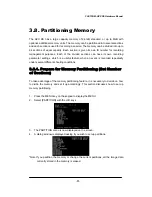
6. Now the [POSITION ADJUSTMENT]
screen is displayed on the monitor with a
window in the center of the screen
indicating the maximum size of image
window (actually, the image data
readout area on the image sensor
surface) allowed by the frame rate just
selected in the above steps. At this
moment, the image window is displayed
as a rectangle that is the closest to a
square in shape within the maximum image resolution allowed by the currently-set
frame rate. The coordinate of the upper left corner of the rectangle is shown as the
position of the window.
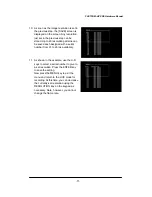
7. Use the U-D and L-R keys to move the
window to a position within the screen
where you wish to have the window set
in depending on your application. The
window moves at the increments of 32
pixels horizontally and 2 lines up or
down. Once the window is in your
desired position, press the ENTER key
on the keypad to set it.
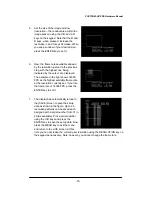
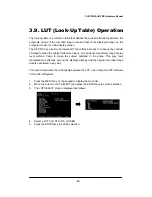
8. The monitor display should have
automatically turned to the
[RESOLUTION ADJUSTMENT] screen.
9. Use the U-D and L-R keys on the keypad
to adjust the resolution. Note that the R
and D keys, when pressed, increase the
resolution; L and U keys decrease. The
resolution is adjusted at increments of
128 pixels horizontally, and 16 lines
vertically at each press on the respective
keys. Press the ENTER key to finally set
the image resolution.


